Do Crankshaft Sensors Fail
Yes, crankshaft sensors can fail, and the symptoms often include hard starting, stalling, rough idle, or a no-start condition. Because wiring and trigger-wheel issues can look similar, confirm the signal before replacing parts.
Yes, crankshaft sensors do fail, and when they do, the engine may crank normally but refuse to start, stall, or run poorly. The tricky part is that the symptoms can look like ignition, fuel, or wiring problems, so accurate diagnosis matters before you replace parts.
- Common symptoms: Hard starting, stalling, misfires, rough idle, and check engine lights are typical warning signs.
- Diagnosis first: Read OBD-II codes, check live RPM data, and inspect wiring and connectors before buying.
- Fit matters: Match the exact engine code, connector, mounting style, and signal type.
- Failure causes: Heat, vibration, corrosion, oil contamination, and harness damage are common reasons sensors go bad.
- Repeat faults: If a new sensor fails again, inspect the crankshaft system, trigger wheel, and related.
Do Crankshaft Sensors Fail? The Short Answer and Why It Matters
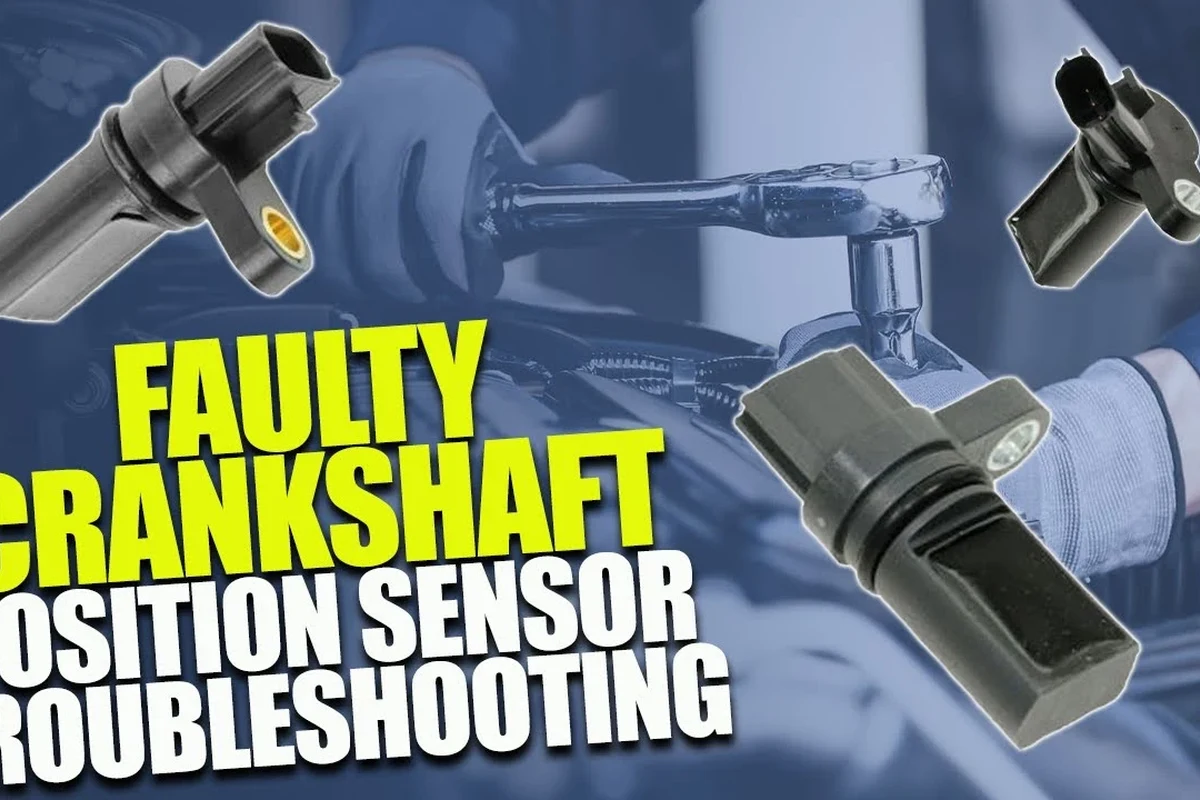
A crankshaft position sensor is a small part with a big job: it tells the engine computer where the crankshaft is and how fast it is turning. When that signal becomes weak, erratic, or disappears, the ECU can lose the timing information it needs to manage spark and fuel delivery.
That is why a failing sensor can create anything from an intermittent rough idle to a complete no-start condition. In many vehicles, the problem shows up suddenly, but in others it gets worse over time as heat, vibration, or wiring issues build up.
What a Crankshaft Position Sensor Does in 2026 Engines
Modern engines rely on precise timing data, and the crankshaft sensor is one of the core inputs. Depending on the design, it may use a magnetic pickup or a Hall-effect style signal to report crank position and rotational speed.
How the sensor reads engine speed and crank position
The sensor watches a toothed reluctor wheel or trigger pattern attached to the crankshaft. As the wheel passes the sensor, the signal pulses let the ECU calculate engine RPM and identify exact crank angle references.
That timing data helps the computer decide when to fire spark plugs, open injectors, and coordinate other controls. If the signal is missing or distorted, the engine may still crank, but the computer may not know when to start combustion safely.
Why modern ECUs depend on accurate crankshaft signals
Today’s engine management systems are more tightly integrated than older setups. Many vehicles use crankshaft data alongside camshaft sensor data to manage variable valve timing, misfire detection, and start-stop behavior.
If the crank signal is inconsistent, the ECU may protect the engine by limiting operation or shutting down fuel and spark. That is why a small sensor problem can have a large impact on drivability.
Some engines can still show a crankshaft sensor code even when the real issue is damaged wiring, a loose connector, or a problem with the trigger wheel.
Common Signs a Crankshaft Sensor Is Failing
Symptoms vary by vehicle and failure pattern, but the warning signs often involve starting, stalling, and rough running. The key is to notice whether the issue is constant or intermittent, because intermittent faults often point to heat-sensitive or wiring-related problems.
Hard starting, stalling, and no-start conditions
A weak or missing crank signal can make the engine crank longer than usual before it starts. In more serious cases, the engine may start and then stall once the signal drops out.
If the sensor fails completely, the engine may crank without firing at all. That symptom is common, but it is not proof by itself, since fuel pump, ignition, immobilizer, and battery issues can look similar.
Misfires, rough idle, poor acceleration, and warning lights
Some crankshaft sensor problems are not dramatic at first. You may notice rough idle, hesitation under load, poor throttle response, or a check engine light with misfire-related codes.
Because the ECU depends on stable timing information, even a signal that is only slightly off can affect performance. In many cases, the vehicle may run well when cold and act up after heat soak or stop-and-go driving.
If the engine stalls in traffic, loses power unpredictably, or will not restart in a safe place, avoid repeated roadside attempts and follow normal towing and repair procedures.
Why Crankshaft Sensors Fail: Main Causes and Failure Patterns
Crankshaft sensors fail for the same broad reasons many automotive electronics fail: heat, vibration, contamination, and electrical stress. The failure pattern often reveals the likely cause, especially if the problem appears only when the engine is hot or after a recent repair.
Heat stress, vibration, oil contamination, and wiring damage
Crankshaft sensors often live near the engine block, transmission bellhousing, or other hot components. Over time, repeated heat cycles can weaken internal electronics and harden insulation on nearby wiring.
Vibration can also loosen connectors or damage the harness where it flexes. Oil leaks, coolant exposure, road grime, and debris can contaminate the sensor body or connector and interfere with the signal.
Electrical faults, connector corrosion, and sensor wear
Corrosion at the connector pins can raise resistance and interrupt a clean signal. That is especially common in vehicles exposed to moisture, salt, or prior engine-bay repairs.
Electrical issues may also come from damaged grounds, shorted harness sections, or poor-quality replacement parts. In some cases, the sensor itself is fine, but the signal is being distorted by another component in the crankshaft system.
Failure patterns vary by model, engine layout, and sensor design. Always compare the symptom with the official diagnostic path in the service manual or manufacturer repair information.
How to Diagnose the Problem Before Replacing Parts
Good diagnosis saves money and avoids unnecessary part swaps. Since crankshaft sensor symptoms overlap with ignition and fuel system problems, the best approach is to check codes, inspect the wiring, and confirm whether the sensor signal is actually missing or unstable.
Reading OBD-II codes and checking live data
Start by reading OBD-II trouble codes with a scan tool. Codes related to crankshaft position, camshaft correlation, misfires, or engine speed signal loss can help narrow the issue, but they do not automatically prove the sensor is bad.
Live data can be just as useful. If the scan tool shows engine RPM during cranking, the sensor may still be sending a signal; if RPM stays at zero while the engine cranks, that is a stronger clue that the signal is missing.
Inspecting wiring, connectors, and related components
Look closely at the sensor connector, harness routing, and nearby heat shields or brackets. A loose plug, damaged wire, oil-soaked connector, or rubbed-through harness can create the same symptoms as a failed sensor.
Also check related parts such as the camshaft sensor, fuse protection, and battery voltage condition. Low voltage or a bad ground can cause confusing symptoms that appear sensor-related.
- Check for stored and pending codes before clearing anything.
- Inspect the harness near hot exhaust areas and moving parts.
- Use the vehicle’s service information to confirm the sensor type and test method.
- If the fault appears only hot, note the temperature and driving conditions when it happens.
When the issue is the sensor vs. the crankshaft system
Sometimes the sensor is only the messenger. A damaged reluctor wheel, excessive crankshaft play, timing-related mechanical problems, or contamination at the trigger area can create a bad signal even with a new sensor installed.
If the sensor keeps failing repeatedly, that is a sign to inspect the surrounding system rather than assuming the replacement part is defective. Persistent repeat failures often point to heat exposure, mounting issues, or a deeper mechanical fault.
- Check the exact engine code and sensor location.
- Confirm connector style, mounting depth, and cable routing.
- Verify whether the part is OEM, OE-equivalent, or aftermarket.
- Review the service manual for the recommended test procedure.
Replacement Guide: Choosing the Right Crankshaft Sensor
Once you confirm the fault, choosing the correct replacement matters just as much as the diagnosis. Crankshaft sensors can look similar across engines, but small differences in connector shape, mounting style, or signal type can make the wrong part unusable.
OEM vs. aftermarket fit, compatibility, and build quality
OEM parts are usually the safest choice when exact fit and signal behavior are important, but quality aftermarket options can also work well if they match the vehicle specification. The key is not the brand name alone, but whether the part is designed for your exact engine and sensor type.
Lower-cost parts may fit physically but still produce inconsistent readings or premature failure. If the vehicle is difficult to access or the sensor is buried under intake or exhaust components, reliability becomes even more important.
Key specs to verify: connector type, mounting style, and engine match
Before buying, verify the connector pin count, housing shape, sensor length, and mounting method. Some sensors are bolt-in, some clip in, and some require a precise air gap or depth to read correctly.
Also confirm the engine code, model year range, transmission compatibility if relevant, and whether the part is for a magnetic or Hall-effect system. A close visual match is not enough if the signal logic is different.
Value considerations, warranty, and what to avoid buying
Price can vary widely by vehicle and retailer, so compare value carefully rather than chasing the cheapest listing. A better warranty may matter if the part is difficult to reach or if the vehicle has a history of heat-related sensor problems.
Avoid parts with vague fit claims, missing engine-specific details, or unclear return terms. If a listing does not clearly state compatibility, confirm it before ordering rather than assuming it will work.
Choose the most exact-fit, clearly specified sensor when the engine layout is hard to access or the vehicle is sensitive to signal quality. The main limitation is that the best option depends on the exact engine code and connector style, not just the car model.
Safe Installation, Maintenance, and Common Mistakes to Avoid
Crankshaft sensor replacement is often straightforward on paper, but access can be tight and mistakes are easy to make. Careful routing, clean connectors, and correct seating are essential for preventing repeat failures.
Basic replacement steps and safety precautions
Always follow the service manual for your vehicle, because sensor location and access vary a lot. In general, the process involves disconnecting power if recommended by the manufacturer, accessing the sensor, removing the old part, installing the new one, and clearing codes only after verifying the repair.
Match the part to the exact engine and sensor design before removal.
Check for oil leaks, damaged brackets, debris, or trigger-wheel problems.
Seat the sensor fully and keep the harness away from heat and moving parts.
Clear codes only after confirming the engine starts and the live data looks stable.
Preventing repeat failures with proper routing and inspection
After installation, make sure the cable is clipped in place and not rubbing against the engine, belt drive, or exhaust components. Even a good sensor can fail early if the harness is left under tension or exposed to excess heat.
It is also smart to inspect nearby seals and leaks. Fixing an oil leak or cooling issue can help protect the replacement sensor from the same conditions that damaged the original.
Stop using damaged connectors, frayed wiring, or overheated harnesses until the underlying issue is repaired. If the sensor area shows melted insulation or heavy contamination, a deeper inspection is safer than repeated part replacement.
Final Recommendation: When to Replace, Repair, or Seek Professional Help
Replace the crankshaft sensor when diagnosis points clearly to the sensor itself, the connector and harness are sound, and the part matches the exact engine specification. Repair the wiring or connector if the sensor signal is being interrupted by corrosion, damage, or poor contact.
If the vehicle has repeat no-starts, intermittent stalls, or a code that returns after replacement, the issue may be in the crankshaft system rather than the sensor alone. In that case, professional diagnosis is often the fastest way to confirm the trigger wheel, wiring, mechanical timing, or ECU-related cause before more parts are replaced.
- Crankshaft sensors do fail, and the symptoms often overlap with other engine problems.
- Scan data, wiring checks, and service-manual testing are the best way to avoid unnecessary replacement.
- Exact fit matters: connector, mounting style, signal type, and engine code all need to match.
Frequently Asked Questions
Yes. If the ECU cannot read crankshaft position or speed, it may not trigger spark or fuel correctly. That can leave the engine cranking but not starting.
Hard starting, stalling, rough idle, hesitation, and misfires are common signs. A check engine light often appears too, but the exact code depends on the vehicle.
Yes. Corrosion, loose connectors, damaged insulation, and poor grounding can interrupt the signal and mimic sensor failure. That is why visual inspection matters before replacing the part.
If the fault returns after replacement, the issue may be the trigger wheel, wiring, or a mechanical timing problem. Live data and service-manual testing help separate those causes.
Either can work if the part matches the exact engine and signal type. OEM is often the safer choice when compatibility is uncertain or access is difficult.
Get help if the vehicle stalls unpredictably, will not start, or keeps returning the same code after replacement. A technician can test the signal and check related systems more efficiently.