Best Tasmota Smart Plug Guide for Easy Home Automation
If you want a smart plug that keeps control local instead of depending on a vendor cloud, a tasmota smart plug can be a strong fit. It is best for users who care about privacy, automation flexibility, and reliable response inside a self-managed smart home.
- Best fit: Great for privacy-focused users and Home Assistant or MQTT setups.
- Buy carefully: Match the plug’s wattage, amperage, and outlet size to your appliance.
- Setup matters: Most models need 2.4 GHz Wi-Fi and clear naming for reliable automation.
- Safety first: Avoid high-risk loads unless the manufacturer clearly allows plug control.
- Value trade-off: You gain local control, but you give up some simplicity and polish.
Best Tasmota Smart Plug Guide for Easy Home Automation: What It Is and Whether It’s Right for You
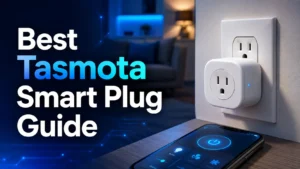
Tasmota is firmware that gives compatible smart plugs a local web interface and automation options without requiring the same app-first, cloud-heavy workflow many consumer plugs use. In practical terms, that means you can often control the plug from your home network, connect it to tools like MQTT or Home Assistant, and keep automations running even when a vendor service is unavailable.
Quick answer: the best Tasmota smart plug is the one that matches your load, connectivity, and local-control needs without relying on cloud accounts.
The “best” option is not a single model for everyone, because Tasmota smart plugs vary by hardware, power rating, and how they are configured or sold. The right choice is the one that safely supports your device, fits your outlet layout, and works with the automation stack you already use.
Who this guide is for: privacy-focused smart home users, DIY tinkerers, and anyone replacing app-heavy plugs with local automation.
This guide is aimed at people who want more control than a typical one-tap app setup offers. It is also useful if you are building a Home Assistant setup, experimenting with MQTT, or simply trying to reduce app clutter and cloud dependence in daily home automation.
- Check the plug’s rated wattage and amperage for your intended device.
- Confirm 2.4 GHz Wi-Fi support, outlet fit, and local-control options.
- Verify firmware path, update support, warranty terms, and safety certifications before purchase.
How a Tasmota Smart Plug Works in a 2026 Smart Home Setup
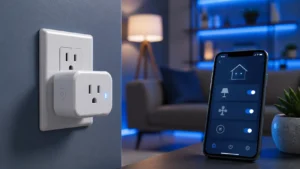
A Tasmota smart plug connects to your Wi-Fi network and exposes local control tools such as a browser-based interface, timers, and automation rules. Depending on the model and setup, it may also integrate with MQTT, Home Assistant, or voice assistants through local or bridge-based configurations.
Choose a plug for local control only if you are comfortable managing setup details like Wi-Fi, firmware, and automation settings.
Local control explained: Wi-Fi connection, web interface, MQTT, timers, scenes, and automation rules.
Local control means the plug can respond on your home network without sending every action through a remote server. That usually includes simple on/off control, schedules, countdown timers, sunrise or sunset triggers, and rule-based automations; more advanced users may also connect it to MQTT so other devices and dashboards can react to its state.
What makes it different from cloud-based plugs: privacy, speed, reliability, and reduced dependency on vendor apps.
Compared with cloud-first plugs, a Tasmota smart plug can feel faster because commands stay on your local network. It can also be more dependable for routines that should keep working during internet outages, though the exact experience still depends on your router, firmware version, and how well the device is configured.
Typical use cases: lamps, fans, coffee makers, space heaters only when manufacturer-safe, and standby power reduction.
These plugs are commonly used for lamps, desk fans, holiday lighting, and low-risk appliances that are safe to switch on and off with a plug. They can also help reduce standby power on entertainment gear or chargers, but high-draw appliances need special caution and should only be used if the manufacturer allows plug-based control.
Key Specs and Buying Criteria to Check Before You Choose
Because Tasmota smart plugs are sold on different hardware platforms, the most important step is checking the exact model details before you buy. The firmware matters, but the underlying electrical rating, radio support, and physical design matter just as much.
Power rating and load limits: wattage, amperage, and why the plug must match the device you plan to control.
Always match the plug’s rated load to the appliance you want to automate. A device that draws too much current can overheat the relay or body of the plug, so the manufacturer’s limits should be treated as the hard ceiling, not a suggestion.
Connectivity and compatibility: 2.4 GHz Wi-Fi support, router stability, and integration with Home Assistant, Alexa, Google Home, or MQTT setups.
Most smart plugs in this category use 2.4 GHz Wi-Fi, so a modern router with stable coverage matters more than raw internet speed. If you want voice control or a broader dashboard, confirm whether the plug works directly with your platform or through a local integration path such as MQTT or Home Assistant.
Physical fit and design: dimensions, outlet spacing, plug shape, and whether the unit blocks adjacent sockets.
Physical size matters more than many buyers expect. A bulky plug can block the second outlet on a duplex receptacle, interfere with power strips, or make it awkward to use in tight spaces behind furniture.
App and firmware requirements: setup via browser or flashing tools, OTA update support, and what to verify before purchase.
Some models arrive preflashed, while others require flashing before they are useful as Tasmota devices. Before buying, confirm whether the seller provides browser-based setup, over-the-air updates, or any special tools you may need, because that affects both convenience and long-term maintenance.
Build quality and safety markers: certifications, relay quality, heat management, and overcurrent protection details to confirm.
Look for documentation that clearly states safety certifications and electrical ratings for your region. If the listing is vague, treat that as a red flag and check the manufacturer manual, seller documentation, or product label before relying on the device for regular use.
Setup Guide: Installing, Flashing, and Configuring a Tasmota Smart Plug
Setup can be simple or technical depending on whether the plug arrives preconfigured. In both cases, the goal is the same: get the device onto your network, name it clearly, and make sure it behaves predictably inside your automation system.
Initial setup steps: powering on, joining Wi-Fi, assigning a static IP or reserved address, and naming the device clearly.
A reserved address is not always mandatory, but it often makes smart-home troubleshooting easier. Clear naming also helps when you have multiple plugs in the same room or when you connect them to voice assistants and scenes.
Firmware options: preflashed models vs. flashing your own device, and the trade-offs in convenience versus control.
Preflashed models are usually the easiest path for most buyers, while flashing your own device gives more control but adds complexity and risk. If you are new to local firmware, it is wise to favor a model that is already documented as Tasmota-ready rather than assuming every plug is equally simple to convert.
Automation basics: schedules, countdown timers, sunrise/sunset routines, and scene triggers for everyday use.
Useful automations start small. For example, you can use a countdown timer for a fan, a sunset routine for a lamp, or a scene trigger that powers several devices together when your evening routine begins.
Common setup mistakes: wrong Wi-Fi band, weak signal placement, outdated firmware, and mismatched home automation settings.
Many setup issues come from using the wrong Wi-Fi band or placing the plug too far from the router. Other common problems include outdated firmware, incorrect MQTT settings, or trying to use a voice assistant integration that does not match the plug’s actual support path.
Real-Use Benefits and Limitations of Tasmota Smart Plugs
Tasmota smart plugs are appealing because they put control closer to the home network and away from a third-party account. That design can be excellent for privacy-minded users, but it is not the easiest path for everyone.
- Fast local response for on/off control and automation
- Reduced reliance on vendor apps and cloud services
- Flexible for MQTT, scripts, and self-hosted setups
- More setup work than a typical app-based plug
- Compatibility can vary by model and firmware version
- Not ideal if you want the simplest possible smart-home experience
Benefits that matter: faster response, local privacy, reduced subscription dependence, and flexible automation.
The biggest practical benefit is control without constant cloud dependency. That matters most if you want automations that feel responsive, if you prefer to keep device behavior inside your own network, or if you want to avoid a product becoming less useful when an app changes.
Limitations to expect: setup complexity, occasional firmware learning curve, and possible compatibility gaps with some ecosystems.
Local firmware can be powerful, but power often comes with a learning curve. If you are unfamiliar with device discovery, network reservations, or MQTT, expect a little more setup time than you would with a mainstream plug that works almost entirely through an app.
Best-fit scenarios: tech-savvy homeowners, energy monitoring projects, and users building a self-hosted smart home.
These plugs fit especially well in homes where the owner wants to standardize on local automation. They are also useful for projects that need predictable state control, such as recurring schedules, energy-conscious routines, or custom dashboards.
When not to buy one: if you want plug-and-play simplicity, minimal configuration, or a fully managed cloud app experience.
If your main goal is to unpack a plug, tap a few prompts, and move on, a simpler cloud-based model may be a better match. The same is true if you do not want to manage firmware, local integrations, or network troubleshooting.
For readers comparing local automation gear with lighting gear, our guides to smart light switches and Home Assistant-friendly smart lights can help you decide whether a plug, bulb, or switch is the better fit.
Safety Guide: Rated Wattage, Heat, Cable Quality, and Safe Use Limits
Any smart plug should be treated as an electrical device first and a convenience product second. That means checking ratings, watching for heat, and avoiding risky loads even if the automation feature looks convenient.
How to stay within safe limits: check the plug’s rated wattage/amperage and keep high-draw appliances within manufacturer guidance.
The safest rule is simple: stay below the plug’s stated electrical limits and the appliance maker’s own guidance. If you are unsure whether a device is appropriate for plug-based switching, verify it in the manual before connecting it.
Heat and inspection checklist: monitor warmth, avoid daisy-chaining, inspect the outlet and plug body regularly, and replace damaged units promptly.
Some warmth is normal in many electronics, but excessive heat is not. Avoid daisy-chaining power strips and extension cords, and check the plug body and outlet periodically, especially after long runtimes or power interruptions.
Cable and connection quality: why loose sockets, worn cords, and poor contact increase risk and reduce reliability.
Poor contact can create unstable behavior and extra heat. A snug, properly maintained outlet and a good-quality cord are part of the safety system, not just accessories.
High-risk devices to avoid or verify carefully: space heaters, kettles, air fryers, and other continuous high-load appliances.
These appliances can draw substantial power and may cycle in ways that stress a smart plug. If you plan to automate them, verify the manufacturer’s instructions carefully and consider whether a different control method is safer.
Maintenance, Troubleshooting, and Long-Term Reliability
Long-term reliability usually comes down to routine care, stable networking, and sensible firmware management. Most issues are manageable if you keep the setup simple and document your device names and network settings.
Routine care: dust removal, keeping vents clear, and checking the plug after power outages or firmware updates.
Dust buildup and blocked ventilation can contribute to heat problems over time. After a power outage or update, verify that the plug returns to its expected state and that your automations still behave the way you intended.
Troubleshooting connection issues: Wi-Fi dropouts, device not responding, MQTT misconfiguration, and router channel problems.
If the plug becomes unreliable, start with the basics: signal strength, router band, and whether the device is still on the correct network. If you use MQTT, confirm the broker settings, topic names, and authentication details before assuming the hardware has failed.
Firmware and replacement guidance: when to update, when to reset, and when a plug should be retired for safety.
Firmware updates are worth considering when they address bugs, compatibility, or security issues, but only if the update path is well documented. If a plug repeatedly overheats, disconnects, or shows physical wear, replacement is the safer choice than continued troubleshooting.
Warranty details to verify before buying: coverage length, return policy, and whether seller support applies after flashing.
Warranty and return terms can vary widely by seller and region. If you plan to flash the device yourself, confirm whether that affects support before you buy, because some sellers treat modified firmware differently.
Best Alternatives, Value Comparison, and Final Recommendation
The right alternative depends on whether you value simplicity, local control, or energy tracking most. If you want a broader view of home automation choices, it helps to compare plugs with bulbs and switches rather than treating them as interchangeable.
| Option | Best For | Key Consideration |
|---|---|---|
| Tasmota smart plug | Local control, MQTT, Home Assistant, privacy-focused users | Requires more setup and compatibility checking |
| Cloud-first smart plug | Beginners and quick app-based setup | Depends more on vendor services and accounts |
| Smart switch or smart bulb | Lighting control and room-wide automation | Better for fixtures than plug-in appliances |
How Tasmota compares with other smart plugs: cloud-first brands, Home Assistant-friendly options, and energy-monitoring models.
Compared with cloud-first brands, Tasmota usually offers more local control and less app dependence. Compared with other Home Assistant-friendly plugs, the difference often comes down to hardware quality, firmware support, and whether you want built-in energy monitoring or a simpler on/off device.
Value for money: what you gain from local control versus what you give up in convenience and polish.
The value is strongest when you will actually use the local features. If your home already runs on self-hosted automation, the extra setup effort can pay off in responsiveness and control; if not, the convenience gap may outweigh the benefits.
Transparent verdict: the best choice for advanced users, the safer choice for beginners, and the key buying takeaway for 2026.
Frequently Asked Questions
A Tasmota smart plug is used to control compatible appliances locally over Wi-Fi without relying on a cloud app for every action. It is popular for Home Assistant, MQTT, schedules, and privacy-focused home automation.
Setup can be simple if the plug arrives preflashed and documented, but it can also be technical if flashing is required. The difficulty depends on the exact model, firmware path, and your comfort with local network settings.
Check the rated wattage and amperage, 2.4 GHz Wi-Fi support, physical size, firmware requirements, and safety certifications. Also confirm that it works with your automation platform and fits your outlet layout.
Many Tasmota smart plugs can work with Home Assistant through local integrations such as MQTT or direct device discovery, depending on the model and configuration. Always verify the current compatibility notes for your specific device and firmware version.
Only if the plug’s rating and the appliance manufacturer’s guidance both allow it. High-draw devices like space heaters and kettles need extra caution, and any sign of overheating means you should stop using the plug.
The main drawbacks are setup complexity, a steeper learning curve, and possible compatibility differences between models. They are usually best for users who value local control more than plug-and-play convenience.