Can a Crankshaft Position Sensor Be Cleaned
Yes, a crankshaft position sensor can sometimes be cleaned if the problem is light contamination rather than internal failure. If the sensor is damaged, heat-stressed, or the wiring is faulty, replacement is the better fix.
If you’re asking whether a crankshaft position sensor can be cleaned, the short answer is yes—sometimes. Cleaning can help when the sensor is only contaminated by oil, grime, or light corrosion, but it will not fix internal failure, heat damage, or wiring problems.
- Cleanable issues: Light oil, grime, debris, and mild connector corrosion can sometimes be removed safely.
- Replacement signs: Cracks, melted housing, loose terminals, and internal failure usually mean the sensor should be.
- Safety first: Use a sensor-safe cleaner, avoid scraping the tip, and let everything dry fully before.
- Don’t ignore root causes: Oil leaks, damaged wiring, or a bad tone wheel can bring the problem back.
Can a Crankshaft Position Sensor Be Cleaned? Quick Answer and When It Makes Sense
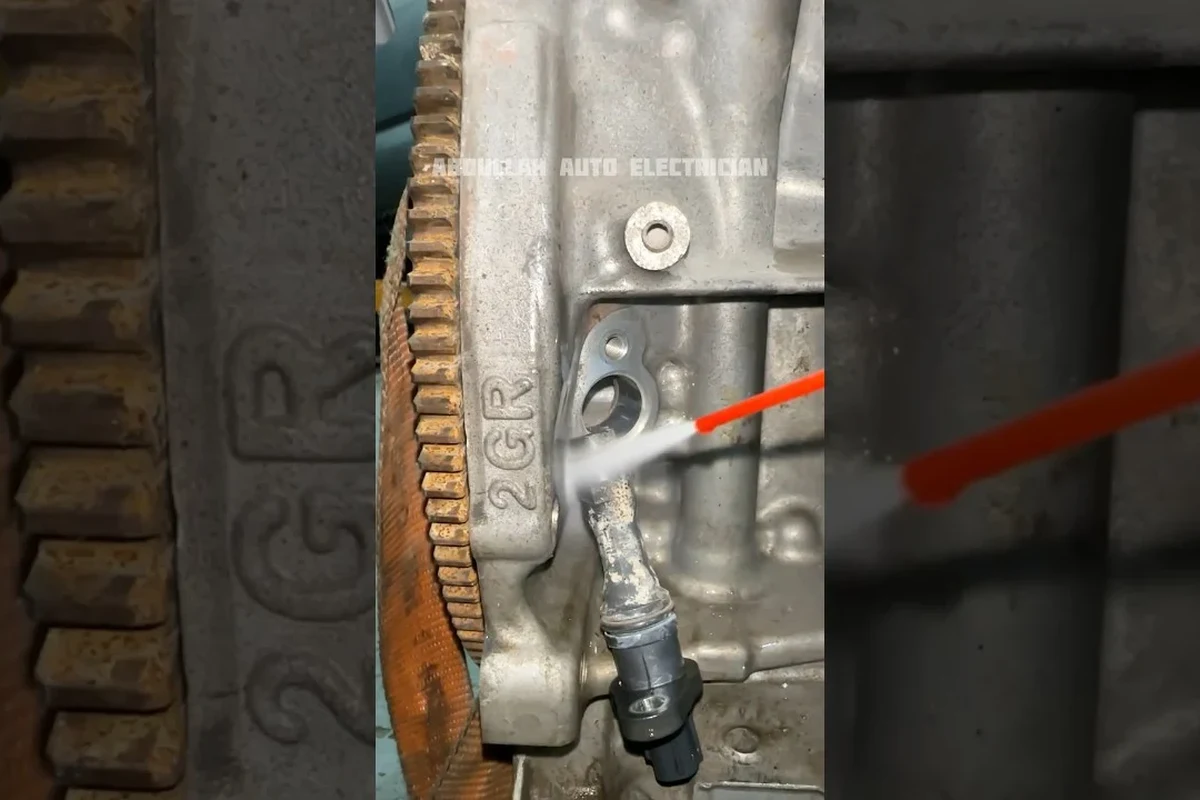
Cleaning a crankshaft position sensor is worth trying only when the sensor itself still appears physically intact and the problem looks like contamination rather than failure. In plain terms, that means dirt, oil seepage, road debris, or a dirty connector may be interfering with the signal.
What makes this tricky is that the crankshaft position sensor is a precision part. A little contamination can matter, but aggressive cleaning can also damage the sensing tip or connector and turn a simple fix into a replacement job.
How a Crankshaft Position Sensor Works in 2026 Vehicles
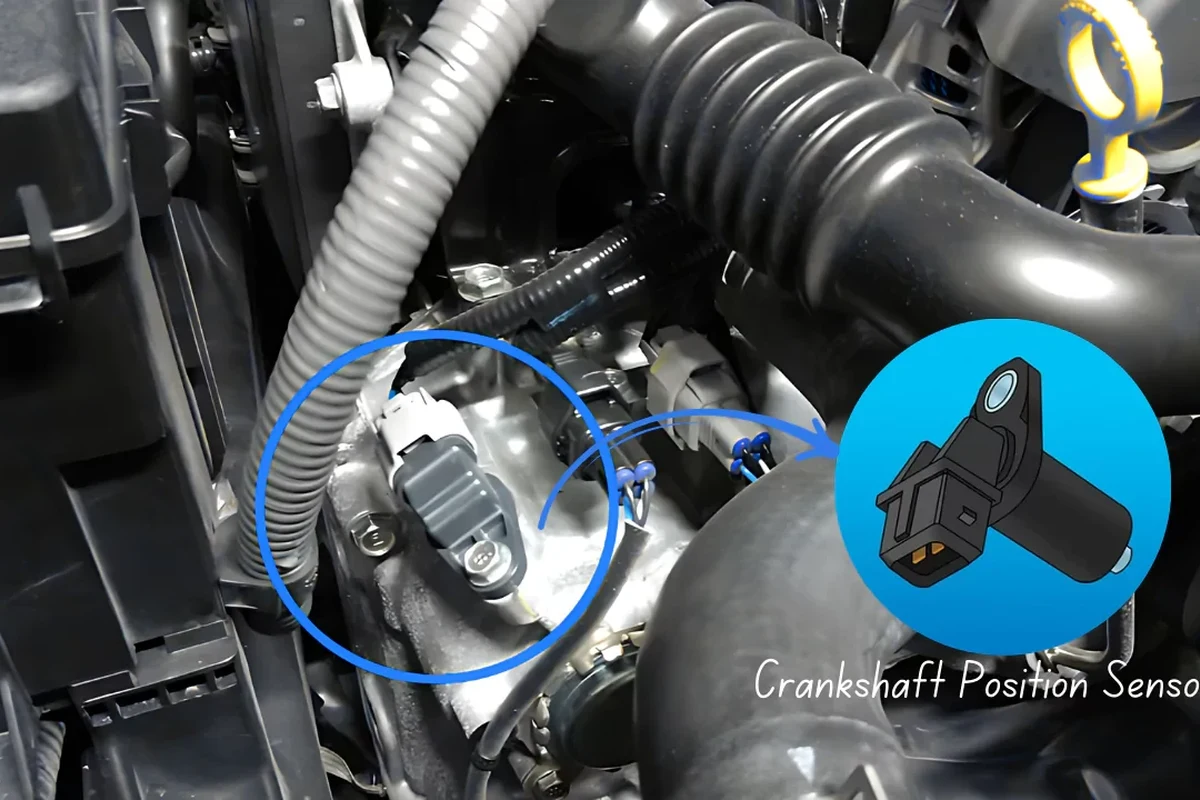
The crankshaft position sensor tells the engine computer how fast the crankshaft is turning and where it is in its rotation. That information helps the vehicle control ignition timing, fuel injection timing, and in many cases engine start-up strategy.
What the sensor reads and why it matters for engine timing
The sensor reads a tone wheel, reluctor wheel, or trigger pattern attached to the crankshaft. As that wheel moves past the sensor, the sensor generates a signal the engine control module uses to keep the engine running smoothly.
If that signal becomes weak, inconsistent, or missing, the vehicle may stall, misfire, crank without starting, or run poorly. Even a small amount of contamination can sometimes distort the signal enough to cause symptoms.
Many crankshaft position sensors are mounted close to the engine block, transmission bellhousing, or timing cover, which puts them near heat, oil vapor, and road grime.
Common sensor types and where they’re mounted
Most modern vehicles use either magnetic or Hall-effect crankshaft position sensors. The exact design varies by engine, and the mounting location can differ widely between models, so the service manual matters more than a generic repair guide.
Connector shape, sensor access, and removal method vary by vehicle, engine layout, and sometimes by trim or drivetrain. Always confirm the exact part location in the official repair information for your model.
Signs a Dirty or Failing Crankshaft Position Sensor May Be the Cause
Symptoms often show up as starting trouble or unstable engine behavior, but they are not unique to this sensor. That is why diagnosis should stay broad until you inspect the sensor, connector, wiring, and nearby engine components.
Starting problems, stalling, misfires, and check-engine codes
Common signs include extended cranking, random stalling, intermittent no-start conditions, rough idle, hesitation, misfires, and a check-engine light. Some vehicles may also store crankshaft sensor fault codes or related timing codes.
- Check whether the problem happens only when the engine is hot, cold, or after driving through water or heavy rain.
- Inspect the connector for oil residue, bent terminals, or loose locking tabs before assuming the sensor is bad.
- Look for related issues such as a weak battery, failing starter, or damaged wiring harness.
How these symptoms overlap with other engine issues
These symptoms can also come from a bad camshaft sensor, ignition problem, fuel delivery issue, vacuum leak, low battery voltage, or damaged tone wheel. Because of that overlap, cleaning the crankshaft sensor should be treated as one possible fix, not the automatic answer.
When Cleaning Is Worth Trying vs. When Replacement Is the Safer Choice
Cleaning makes sense when contamination is the likely root cause and the sensor is still structurally sound. Replacement makes more sense when the sensor has visible damage, repeated failure, or signs that the signal issue is internal.
Contamination, oil leaks, debris, and corrosion as cleanable causes
Light oil film, dust, road grime, and mild connector oxidation can sometimes be removed safely. If a leaking valve cover, front crank seal, or nearby harness issue is coating the sensor, cleaning may help temporarily, but the leak still needs attention or the problem is likely to return.
Damage, heat stress, wiring faults, and internal failure as replacement triggers
Cracks, melted plastic, swollen seals, deep corrosion, broken clips, and heat-brittled wiring usually point to replacement rather than cleaning. If the sensor has failed internally, no amount of surface cleaning will restore a stable signal.
Stop and replace the sensor if you see melted housing, frayed wiring, oil-soaked connectors that will not dry out, or terminals that are loose enough to lose contact.
How to Clean a Crankshaft Position Sensor Safely
Safe cleaning is gentle cleaning. The goal is to remove contamination without scratching the sensing surface, forcing moisture into the connector, or damaging the harness.
Tools, cleaner type, and inspection points to verify before reinstalling
Use a non-residue electronics-safe cleaner or an automotive sensor cleaner approved for delicate electrical parts. Avoid harsh solvents unless the manufacturer specifically allows them, and inspect the sensor tip, O-ring, connector pins, and harness insulation before reinstalling.
- Confirm the cleaner is safe for electronics and sensor contacts.
- Check the sensor housing for cracks, heat damage, or oil saturation.
- Inspect the connector lock and terminals for corrosion or looseness.
- Verify the tone wheel area is clean and not damaged.
Step-by-step removal, cleaning, drying, and reinstallation guidance
Follow the vehicle service procedure and disconnect the battery only if the manual calls for it. Let hot engine parts cool before working near the sensor.
Unplug the connector by releasing the lock tab, then remove the retaining bolt or fastener without twisting the housing.
Spray cleaner lightly on a lint-free cloth or the sensor surface, then wipe away grime. Do not scrape the tip or force liquid deep into the connector.
Allow the sensor and connector to dry fully before reinstalling. Moisture left in the connector can create a new no-start or misfire problem.
Seat the sensor properly, reconnect the harness, and confirm the lock clicks into place. Then check for leaks, loose wiring, or recurring fault codes.
Common Mistakes That Can Damage the Sensor or Worsen the Problem
Most cleaning failures happen because the sensor was treated like a dirty mechanical part instead of a delicate electrical one. A careful approach matters more than speed.
Using harsh chemicals, scraping the tip, or forcing connectors
Abrasive tools, wire brushes, carburetor cleaner, and aggressive solvents can damage the sensor body or leave residue that interferes with the signal. Forcing the connector can bend terminals or crack the locking tab, creating an intermittent fault that is harder to diagnose than the original issue.
Ignoring the harness, tone wheel, or oil leak that caused the contamination
If the harness insulation is damaged or the tone wheel is dirty, cleaning only the sensor may not solve anything. The same is true if an oil leak keeps dripping onto the part, because the contamination will return quickly.
Do not spray cleaner onto hot components, use open flame near solvents, or continue driving if the engine stalls unpredictably. Intermittent sensor failure can leave you stranded or create unsafe traffic situations.
Maintenance, Prevention, and Long-Term Value
Cleaning can be a useful short-term fix, but long-term value depends on solving the source of contamination and confirming the sensor is still reliable. That is especially important on older vehicles or engines with known oil seepage.
How to keep the sensor area clean and reduce repeat failures
Fix nearby oil leaks, keep the harness secured away from hot exhaust parts, and avoid pressure-washing sensitive engine areas unless the manufacturer says it is safe. If the vehicle has a splash shield or cover that protects the sensor area, make sure it is intact and properly installed.
- Low-cost first step when contamination is the likely cause
- Can restore a stable signal if the sensor is only lightly dirty
- May help you avoid unnecessary replacement
- Won’t fix internal sensor failure or damaged wiring
- Can worsen the problem if the sensor is handled roughly
- May only be a temporary fix if an oil leak remains
When a new sensor, wiring repair, or leak fix delivers better value
If the vehicle has high mileage, repeated stalling, or a history of heat-related electrical problems, a new sensor may be better value than repeated cleaning. The same is true when the connector, harness, or nearby seal is the real source of the fault.
Final Recommendation: Clean It, Inspect It, or Replace It?
The best choice depends on what you find during inspection. Clean the sensor if the contamination is light and the part is otherwise intact; inspect the connector, harness, and tone wheel if the symptoms are intermittent; replace the sensor if you see damage, heavy corrosion, or repeated failure after cleaning.
For a dirty but undamaged crankshaft position sensor, careful cleaning is a reasonable first step. For cracked, heat-stressed, or electrically unstable sensors, replacement is the more dependable repair, and any oil leak or wiring fault should be fixed at the same time.
Best choice by symptom severity, vehicle age, and repair budget
If the car is older, the symptoms are severe, or the sensor is difficult to access, replacement often saves time and reduces repeat labor. If the budget is tight and the issue looks contamination-related, a careful clean-and-inspect approach is a sensible place to start—as long as you stop if the part shows damage.
Frequently Asked Questions
Yes, if the sensor is only lightly contaminated and still physically intact. If it is cracked, melted, heavily corroded, or internally failed, replacement is the safer choice.
Use an electronics-safe or sensor-safe cleaner that leaves no residue. Avoid harsh solvents or abrasive tools unless the vehicle manufacturer specifically allows them.
Common signs include hard starting, stalling, misfires, rough idle, and check-engine lights. These symptoms can also come from other engine problems, so inspection matters.
Yes, oil or grime can interfere with the sensor signal or the connector contact. If oil keeps coming back, the leak should be repaired or the problem may return.
Yes, but gently and only with an appropriate electrical cleaner. Do not force the terminals or soak the connector with excessive liquid.
Stop if you find cracks, heat damage, loose terminals, deep corrosion, or repeated failure after cleaning. Those are strong signs the sensor or wiring needs replacement.