Can I Clean a Flame Sensor with Sand Paper
You can clean a flame sensor with sandpaper, but only very lightly and only as a last-resort cleaning method. The safer choice is to start with gentler cleaning and replace the sensor if it is bent, pitted, or still fails after cleaning.
If you’re asking whether you can clean a flame sensor with sandpaper, the short answer is: sometimes, but it is usually not the best first choice. A very light cleaning can help in some cases, but aggressive sanding can damage the sensor and create a bigger furnace problem.
- Best first step: Use the gentlest cleaning method before any sanding.
- Safety matters: Turn off power and follow the furnace manual before removing the sensor.
- Use caution: Fine grit only, with very light pressure if abrasion is needed.
- Replace when worn: Visible damage, bending, or repeated failure often means the sensor is done.
Can You Clean a Flame Sensor with Sandpaper? Short Answer and Safety First
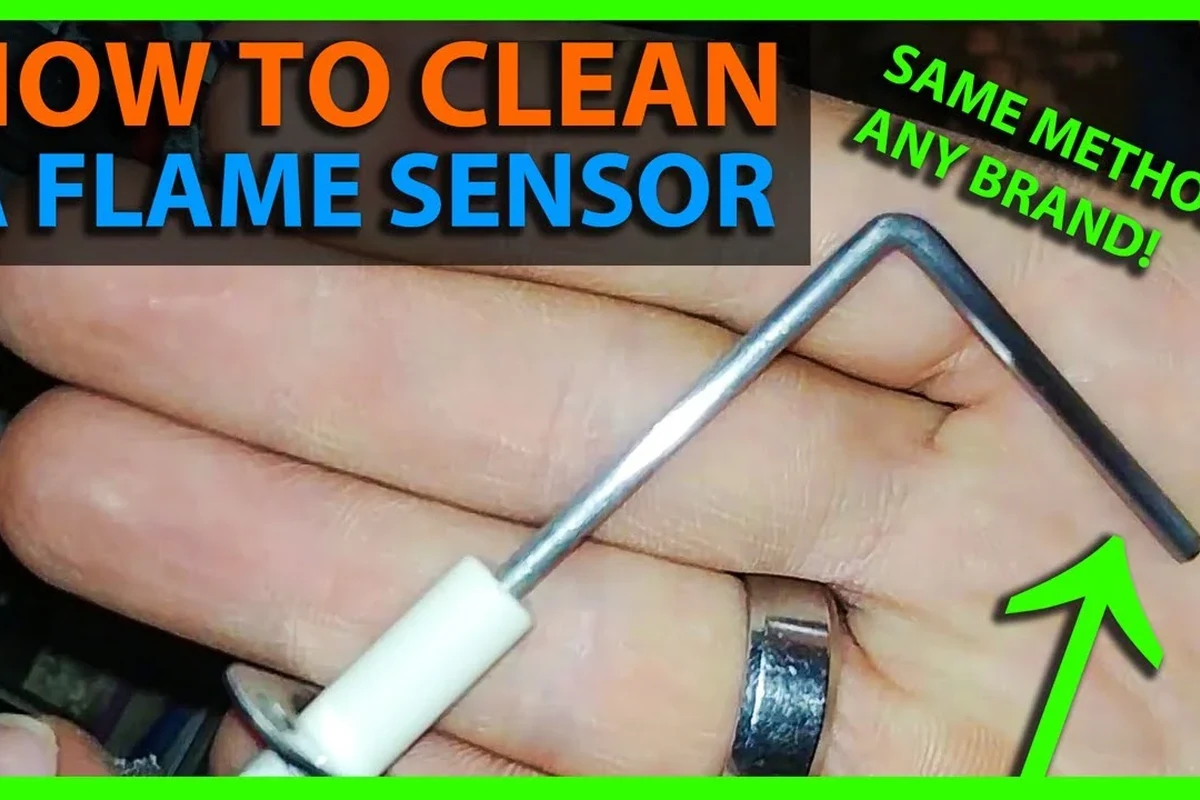
A flame sensor is a delicate safety part, so the goal is to remove light oxidation or residue without changing the shape or surface of the sensing rod. Fine abrasion may work in a pinch, but the safer approach is to start gently and stop as soon as the surface is clean enough to restore reliable operation.
Always shut off power and gas before touching furnace components, and let the unit cool fully. If you smell gas, see visible damage, or are unsure about the shutdown procedure, stop and call a qualified HVAC professional.
What a Flame Sensor Does and Why It Gets Dirty
The flame sensor is a safety device used in many gas furnaces. Its job is to confirm that a flame is actually present after ignition, so the furnace does not keep sending gas if the burners fail to light properly.
How the Sensor Detects Flame
Most furnace flame sensors use flame rectification, which is a simple way of saying the sensor reads the flame’s electrical behavior. When the burner flame touches the sensor rod, the control board gets a signal that the flame is present and safe.
If the rod is coated with oxidation, soot, or residue, that signal can weaken. The furnace may still try to light, but it can shut down quickly because the control board does not “see” the flame clearly enough.
A flame sensor does not “watch” the flame like a camera. It measures an electrical signal created by the flame itself, which is why even a thin film on the rod can matter.
Common Signs of a Dirty or Failing Flame Sensor
A dirty flame sensor often shows up as a furnace that lights briefly and then shuts off. Some systems will retry ignition several times before locking out, while others may display an error code on the control board.
Other clues can include intermittent heat, repeated startup failures, or a furnace that works after a reset and then fails again later. Those symptoms can also point to other issues, so it is important not to assume the sensor is the only problem.
Is Sandpaper a Good Idea for Cleaning a Flame Sensor?
Sandpaper is not automatically wrong, but it should be treated as a last-resort cleaning method, not the default. The biggest risk is removing too much of the protective surface or leaving scratches that make future buildup worse.
When Light Abrasion Might Be Considered
If the sensor only has a light layer of oxidation and the manufacturer’s guidance does not prohibit gentle abrasion, a very fine abrasive can sometimes restore conductivity. In practice, that means minimal pressure and only enough contact to remove the visible film.
For many homeowners, a non-abrasive method or a dedicated fine cleaning pad is a safer first step. The less material you remove, the lower the chance of changing the sensor’s performance.
Before reaching for sandpaper, check the furnace manual or the sensor manufacturer’s instructions. Some models are more sensitive than others, and the recommended cleaning method can vary.
Why Over-Sanding Can Cause More Problems
Too much sanding can shorten the life of the sensor by thinning the rod or roughening the surface. A scratched or heavily abraded rod may collect residue faster, which means the furnace could start failing again sooner.
There is also a handling risk. Flame sensors are usually small and easy to bend, and even a slight bend can affect how the rod sits in the flame path.
Safer Cleaning Methods Recommended Before Sandpaper
In most cases, start with the least aggressive method that can still remove the buildup. That keeps the sensor intact and reduces the chance of turning a simple maintenance task into a replacement job.
Power Off, Shut Off Gas, and Let the Unit Cool
Turn off electrical power to the furnace at the switch or breaker, then shut off gas if the manual instructs you to do so for service access. Wait until the furnace is cool enough to handle without heat-related injury.
Never clean a flame sensor while the system is energized. Even if the furnace is not actively heating, the control board and other components may still carry electrical power.
Use Fine Grit Alternatives and Non-Abrasive Cleaning Steps
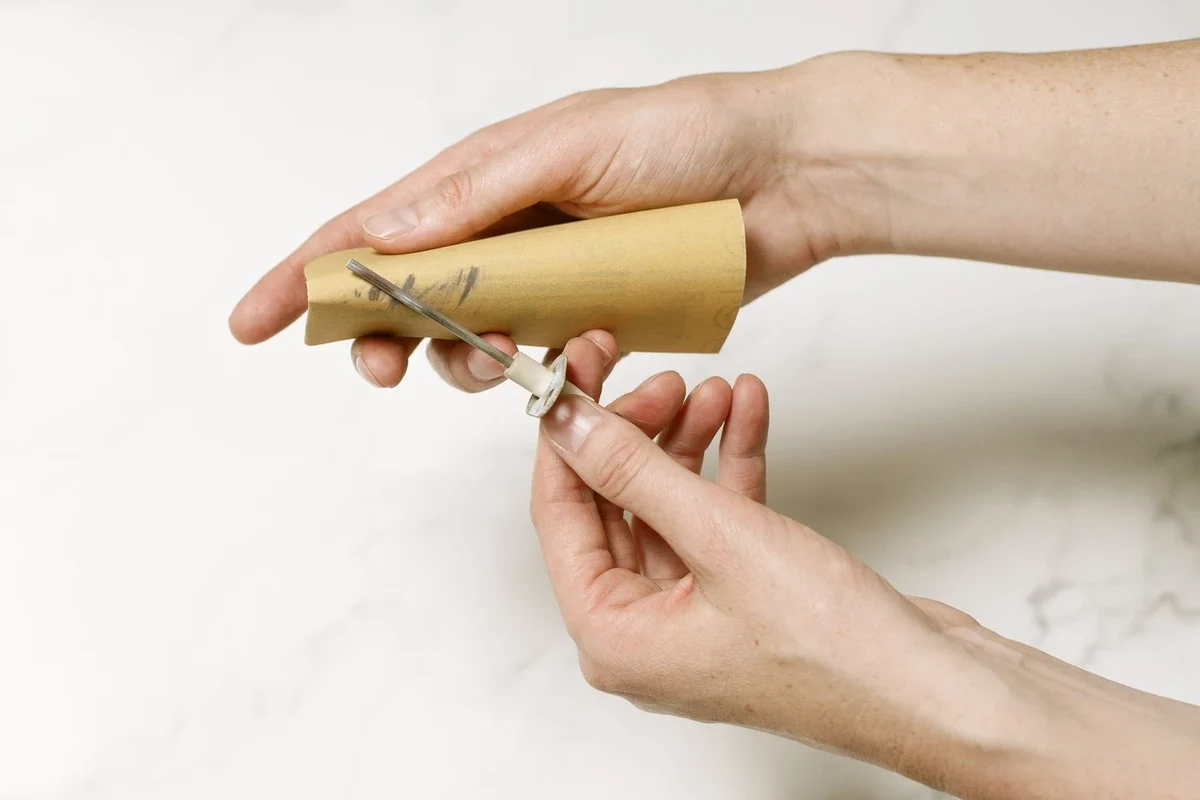
Start with a clean, dry cloth or a soft non-abrasive pad to remove loose residue. If the buildup remains, a very fine abrasive pad or extremely fine sandpaper may be used carefully, but only with light pressure and short, controlled strokes.
Avoid heavy grit, metal files, or anything that could leave deep scratches. The aim is to clean the rod, not reshape it.
- Use the gentlest method that removes the buildup.
- Clean only the sensing rod, not the mounting bracket or insulation.
- Wipe away dust after cleaning so residue does not fall into the burner area.
When to Stop and Replace the Sensor Instead
If the rod is visibly pitted, cracked, bent, or heavily worn, cleaning may not solve the problem. Replacement is usually the better choice when the sensor no longer has a smooth sensing surface or when cleaning only fixes the issue for a short time.
If your furnace keeps failing after proper cleaning, the problem may be wiring, grounding, burner contamination, ignition, or the control board rather than the sensor itself. At that point, replacement or professional diagnosis is more useful than repeated sanding.
Step-by-Step Guide to Cleaning a Flame Sensor the Right Way
The safest cleaning process is simple: remove the sensor carefully, clean it lightly, inspect it closely, and reinstall it without forcing anything. If anything looks damaged during the process, pause and reassess before putting the furnace back into service.
Tools and Materials You Need
Keep the job basic. A screwdriver or nut driver that fits your furnace fasteners, a clean cloth, a very fine abrasive pad or very fine sandpaper if needed, and a flashlight are usually enough for a routine cleaning.
- Confirm the furnace model and locate the flame sensor in the manual.
- Verify the shutdown procedure for power and gas.
- Have a replacement sensor available if the old one is damaged.
- Keep the work area dry, clear, and well lit.
How to Remove, Clean, Inspect, and Reinstall the Sensor
Turn off power, follow the manual for gas shutdown if needed, and allow the unit to cool before opening the access panel.
Unscrew the sensor and pull it out gently. Do not twist or bend the rod more than necessary.
Use a soft cloth first. If needed, apply very light abrasion only to the metal rod until the surface looks clean and evenly colored.
Look for cracks, heavy pitting, corrosion, or a bent rod. If you see damage, replace the sensor instead of forcing it back in.
Put the sensor back in the same position, tighten the fastener securely, and restore power according to the manual.
How to Confirm the Furnace Is Working Properly After Cleaning
After reassembly, watch the furnace through a full startup cycle. The burners should ignite normally, stay lit, and continue running without repeated shutdowns.
If the furnace still locks out, check for loose wiring, poor grounding, dirty burners, or an installation issue with the sensor position. Repeated failures after careful cleaning are a sign to stop troubleshooting blindly and move to a more complete diagnosis.
Stop using damaged electronics, swollen batteries, frayed cables, overheating chargers, or unstable appliances and follow the manufacturer’s guidance. For furnaces, any sign of gas odor, scorch marks, or repeated ignition failure deserves immediate caution.
Common Mistakes That Can Damage the Sensor or Furnace
Most flame sensor problems during DIY cleaning come from being too aggressive or skipping inspection. The sensor is small, but the furnace depends on it for safe operation, so small mistakes can create repeated lockouts or unnecessary replacement costs.
Using the Wrong Grit or Too Much Pressure
Coarse sandpaper can scratch the rod enough to make future buildup worse. Pressing hard can also remove more material than needed, which is especially risky on older sensors that already show wear.
If you do use an abrasive, keep it very fine and use only enough pressure to remove the oxidation. Think “polish lightly,” not “sand it down.”
Bending the Rod, Touching the Tip, or Skipping Inspection
Bending the rod can change where it sits in the flame, and that can prevent the furnace from reading the flame correctly. Touching the sensing area with oily fingers can also leave residue that interferes with the signal.
Skipping the inspection step is another common mistake. If the sensor is cracked, pitted, or loose at the mount, cleaning alone will not restore reliable operation.
When Cleaning Is Not Enough: Replacement, Cost, and Value
Cleaning is worthwhile when the sensor is simply dirty, but replacement makes more sense when wear or damage is already visible. The value question is not just what the part costs; it is whether the sensor can still give a stable, dependable signal.
Signs the Flame Sensor Should Be Replaced
Replace the sensor if the rod is badly corroded, bent, cracked, or worn thin. Replacement is also smart if the furnace keeps failing even after a proper cleaning and the rest of the system checks out.
If the connector is loose or the mounting hardware is damaged, that can also justify replacement because a poor connection can mimic a bad sensor.
What to Look for in a Replacement Sensor
Match the part to your furnace model whenever possible. The rod length, mounting style, connector type, and bracket shape can vary, so the safest choice is the exact part number listed by the manufacturer or a verified compatible equivalent.
Compatibility can vary by furnace brand, model number, and production revision. Before buying a replacement, confirm the part number in the unit manual, on the old sensor, or through the manufacturer’s parts lookup.
Final Recommendation: Best Practice for Homeowners and DIYers
If you are wondering whether you can clean a flame sensor with sandpaper, the best answer is yes, but only very cautiously and only if gentler cleaning is not enough. In most cases, a soft cloth or very light non-abrasive cleaning is the smarter first move, because it reduces the chance of damaging a part that the furnace depends on for safe operation.
For homeowners, the safest approach is to follow the furnace manual, inspect the sensor carefully, and replace it when wear is obvious. If the furnace still fails after proper cleaning, the issue may be deeper than the sensor, and that is the point where professional diagnosis is usually the better value.
—
Frequently Asked Questions
Yes, but only very lightly and only if gentler cleaning does not work. Fine abrasion can remove oxidation, but too much sanding can damage the sensor.
If you use sandpaper at all, choose very fine grit and use minimal pressure. Coarse grit can scratch the rod and make future problems more likely.
Common signs include brief ignition followed by shutdown, repeated restart attempts, and lockout errors. These symptoms can also come from other furnace issues.
Clean it if the rod only has light residue or oxidation. Replace it if the rod is bent, cracked, pitted, or still fails after proper cleaning.
Verify the furnace model, part number, rod length, mounting style, and connector type before buying. Compatibility can vary by brand and model revision.
Check for loose wiring, poor grounding, dirty burners, or installation issues. If the problem continues, stop troubleshooting and consult the manual or a qualified HVAC technician.