How to Connect Robot Vacuum to WiFi in Minutes
How to Connect a Robot Vacuum to WiFi
Connecting a robot vacuum to WiFi is usually simple once the network, app, and pairing mode all match the vacuum’s requirements. In most cases, the fastest path is to place the vacuum on its dock, connect your phone to a 2.4GHz network, open the brand’s app, put the vacuum in pairing mode, and finish setup before updating firmware and testing remote controls.
To connect a robot vacuum to WiFi, place it on the dock, connect your phone to a 2.4GHz network, and add the vacuum through the official brand app. If setup fails, check pairing mode, WiFi password, signal strength, and app permissions before resetting anything.

Roborock Saros 10 Robot Vacuum and Mop
If you are looking for a premium connected robot vacuum rather than only troubleshooting an older model, the Roborock Saros 10 is the strongest high-end option among the three featured here.
- Premium robot vacuum and mop combination
- Designed around connected smart cleaning
- Strong fit for automation-focused households
- High-end option for demanding cleaning setups
Main trade-off: A flagship model may be unnecessary if you only need simple scheduled cleaning.
Check Roborock Saros 10 on Amazon → ASIN: B0DLH247PS- Use 2.4GHz first: Many robot vacuums still pair most reliably on 2.4GHz networks.
- Start with the official app: Correct model selection prevents many setup failures.
- Check dock placement: Weak signal near the charging base can cause offline issues.
- Update after pairing: Firmware updates may improve app and connection stability.
- Troubleshoot safely: Inspect the charger, dock, and cable if charging is inconsistent.
How to Connect a Robot Vacuum to WiFi: The Fastest Setup Path

If you want the short version, robot vacuum WiFi setup works best when you handle the basics first: correct app, correct password, correct WiFi band, and a strong signal near the dock. Most setup failures happen before the vacuum even starts pairing.
What you need before pairing
Before you start, gather the vacuum, charging dock, power adapter, your phone, the brand app, and your WiFi password. It also helps to keep the vacuum near the router during first-time setup if the dock’s normal location has weak signal coverage.
You should also check the manual or app store listing for the exact app name. Some brands have different apps for older and newer models.
- Confirm the exact model number and supported app.
- Verify the supported WiFi band.
- Check whether a brand account is required.
- Keep your phone on the same home network.
- Place the dock where wireless signal is stable.
Why many robot vacuums use 2.4GHz WiFi
Many robot vacuums use 2.4GHz because it generally provides better range through walls and works well for low-bandwidth smart-home devices.
Robot vacuums mainly exchange commands, maps, schedules, notifications, and status updates, so they do not usually need high wireless bandwidth.
If your router combines 2.4GHz and 5GHz under the same network name, setup may still work. However, some models pair more reliably when the 2.4GHz network is temporarily separated.
Basic step-by-step pairing process
Install the official app, sign in or create an account, power the charging dock, place the vacuum on the charger, and enter the vacuum’s WiFi pairing mode.
Then select the correct model in the app, enter the WiFi password, allow required permissions, and wait while the app transfers the network details.
Place the dock on a stable surface with enough space for the robot to leave and return.
Start with the network band recommended by the manufacturer.
Follow the brand’s instructions until the WiFi indicator or voice prompt confirms pairing mode.
How Robot Vacuum WiFi Setup Works in 2026
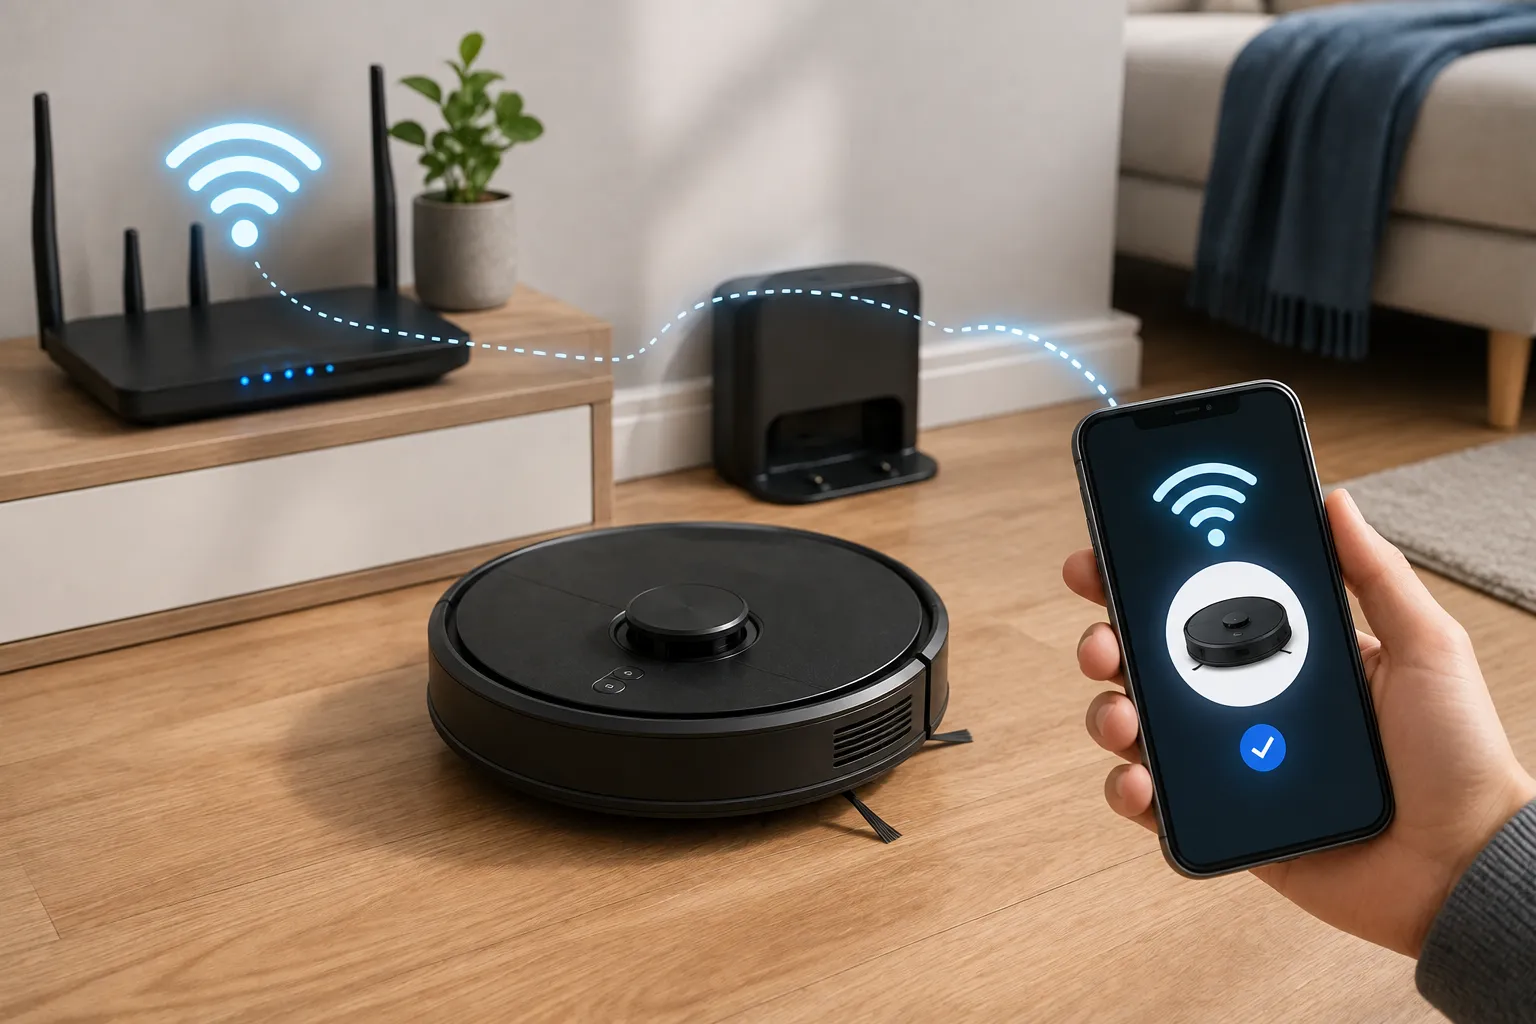
Modern robot vacuum setup depends on the relationship between the vacuum, smartphone, router, and manufacturer app. Many current models also use Bluetooth assistance or QR-based onboarding.
App-based pairing, Bluetooth assist, and QR onboarding
Most current models begin setup inside the brand’s mobile app. Bluetooth can help the phone find the vacuum before WiFi credentials are transferred.
Some models include a QR code on the vacuum, dock, packaging, or quick-start guide that opens the correct app or setup page.
What the vacuum, router, and phone each do
Your phone acts as the setup bridge. It identifies the vacuum, sends network credentials, and confirms connection status through the app.
The router accepts the vacuum as a connected device, while the vacuum uses the connection for commands, firmware updates, maps, notifications, schedules, and other supported features.
A robot vacuum can sometimes appear offline in the app while still being able to clean from its onboard controls.
Check Compatibility Before You Start
If the vacuum, phone, router, or app does not meet the setup requirements, repeatedly restarting pairing may not solve the problem.
Supported WiFi bands and mesh networks
Verify whether your vacuum supports only 2.4GHz or additional wireless bands. Mesh networks can sometimes complicate onboarding because of band steering, device isolation, or automatic roaming.
Phone OS and app compatibility
Make sure your phone’s operating system is supported by the current app version. Also verify permissions such as Bluetooth, local network access, location, and notifications where required.
Dock placement and signal strength
The dock should have reliable WiFi coverage. Metal furniture, thick walls, distant corners, and enclosed spaces can reduce signal quality.
Step-by-Step Setup Guide for a Stable Connection
Place the dock and power the vacuum
Put the dock on a stable surface with suitable clearance. Use the manufacturer-provided or officially compatible power adapter.
Stop using the charger, cable, or dock if it becomes unusually hot, emits a burnt smell, or shows visible damage. You can also read our guide to charger safety.
Connect through the brand app
Select the exact vacuum model in the app. Enter the WiFi password carefully and allow the requested permissions.
Once connected, choose a simple device name that will remain easy to identify if you later add voice assistants or additional cleaning devices.
You can also see our Britech cordless vacuum guide and cordless vacuums for pet hair guide.
Update firmware and test controls
After successful setup, check for firmware updates and confirm that remote start, battery status, notifications, schedules, mapping, and any supported room controls function properly.
- Pair close to the router during first-time setup.
- Temporarily disable VPNs if onboarding repeatedly fails.
- Keep the app updated.
- Write down the exact model and app name for future resets.
Common Connection Problems and How to Fix Them
Robot vacuum cannot find WiFi
Verify the supported wireless band, network name, password, router compatibility, and signal strength.
App cannot detect the vacuum
Confirm that Bluetooth and local network permissions are enabled, restart the app, and place the vacuum back into pairing mode.
Wrong password or weak signal
Enter the WiFi password carefully. A weak signal near the dock may cause disconnects even after successful initial pairing.
When to reset the vacuum
Reset network settings only after checking the password, app permissions, network band, and router settings. A full factory reset should generally be a later troubleshooting step unless the manufacturer recommends it.
If the dock is near water, pet bowls, or damp flooring, inspect the power connection before focusing only on WiFi troubleshooting. See our safe drying guide for charging ports for general moisture-safety principles.
Key Decision Criteria If You’re Choosing a WiFi Robot Vacuum
If you have not bought a robot vacuum yet, connectivity should be considered alongside cleaning performance, mapping, maintenance, parts availability, app quality, and dock design.
App quality and mapping
Look for clear setup guidance, stable device management, room-specific cleaning, no-go zones, and multi-floor support if those features matter to your household.
Connectivity options
WiFi remains the main connection method, while Bluetooth can assist setup. Alexa, Google Home, and other smart-home integrations vary by model and region.

Dreame X50 Ultra Robot Vacuum and Mop
The Dreame X50 Ultra is a premium alternative for buyers who want an all-in-one robot vacuum and mop system with greater cleaning automation.
- Premium robot vacuum and mop system
- All-in-one cleaning-station approach
- Designed for high automation
- Suitable for larger premium smart-home setups
Main trade-off: A larger all-in-one cleaning station requires more floor space than a simple charging dock.
View Dreame X50 Ultra on Amazon → ASIN: B0DM5J52GCConsumables and replacement parts
Before buying, check the availability of filters, brushes, bins, dock accessories, batteries, and other replacement items.
Battery and charging requirements
Battery runtime depends on floor type, suction settings, home size, mapping behavior, firmware, and cleaning mode.
If replaceable batteries matter to you, see our replaceable-battery cordless vacuum guide.
Premium WiFi Robot Vacuum Comparison
| Product | Best For | Type | Position | Amazon |
|---|---|---|---|---|
| Roborock Saros 10 | Premium connected cleaning | Vacuum + Mop | Editor’s Pick | View |
| Dreame X50 Ultra | All-in-one automation | Vacuum + Mop | Premium Alternative | View |
| eufy Omni S2 | Premium smart-home cleaning | Vacuum + Mop | Smart-Home Pick | View |
Safe Use, Charging Limits, and Ongoing Maintenance
WiFi setup is only part of ownership. Robot vacuums also need safe charging, maintenance, and routine inspection.
Dock power and cable condition
Use the correct power adapter and inspect the cable, dock, and charging contacts regularly.
Inspect battery and charging areas
Look for damaged insulation, cracked housings, corrosion, debris, unusual heat, swelling, or charging errors.
Stop using damaged electronics, swollen batteries, frayed cables, or overheating chargers and follow the manufacturer’s guidance.
Replace worn parts when necessary
Filters, side brushes, main brushes, bins, batteries, and dock components should be replaced when the manufacturer’s maintenance guidance or noticeable performance decline indicates replacement is needed.

eufy Omni S2 Robot Vacuum and Mop Combo
The eufy Omni S2 is another premium choice for readers who want app-connected smart cleaning combined with vacuuming and mopping.
- Premium vacuum-and-mop combo
- Designed for automated smart-home cleaning
- Relevant to app-controlled cleaning routines
- High-end upgrade from basic robot vacuums
Main trade-off: A premium all-in-one system makes the most sense when you will use its additional automation features.
Check eufy Omni S2 on Amazon → ASIN: B0GVYTYNP7Is WiFi Control Worth It?
WiFi control can be valuable when you want scheduling, remote cleaning, maps, room controls, cleaning history, notifications, and smart-home routines.
Who WiFi-enabled robot vacuums fit best
They are useful for busy households, pet owners, larger homes, and people who want cleaning to run automatically while they are away.
Real-use benefits
The main advantages are convenience, visibility, remote control, scheduling, mapping, and automated routines.
Limitations
Some functions depend on apps, accounts, cloud services, firmware support, and network connectivity. Privacy-conscious buyers should review account settings and manufacturer privacy documentation.
Which Premium Robot Vacuum Should You Choose?
Choose based on the ecosystem and level of automation you actually need rather than automatically selecting the most expensive model.
If you want to connect a robot vacuum to WiFi with the fewest problems, start by confirming the correct app, network requirements, signal strength, pairing mode, and router compatibility. WiFi control is most useful when you take advantage of scheduling, mapping, notifications, and remote cleaning.
Frequently Asked Questions
The common causes include an unsupported network band, incorrect password, weak signal, app permissions, or incorrect pairing mode.
Many models use 2.4GHz, although support varies. Check the official specifications for your exact vacuum.
Many models allow basic start, stop, or dock controls without the app, while advanced features may require app connectivity.
Place it on a stable indoor surface with suitable clearance and reliable WiFi coverage.
Inspect them periodically for damaged cables, unusual heat, dirty contacts, cracks, or unstable charging.
It is especially useful if you want remote control, schedules, maps, notifications, cleaning history, and smart-home routines.