Street View Public Street Solar Powered Security Camera Guide
A pole-mounted solar security camera is a practical choice when you need outdoor coverage without running new electrical wiring. It works best in sunny, well-connected locations and becomes less reliable in shade, weak signal areas, or heavy winter conditions.
A street view public street solar powered security camera with pole is a pole-mounted outdoor camera system that uses a solar panel and battery storage instead of a permanent wired power run. It is a strong fit when you need visible, flexible monitoring for a street-facing area, but it only works well if the site gets enough sun, the network connection is stable, and the mounting location is chosen carefully.
- Best fit: Driveways, parking areas, business perimeters, and remote sites with good sun exposure.
- Most important specs: Solar wattage, battery capacity, field of view, night vision, and connectivity type.
- Main trade-off: Easier installation, but performance depends on sunlight, weather, and network signal.
- Check before buying: Pole compatibility, app support, storage options, weather rating, and warranty terms.
What a Street View Public Street Solar Powered Security Camera With Pole Actually Is
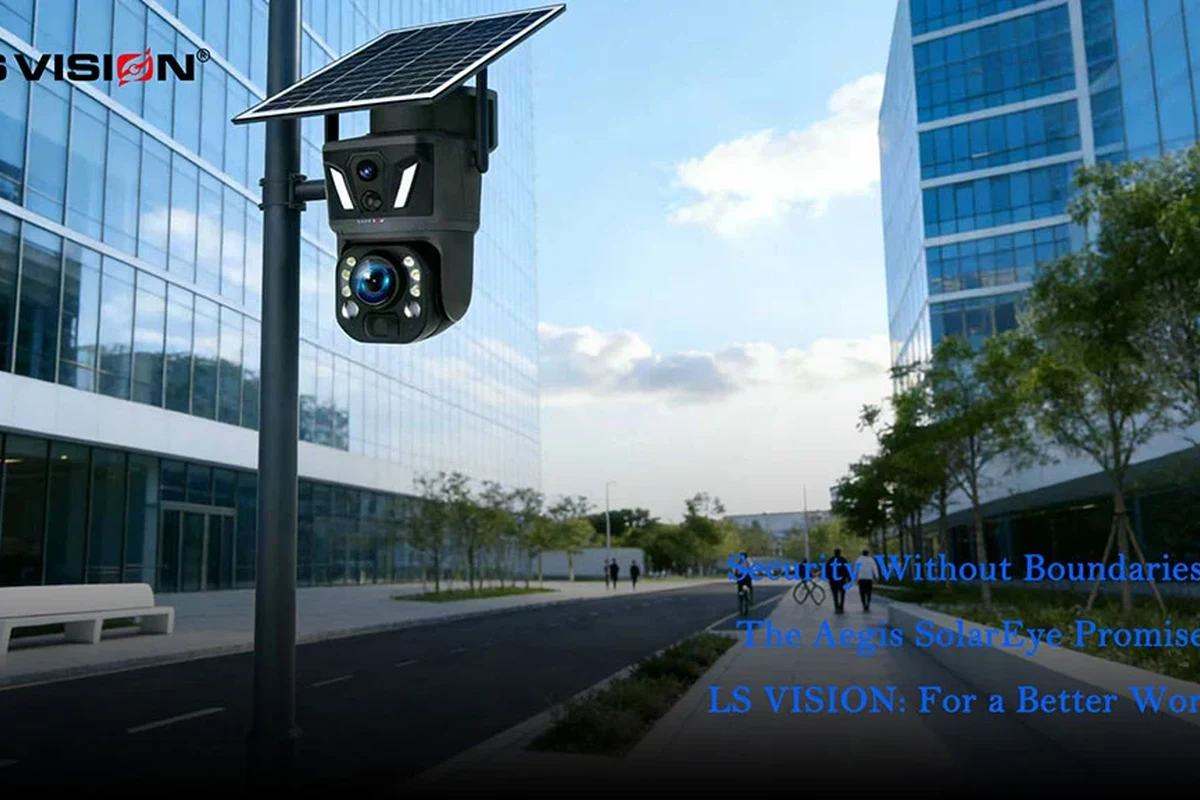
This setup combines four things: an outdoor security camera, a solar charging system, a battery, and a pole mount that raises the camera above ground level. In practice, it is designed for places where pulling electrical wiring is expensive, difficult, or not allowed, while still giving you a broad view of roads, sidewalks, driveways, or perimeter zones.
The phrase “street view” usually means the camera is aimed to cover a public-facing area rather than a small porch or indoor corner. That can be useful for traffic observation, entrance monitoring, or general deterrence, but it also makes placement, privacy, and local rules more important than they are for a basic home camera.
How It Works: Solar Charging, Battery Storage, and 24/7 Street Monitoring
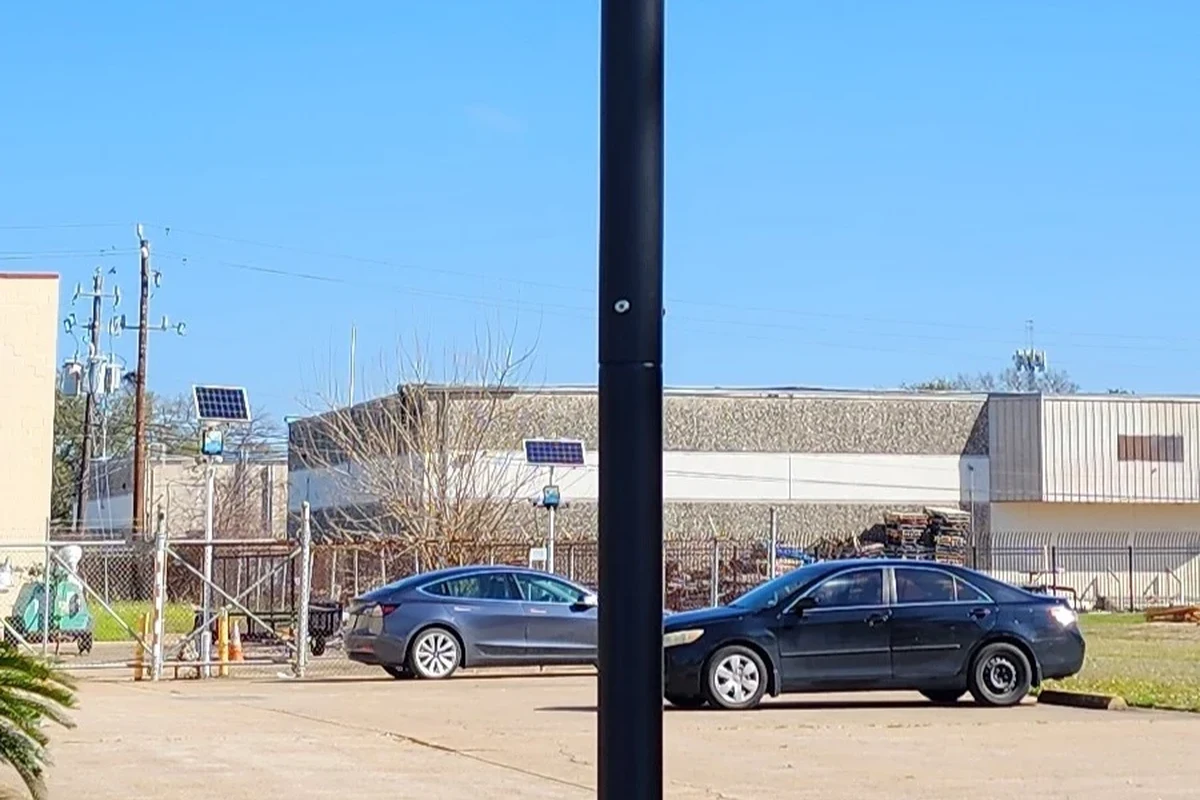
During daylight, the solar panel converts sunlight into power and recharges the internal battery or external battery pack. At night or during cloudy periods, the battery keeps the camera running, and the camera wakes up for motion events, live viewing, alerts, or continuous recording depending on the model.
“24/7” is often used loosely in marketing. For solar cameras, true round-the-clock operation depends on panel size, battery capacity, recording settings, motion frequency, temperature, and how much sunlight the panel actually receives. If a listing promises nonstop operation, treat that as a claim to verify in the manual and spec sheet, not a guarantee.
Core components: camera, solar panel, pole mount, battery, and connectivity
The camera handles video capture, motion detection, audio, and app notifications. The solar panel feeds power, the battery stores it, and the pole mount positions everything high enough for better coverage and fewer obstructions. Connectivity is usually Wi-Fi, LTE, or both, and that choice matters more than many buyers expect.
For readers comparing solar charging gear in general, our guides on whether solar power banks are worth it for everyday use and which solar power banks are the most reliable can help you think through battery and charging trade-offs. The same logic applies here: power input, storage, and real-world usage matter more than the headline spec.
When comparing models, look for the power system first and the camera features second. A great camera with weak charging support will disappoint faster than a modest camera with a well-sized panel and battery.
Why pole placement matters for public-street coverage and visibility
Pole placement affects the viewing angle, the amount of sunlight the panel gets, and how visible the camera is to passersby. Higher placement can improve the field of view and reduce tampering, but it can also make maintenance harder and increase installation complexity.
Visibility can be a benefit in public-street settings because it may deter casual trespassing or loitering. At the same time, the camera should not be aimed in a way that violates privacy expectations or local surveillance rules. If the camera is intended for a shared street, parking lot, or business frontage, check local requirements before mounting it.
Who This Setup Fits Best in 2026
This type of camera is best for people who need flexible outdoor monitoring without trenching power lines or adding a wired outlet. It is also useful when the mount location already has good sun exposure and the camera only needs to handle motion events, alerts, and periodic live checks rather than heavy nonstop recording.
Best use cases: neighborhoods, parking areas, driveways, business perimeters, and remote sites
Neighborhood watch zones, apartment entrances, small business perimeters, parking bays, farm gates, utility yards, and remote access roads are all common fits. The pole mount helps cover a wider area than a low porch bracket, and the solar system reduces the need for electrical work.
For homeowners who already use smart home devices, it is worth checking whether the camera app integrates with your broader setup. If that matters to you, our article on smart lighting compatibility with Alexa shows the kind of ecosystem questions that also apply to cameras, sensors, and alerts.
When a pole-mounted solar camera is not the right choice
Skip this setup if the mount area is heavily shaded, if you need constant high-bitrate recording, or if the site has weak cellular and Wi-Fi coverage. It is also a poor fit when the camera must be hidden, when the pole cannot be secured properly, or when theft risk is high enough that a visible outdoor unit would need extra protection.
If you need a camera in a location with almost no sunlight, a wired PoE camera or an AC-powered model may be more dependable. A solar unit can still work in some low-light regions, but only if the battery and panel are sized for the actual environment.
Key Specs and Buying Criteria to Check Before You Buy
Do not shop by the “solar” label alone. Compare the power system, camera optics, mounting hardware, weather protection, and app requirements together, because a weakness in any one of those areas can make the entire setup frustrating.
- Check camera resolution, battery size, solar wattage, and expected runtime behavior in low-sun conditions
- Confirm pole diameter compatibility, weather rating, app requirements, storage options, and connectivity type
Solar panel wattage, battery capacity, and expected runtime limits
Panel wattage and battery capacity are among the most important specs, but they are only meaningful when paired with actual usage patterns. A camera that records every motion clip, sends frequent alerts, and streams often will use more power than one that sleeps most of the day.
Look for the manufacturer’s guidance on how long the camera can last without sun and how much direct sunlight it needs for continuous operation. If that information is vague, treat it as a sign to verify the model carefully before buying.
Camera resolution, night vision, motion detection, and field of view
Resolution affects how much detail you can see at a distance, but it is not the only image quality factor. Night vision range, low-light performance, motion detection accuracy, and field of view often matter more for street-facing use, especially when the camera must cover moving vehicles or people at a distance.
Wide field of view helps cover more of the street from one pole, but too much width can reduce detail. If the scene is important for identifying faces or license plates, the lens angle and placement height matter as much as the resolution number.
Mounting hardware, pole diameter compatibility, weather rating, and cable quality
Check whether the included bracket fits your pole diameter or whether adapters are required. Also verify the weather rating and the quality of the connectors, because outdoor cameras fail more often at weak points like cable ends, seals, and bracket joints than at the camera body itself.
Do not mount a camera on an unstable pole, damaged railing, or improvised bracket. Follow the manufacturer’s installation instructions, use the correct fasteners, and stop if the hardware feels loose, corroded, or undersized for the load.
App requirements, Wi-Fi/LTE connectivity, and storage options
Some models depend on a phone app for setup, motion zones, playback, and firmware updates, so check operating system support before buying. Connectivity is equally important: Wi-Fi works well when the pole is near a strong router signal, while LTE models may be better for remote sites but can add plan costs.
Storage can be local, cloud-based, or both. Local storage may reduce recurring fees, but cloud access can make remote viewing and event history easier. Confirm whether the camera supports microSD cards, subscription plans, or both, and review the privacy settings in the official app before installation.
Real-World Benefits and Trade-Offs
The main appeal of a solar pole-mounted camera is convenience. It reduces wiring work, can be placed in more locations, and often installs faster than a hardwired outdoor system. For many buyers, that flexibility is the reason to choose it.
Energy savings, easier installation, and reduced wiring needs
Because the camera generates its own power from sunlight, it can lower installation complexity and eliminate the need to run new electrical lines. That makes it especially attractive for long driveways, detached structures, parking lots, and temporary monitoring points.
It can also be easier to reposition than a wired camera if the site changes. If your monitoring needs evolve, a pole-mounted solar setup may be simpler to relocate than a system tied to fixed electrical infrastructure.
Outdoor battery cameras often save power by recording only when motion is detected, which is why motion settings can have a big impact on battery life.
Limitations: shade, winter performance, network dead zones, and theft risk
Shade from trees, buildings, signs, or rooflines can reduce charging enough to cause problems over time. Cold weather can also reduce battery performance, and long winter days may not provide enough charging margin for heavy activity.
Network dead zones are another common failure point. A camera with no reliable Wi-Fi or LTE signal may still power on, but it will not be useful if alerts, live view, or uploads cannot reach your phone. Theft risk matters too, because a visible pole-mounted camera may need tamper-resistant hardware or a more secure placement.
Evidence limits: what product claims usually need verification
Marketing language around “all-day power,” “weatherproof,” “AI detection,” or “night vision range” often depends on ideal conditions. Those claims should be checked against the manual, compatibility list, app store listing, and warranty terms before you rely on them.
When the product page does not clearly explain how the camera behaves in low sunlight, extreme temperatures, or weak signal areas, assume performance will vary by environment. That is not a flaw unique to one brand; it is a normal limitation of outdoor solar electronics.
Setup Guide: Installing a Solar Security Camera on a Pole Safely
Installation is usually straightforward, but the details matter. The best setup balances sun exposure, viewing angle, cable protection, and secure fastening so the camera can stay powered and stable over time.
Pick a pole position with the best mix of sunlight, clear sightlines, and stable mounting surface. Avoid deep shade and areas where branches or signs block the panel.
Mount high enough for coverage and safety, but not so high that cleaning or maintenance becomes impractical. Angle the panel toward the strongest sun path for your location and orient the camera toward the area that matters most.
Use the included brackets, clamps, and weather seals exactly as directed. Keep connectors out of standing water and avoid sharp bends or tension on the cable.
Choosing the mounting height, angle, and sun exposure
A good height improves the field of view and reduces accidental contact, but it should still allow inspection and servicing. If the panel and camera are separate, make sure the solar panel gets the best sunlight even if the camera must face a different direction.
In many cases, the panel angle is more important than making the camera look neat. A slightly less elegant mount that charges reliably is usually the better choice.
Securing the pole mount, routing cables, and protecting connectors
Use the manufacturer’s hardware and tighten everything evenly so the unit does not twist in wind. Route cables so they do not rub against the pole, and leave enough slack for movement without creating a dangling loop that can snag or collect water.
If the camera uses exposed connectors, confirm that the seals are seated properly before outdoor use. A small gap can lead to corrosion, intermittent power loss, or moisture intrusion over time.
App setup, connectivity checks, and motion-zone calibration
After installation, complete the setup in the official app and confirm that the camera can connect, save clips, and send alerts. Then test the signal strength from the pole location, not just from the house or office, because the real mounting spot may behave differently.
Motion zones should be tuned so the camera does not trigger constantly from passing traffic, tree movement, or headlights. A careful setup can reduce false alerts and preserve battery life.
Maintenance, Inspection, and Long-Term Care
Solar cameras are low maintenance, not no maintenance. A little routine care helps preserve charging performance, image quality, and weather resistance.
Cleaning the solar panel, checking seals, and inspecting brackets
Dust, pollen, bird droppings, and road grime can reduce charging efficiency. Clean the panel gently according to the manufacturer’s instructions, and inspect the seals, brackets, and cable points for wear after storms or seasonal changes.
Stop using damaged electronics, swollen batteries, frayed cables, overheating chargers, or unstable mounts and follow the manufacturer’s guidance. Outdoor equipment should be removed from service if it shows corrosion, cracks, or loose structural parts.
Battery health, replacement guidance, and safe-use limits
Battery life depends on chemistry, temperature, charging cycles, and how deeply the battery is discharged. Follow the official replacement guidance for the exact model, and do not attempt unsafe battery repairs or modifications.
If the battery no longer holds charge well, or if the camera frequently shuts down despite good sunlight, the battery may be nearing end of life. At that point, check whether the manufacturer offers a replacement part or service path.
Firmware updates, storage management, and seasonal adjustments
Firmware updates can improve motion detection, power behavior, and app stability, but they should come from the official app or vendor site only. Review update notes before installing, especially if the camera is part of a business or shared security setup.
Seasonal changes may require small adjustments. In winter, for example, you may need to reduce unnecessary motion triggers, lower video quality if the model allows it, or reposition the panel if sun angles change significantly.
Value, Common Mistakes, and Final Recommendation
The value of this category comes from flexibility. If you need outdoor monitoring where wiring is difficult, a solar pole-mounted camera can be more practical than a conventional wired system, even if it costs more up front in hardware or accessories.
Cost versus wired alternatives and total ownership considerations
When comparing value, include more than the sticker price. Think about installation labor, mounting hardware, storage fees, LTE plans if needed, and the time spent maintaining the system. A wired camera may cost less over time in a sunny, cable-friendly location, while a solar camera may win where wiring is expensive or impossible.
For buyers who want to understand battery trade-offs more broadly, our guides to solar power banks with fast charging and whether solar power banks can charge multiple devices are useful comparisons. They cover the same core question: how much real-world power can a solar setup actually deliver?
Common installation mistakes to avoid
The most common mistakes are mounting in shade, assuming the camera will be maintenance-free, ignoring Wi-Fi or LTE signal strength, and using the wrong bracket for the pole diameter. Another frequent issue is aiming the camera for convenience instead of the actual coverage area, which can leave blind spots.
Also avoid skipping privacy and security setup. Use a strong account password, turn on two-factor authentication if the app offers it, and review permissions and notification settings before relying on the camera for important monitoring.
This setup is best for buyers who need flexible outdoor street or perimeter coverage, have decent sun exposure, and want to avoid running new electrical wiring. If your site is shaded, heavily weather-exposed, or requires nonstop recording, a wired alternative is usually the safer long-term choice.
Transparent verdict: when a street view public street solar powered security camera with pole is worth it
Choose this type of camera when the location is hard to wire, the pole can be mounted securely, and the panel can get consistent sun. It is especially sensible for driveways, business edges, parking areas, and remote monitoring points where convenience and visibility matter.
Choose something else when power reliability is nonnegotiable, the site is shaded, or the network signal is weak. In those cases, a wired camera or a different placement will usually deliver better long-term results than forcing solar to do a job it is not well suited for.
Frequently Asked Questions
It is used for outdoor monitoring where wiring is difficult or impractical, such as driveways, parking areas, perimeters, and remote sites. The pole mount improves coverage and helps place the solar panel where it can get better sunlight.
It depends on the model, battery size, motion activity, and climate. Check the manufacturer’s guidance for low-sun performance and treat strong direct sun as the safest assumption for reliable use.
Some models use LTE instead of Wi-Fi, while others need a nearby wireless network. If the camera cannot connect reliably, alerts, live view, and cloud uploads may not work as expected.
Focus on solar wattage, battery capacity, camera resolution, night vision, motion detection, pole compatibility, weather rating, and storage options. Also verify app support and any subscription requirements before you buy.
Clean the solar panel, inspect brackets and seals, check cables for wear, and keep firmware updated through the official app. Seasonal sun changes may also require small placement or motion-setting adjustments.
It is better when you need flexible placement and want to avoid electrical work. A wired camera is usually better when you need nonstop recording, the site is shaded, or long-term power reliability matters most.