Xenon Tube from Disposable Camera Guide for DIY Projects
A disposable camera xenon tube can be reused for compact flash effects, but it is only appropriate for experienced DIYers who understand high-voltage safety. For most smart-home projects, LED-based alternatives are safer and easier to use.
A xenon tube from a disposable camera is a small flash lamp that can be reused in certain DIY experiments, especially when a maker wants a compact burst of bright light. It is not a beginner-friendly part, though, because the flash circuit involves high voltage and stored energy that must be handled with care.
- Best use: Short, bright flash effects for advanced DIY and prop projects.
- Main risk: The circuit can retain dangerous high voltage after power is removed.
- Fit check: Inspect the tube, capacitor, leads, and trigger circuit before reuse.
- Better alternative: LEDs are usually safer, simpler, and more efficient for home projects.
Xenon Tube from Disposable Camera: What It Is and Why DIY Makers Use It
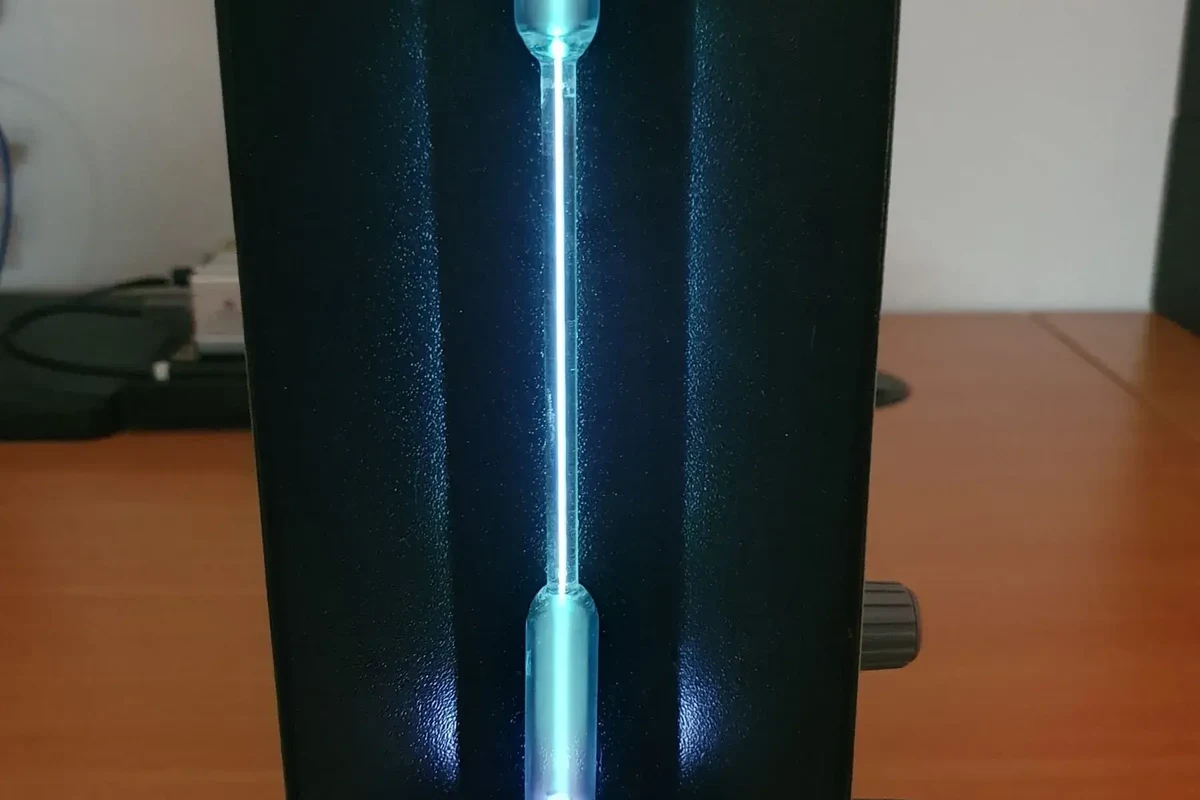
Quick answer: a disposable camera xenon tube is a compact flash lamp that can be repurposed for low-cost lighting experiments, but it is only suitable for experienced DIYers who understand high-voltage safety.
In practical terms, this part is most interesting to electronics hobbyists who need a short, intense flash rather than steady illumination. Makers sometimes salvage it for prop effects, simple optical experiments, or retro-style light bursts where LEDs would look too clean or too continuous.
Disposable camera flash circuits can retain a charge after power is removed. Do not touch the capacitor, tube leads, or trigger circuit unless you know how to discharge and verify the circuit safely using proper high-voltage precautions.
How a Disposable Camera Xenon Flash Tube Works
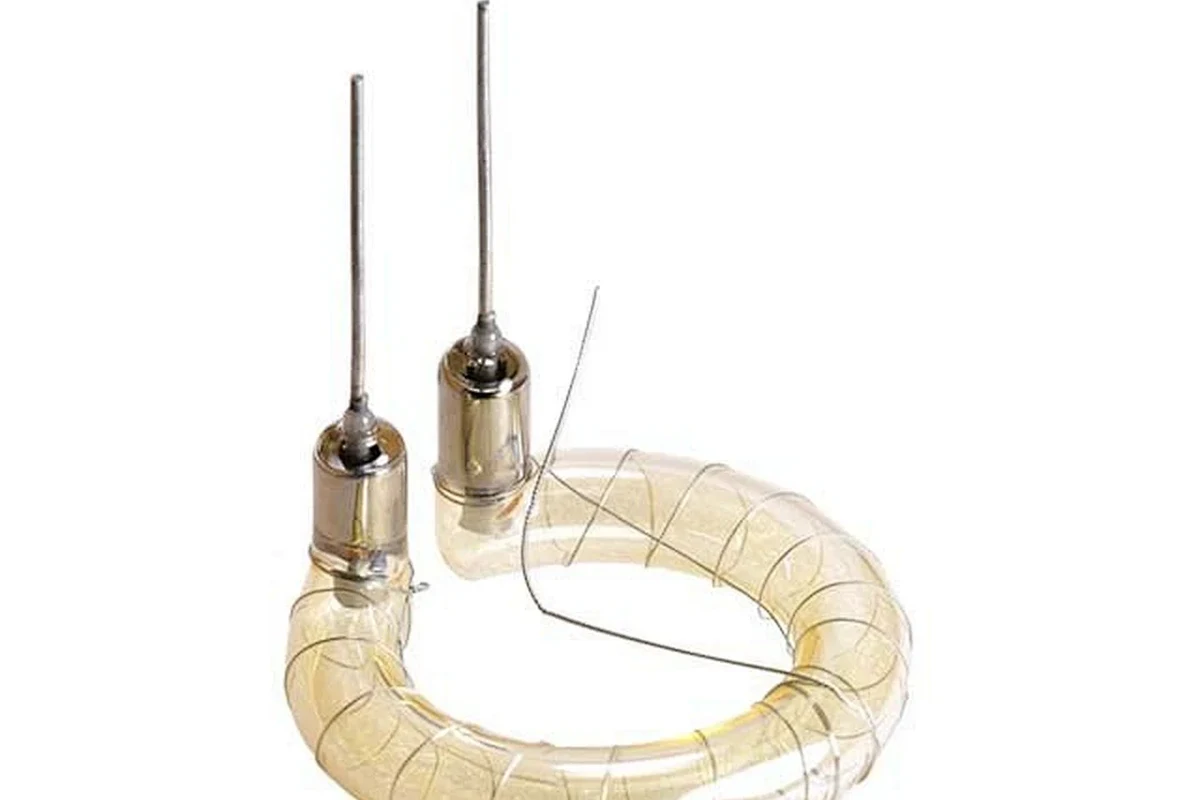
Basic flash-tube operation, capacitor discharge, and why the tube produces a bright burst of light
A xenon flash tube works by storing energy in a capacitor and releasing it very quickly through a gas-filled tube. That sudden discharge excites the xenon gas, which produces a brilliant flash of light for a very short time.
The brightness comes from speed, not long duration. Instead of glowing steadily like an LED, the tube turns stored electrical energy into a burst that is useful for freezing motion, signaling, or creating a dramatic visual effect.
What parts are usually involved: tube, capacitor, trigger circuit, reflector, and battery source
Most disposable camera flash assemblies include a xenon tube, a high-voltage capacitor, a trigger circuit, a reflector, and a low-voltage battery source that powers the charging circuit. The exact layout varies by camera model, but the basic function is the same: charge, trigger, flash, repeat.
The trigger circuit is especially important because the tube usually needs a separate high-voltage pulse to start conduction. Without that trigger, the capacitor may charge but the tube will not fire reliably.
Xenon flash tubes are valued for very short light pulses, which is why they were common in compact cameras before high-power LEDs became practical for many uses.
Who This DIY Project Is Best For in 2026
Ideal users: electronics hobbyists, prop builders, makers, and students with soldering and safety experience
This project makes the most sense for people who already understand basic electronics, polarity, insulation, and safe work habits around charged components. It can also appeal to prop builders and students doing supervised lab-style experiments where a brief flash effect is more useful than a general-purpose lamp.
For smart-home enthusiasts, the main attraction is usually not the tube itself but the visual effect it can create in a custom build, such as an alert strobe or a retro indicator. Even then, the design should stay simple and well-insulated.
Who should avoid it: beginners, children, and anyone without high-voltage handling knowledge
If you are new to electronics, this is not a good first project. The tube may look small and harmless, but the supporting circuit can still store enough energy to deliver a painful shock or damage components if handled incorrectly.
Children should not work with salvaged flash circuits, and casual tinkerers are usually better served by low-voltage LED modules, which are easier to power, mount, and troubleshoot.
Advanced DIY makers who want a compact flash effect and already know how to work safely with stored high voltage. It is a poor fit for beginners, family projects, and most everyday smart-home lighting jobs.
Key Specs and Selection Criteria Before You Salvage or Buy One
Tube size, mounting style, trigger voltage, capacitor rating, and power source considerations
Before salvaging a tube, check the physical size and mounting style so you know whether it can fit your enclosure or project frame. Also confirm the trigger arrangement, because some tubes are easier to reuse than others depending on how the leads and reflector are arranged.
Capacitor rating matters because the tube is only one part of the system. If the capacitor, trigger transformer, or battery source is mismatched, the flash may be weak, unreliable, or unsafe.
Condition checks: cracks, corrosion, broken leads, and signs of capacitor damage
Inspect the tube and surrounding board before reuse. Cracks, cloudy glass, corrosion on the leads, or brittle wiring are all signs that the part may be unreliable or unsafe.
Capacitor damage is just as important to watch for. Bulging, leakage, discoloration, or a burnt smell around the circuit are all reasons to stop and replace the damaged part instead of trying to force the build forward.
Stop using any flash circuit with cracked glass, corroded contacts, swollen or leaking capacitors, or overheated wiring. If a part looks damaged, treat it as unreliable until the manufacturer’s guidance or a qualified repair source says otherwise.
Value factors: salvage cost, replacement availability, and whether a modern flash module is a better option
Salvaged tubes can be very low-cost, but the value depends on whether you already have the rest of the circuit and whether replacement parts are easy to find. In many cases, a modern LED strobe or ready-made flash module is simpler, safer, and easier to integrate.
That does not make the xenon tube useless; it just means the tube is best chosen for a specific visual effect or learning goal rather than for convenience.
DIY Setup Guide: Safe Use, Wiring Basics, and Common Build Paths
Typical setup steps for a salvaged xenon tube project, from disassembly to test fit
Start by separating the flash assembly carefully and identifying the tube, capacitor, and trigger parts before doing any wiring changes. Then plan the enclosure so the tube has enough room, the leads are not strained, and the circuit board can be mounted securely.
Before removing anything, note how the tube, capacitor, and trigger leads are arranged so you can preserve the original function.
Make sure the tube and board can sit in the enclosure without touching metal surfaces or sharp edges.
Use proper insulation and keep hands away from the circuit while confirming that the flash path works as intended.
Insulation, spacing, discharge precautions, and why cable quality matters for high-voltage connections
High-voltage flash circuits need more spacing and better insulation than low-voltage hobby projects. Use intact wiring, secure solder joints, and materials that will not easily crack, melt, or expose conductors.
Cable quality matters because weak insulation or loose connections can cause intermittent firing, arcing, or unnecessary heat. For any flash circuit, the safest approach is to keep the wiring short, protected, and clearly separated from user-touch areas.
When planning a xenon-tube build, treat the circuit like a high-voltage module first and a lighting effect second. Good spacing, strain relief, and enclosure design reduce most of the avoidable problems.
Practical limits of safe use: heat buildup, repeated firing, and avoiding continuous operation
Xenon tubes are built for short bursts, not continuous lighting. Repeated firing can create heat buildup and stress the tube, the capacitor, and nearby components, especially in a compact enclosure with limited airflow.
If your project needs long-duration illumination, an LED solution is usually the better fit. Reserve the xenon tube for flashes, strobes, or brief effects where it can operate within its intended duty cycle.
Real-World Benefits and Limitations for Smart Home and Maker Projects
Benefits: intense light output, low part cost, compact size, and useful strobe effects
The biggest advantage of a xenon tube from a disposable camera is the intensity of the light in a very small package. That makes it appealing for compact prop builds, experimental indicators, and projects where a sudden flash is the whole point.
Salvage parts can also be inexpensive, which is useful for learning, prototyping, or one-off effects. In the right project, the tube offers a visual style that standard LEDs do not fully duplicate.
Limitations: poor efficiency compared with LEDs, audible clicking in some circuits, and safety complexity
The tradeoff is efficiency and complexity. Compared with LEDs, xenon flash systems are harder to power, harder to insulate, and more complicated to troubleshoot because they involve charging, triggering, and discharge behavior.
Some circuits also produce an audible click or snap during operation, which may be fine in a prop but not ideal in a quiet room or home office. For many smart-home projects, that sound is a sign that another lighting method may be more practical.
- Very bright burst from a compact part
- Low salvage cost if parts are already available
- Useful for strobes, props, and retro effects
- High-voltage safety requirements
- Less efficient than LED alternatives
- Not ideal for continuous or beginner-friendly projects
Where it fits best: experimental lighting, camera props, alert indicators, and retro-style effects
Good use cases include experimental lighting demos, prop flashes, warning effects, and retro-inspired projects where the flash itself is part of the design. It can also work in a niche smart-home build if the goal is a short visual alert rather than ambient lighting.
For most everyday home automation tasks, though, modern LED modules are easier to integrate with controllers, sensors, and low-voltage power supplies.
Maintenance, Storage, and Troubleshooting
How to inspect for wear, store the tube safely, and prevent moisture or static damage
Store salvaged tubes in a dry, padded container where the glass and leads will not get bent or scratched. Keep them away from moisture, dust, and loose metal parts that could damage the circuit or create accidental contact points.
Before reuse, inspect the tube for physical wear and check the circuit for corrosion or loose solder joints. A clean, dry storage setup helps preserve reliability, especially for parts that may sit unused for long periods.
Common mistakes: overdriving the tube, using the wrong capacitor, weak trigger pulses, and poor grounding
One of the most common errors is overdriving the tube with an incompatible circuit. Another is using a capacitor that does not match the intended design, which can lead to weak flashes or stressed components.
Weak trigger pulses and poor grounding can also make the tube seem “bad” when the real issue is the surrounding circuit. If the flash is inconsistent, the safest approach is to verify the wiring, the trigger path, and the component ratings before assuming the tube itself has failed.
Replacement guidance: when to reuse, when to replace, and how to know the tube is no longer reliable
Reuse the tube only if the glass is intact, the leads are healthy, and the circuit still behaves consistently. Replace the part if you see cracks, persistent misfires, visible arcing, or signs that the tube no longer fires at normal trigger voltage.
If you are unsure whether the tube is still reliable, it is usually better to replace the entire flash module or switch to a safer low-voltage lighting approach. That is especially true when the project is meant for a home environment rather than a lab bench.
Final Recommendation: Is a Xenon Tube from a Disposable Camera Worth Using in 2026?
Transparent verdict on cost, safety, performance, and whether modern alternatives are the smarter choice
A xenon tube from a disposable camera is still worth considering if your goal is a compact flash effect and you already have the skills to handle high-voltage electronics safely. For most people, though, the safety burden and circuit complexity make modern LED flash or strobe modules the smarter option.
Best-fit recommendation by user type: beginner, hobbyist, or advanced DIY builder
Beginners should skip it and choose low-voltage lighting instead. Hobbyists with solid electronics experience can use it for niche effects, while advanced DIY builders are the best fit if they want to salvage parts and understand the limitations of the original flash design.
Use a disposable-camera xenon tube only when the flash effect matters more than convenience and you can follow proper high-voltage safety practices. For most smart-home and everyday maker projects, a modern LED-based solution is easier, safer, and more practical.
Frequently Asked Questions
It is a small flash lamp that can be reused for short, bright light effects in DIY projects. It is best suited to experienced electronics hobbyists who understand high-voltage safety.
No, it is not a good beginner project because the flash circuit can store dangerous high voltage. Beginners are usually better off with low-voltage LED modules.
A typical setup includes the tube, a capacitor, a trigger circuit, a reflector, and a battery-powered charging circuit. The exact parts vary by camera model and project design.
Check for cracks, corrosion, broken leads, and any signs of capacitor damage or overheating. If the tube or circuit looks damaged, it should be replaced instead of reused.
No, xenon flash tubes are meant for brief bursts, not continuous illumination. Repeated or constant firing can create heat buildup and stress the circuit.
Choose a xenon tube only if you specifically want a flash effect and have the right safety knowledge. For most smart-home and maker projects, an LED module is simpler, safer, and easier to integrate.