Backup Camera Quit Working Fixes You Need to Try Now
If your backup camera quit working, start with the simplest checks first: verify the display is on, make sure the vehicle is actually in reverse, and inspect the lens for dirt or damage. In many cases, the problem is not a dead camera at all but a fuse, loose connection, software setting, or signal issue that can be found quickly with a safe, methodical check.
- Fastest checks first: Verify reverse mode, display input, lens cleanliness, and fuse condition.
- Most common causes: Loose connectors, moisture intrusion, software glitches, and damaged wiring.
- Replace only when needed: Repeated fuse failure, cracked housing, or water damage often means the camera or cable.
- Compatibility matters: Factory, aftermarket, wired, and wireless systems use different parts and connection methods.
- Safety first: Do not rely on a faulty camera alone when backing up in tight spaces.
Backup Camera Quit Working? Start With the Fastest Fixes First
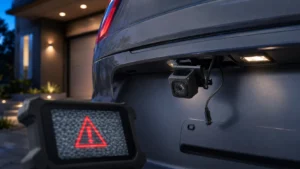
Before you replace anything, confirm that the system is being asked to turn on. A surprising number of “dead camera” complaints come from the reverse trigger not activating, the infotainment screen being set to the wrong input, or the lens simply being covered by grime, ice, or a bumper-mounted obstruction.
Check the display, reverse gear trigger, and camera lens before assuming the camera is dead
Start by shifting into reverse with the engine running and the parking brake set. If the screen stays black, look for menu settings that may disable the camera view, and make sure the display brightness is not turned all the way down. On some systems, a reboot of the head unit or a full power cycle of the vehicle can clear a temporary glitch.
Why this issue happens in smart home-enabled vehicle accessories and aftermarket systems
Backup cameras are now common in factory infotainment systems, aftermarket head units, wireless kits, and app-connected displays. That gives you more features, but also more possible failure points: a camera, power feed, video signal, wireless transmitter, app pairing, firmware, or display setting may be involved. The more layers there are, the more important it is to isolate which part stopped responding.
How a Backup Camera System Works in 2026
Even modern systems still rely on a few basic parts working together. Understanding those parts makes troubleshooting faster and helps you avoid replacing a camera when the real problem is elsewhere.
Camera, wiring harness, head unit, fuse, and power source basics
Most systems include a camera module, a power source, a fuse, a wiring harness or wireless transmitter, and a display or head unit. When the vehicle shifts into reverse, a trigger signal tells the system to show the rear view. If any part of that chain fails, the camera image may disappear, flicker, or never appear at all.
Wireless vs. wired backup camera setups: what changes when one stops working
Wired systems usually fail from cable damage, loose connectors, corrosion, or power issues. Wireless systems add possible signal interference, pairing problems, and transmitter or receiver faults. Wireless kits can be easier to install, but they often depend more heavily on clean power and stable signal paths, especially in vehicles with long body panels or heavy electrical noise.
Common failure points: moisture, loose connectors, software glitches, and blown fuses
Moisture intrusion is one of the most common causes of camera problems, especially if the camera is mounted outside the vehicle. Loose connectors can interrupt power or video, while a blown fuse can shut the system down entirely. Software glitches are also common in infotainment systems and app-based monitors, especially after updates or battery disconnects.
What to Inspect When the Backup Camera Quit Working
The safest troubleshooting path is to check power, connections, software, and hardware in that order. That approach helps you avoid unnecessary part swaps and makes it easier to identify whether the problem is electrical, digital, or physical.
Power and fuse checks, including safe inspection steps and replacement guidance
Consult the vehicle manual or the camera kit documentation to find the correct fuse and power source before removing anything. If a fuse is blown, replace it only with the same type and rating specified by the manufacturer. If the replacement blows again, stop there and have the circuit inspected, because repeated fuse failure usually points to a short or wiring fault.
Connection quality: cable routing, connector corrosion, and damaged wiring
Inspect the cable path from the camera to the display or transmitter. Look for crushed sections, pinched clips, loose plugs, bent pins, and corrosion at the connectors. If the camera is mounted near the rear hatch, tailgate, or bumper, repeated opening and closing can stress the harness over time.
Display and software issues: settings, firmware, app pairing, and reboot steps
If the camera hardware appears intact, check the display source settings, reverse camera input, and any app permissions if the system uses a phone or tablet. Reboot the head unit, restart the app, and, if the manufacturer recommends it, check for firmware updates. Model-specific menus vary, so the owner’s manual or official support page is the best reference for reset steps.
Camera hardware problems: cracked housing, lens obstruction, heat damage, and water intrusion
A cracked housing or clouded lens can make the image unreadable even when the camera still powers on. Heat exposure can also age plastic housings, seals, and internal electronics, especially in vehicles parked outdoors. If you see fogging inside the lens, visible water, or a damaged mount, the camera module may need replacement rather than another reset.
Who This Fix Guide Fits Best
This guide is aimed at drivers who want a practical way to narrow down the problem before buying parts or booking service. It applies to many common setups, but the exact fix depends on whether the system is factory-installed, aftermarket, wired, or wireless.
Drivers with factory systems, aftermarket head units, or wireless camera kits
Factory systems often route through the vehicle’s infotainment software, while aftermarket head units may use separate adapters or harnesses. Wireless kits add transmitter and receiver components that can fail independently of the camera itself. The troubleshooting order is similar, but the parts you inspect first may differ.
Best for DIY troubleshooters versus when a professional install is the safer choice
DIY troubleshooting makes sense for simple checks like lens cleaning, fuse inspection, rebooting the display, and reseating accessible connectors. If the issue involves hidden wiring, repeated electrical faults, water damage, or disassembly near airbags or trim panels, a professional installer or automotive technician is the safer choice.
Compatibility considerations for smart displays, infotainment systems, and app-based monitors
Smart displays and app-based monitors can be convenient, but they depend on compatibility with the vehicle, operating system, and app version. Before replacing a monitor or camera, confirm that the new part supports your vehicle make, model, year, connector type, and any required adapter or pairing method.
Key Decision Criteria Before Replacing Any Part
If the camera quit working and basic checks do not solve it, replacement may be the next step. The right choice depends on fit, reliability, image quality, and whether you want a quick repair or a longer-term upgrade.
Compatibility with vehicle make, model, year, and connection type
Compatibility is the first filter. A camera or monitor may look similar but still use a different connector, trigger wire, resolution format, or mounting style. Check the official compatibility list, the manual, or the seller’s fitment guide before ordering anything.
Wired vs. wireless reliability, signal range, and image quality trade-offs
Wired systems are generally the better choice when you want stable video and fewer interference issues. Wireless systems can simplify installation, but image quality and range may vary depending on vehicle size, mounting location, and surrounding electronic noise. If the backup view cuts out only in certain places, wireless signal instability may be the real issue.
Weather resistance, night vision, viewing angle, and mounting style
Outdoor-mounted cameras need a housing and seal that can handle rain, road spray, dust, and temperature swings. Night vision performance, viewing angle, and bracket style all affect how useful the image is in daily driving. Since these features vary by model, confirm the manufacturer’s claims before buying.
Warranty details to verify before buying a replacement camera or monitor
Warranty coverage can matter as much as the purchase price, especially for electronics exposed to vibration and weather. Check what is covered, how long coverage lasts, and whether installation by a professional is required for the warranty to remain valid. Also review return policy details in case the part does not match your vehicle.
- Check compatibility, model number, connector type, and mounting style
- Confirm app requirements, firmware support, and return policy
- Verify weather resistance, warranty terms, and any required adapter
Common Mistakes That Cause Backup Camera Failure
Many camera problems are made worse by small oversights. Fixing those first can save time and prevent you from replacing parts that were still usable.
Ignoring dirty lenses, loose grounds, and damaged cable clips
A dirty lens can make the image look blurry, dark, or completely unusable. Loose grounds and broken cable clips can also create intermittent failures that appear random. If the system works only when the vehicle is parked a certain way or after the hatch is closed firmly, a physical connection issue is likely.
Overlooking software resets, app permissions, or display input settings
Modern vehicle displays and app-connected monitors often need the correct input source, camera mode, or permission setting to show video. After updates or phone changes, permissions may need to be reapproved. A simple reset or re-pairing step can solve the problem without any hardware replacement.
Using low-quality replacement parts that fail from vibration or heat
Low-cost replacement cameras and adapters may work at first but fail early if their seals, connectors, or mounting hardware are weak. Vibration, heat, and moisture are hard on rear-mounted electronics, so build quality matters. When possible, choose parts that clearly match the vehicle and are designed for the same installation environment.
Safe Use, Maintenance, and Storage Tips
Once the system is working again, a little maintenance can help keep it that way. Backup cameras live in a harsh spot, so regular inspection matters more than many owners expect.
How to clean the lens and protect connectors from moisture and corrosion
Use a soft, clean cloth to wipe the lens and remove road film, salt, or mud. Avoid harsh solvents that could cloud plastic or damage seals. If connectors are exposed, make sure they are seated firmly and protected from direct water exposure according to the manufacturer’s instructions.
Inspection intervals for wiring, mounts, and dash displays
Check the camera mount, wiring path, and display behavior during routine vehicle maintenance or whenever you notice image changes. Look for loose trim, cracked insulation, or a display that takes longer than usual to activate. Early inspection is usually easier than waiting for a complete failure.
When to replace a camera, cable, or fuse instead of repeating temporary fixes
If the same fuse keeps blowing, the cable is visibly damaged, or the camera housing shows water intrusion, replacement is usually more practical than repeated temporary fixes. Temporary workarounds may get the system on briefly, but they do not solve the underlying cause. If the fault returns after cleaning or reseating connectors, move from troubleshooting to part replacement or professional diagnosis.
Limits of safe use: when visibility is compromised and the system should not be relied on alone
A backup camera is a helpful aid, not a substitute for checking mirrors and looking around the vehicle. If the image is distorted, delayed, dark, or unavailable, do not rely on it for backing up in tight spaces. Use direct observation and other vehicle safety checks until the system is confirmed working again.
Final Recommendation: Fix, Replace, or Upgrade?
The best next step depends on the symptom pattern and the age of the system. If the camera fails only occasionally, start with cleaning, fuse checks, connector inspection, and display resets; if it is cracked, water-damaged, or repeatedly losing power, replacement is usually the better path.
Best next step based on symptom pattern, repair cost, and system age
Choose troubleshooting first when the problem seems intermittent, after weather changes, or after a software update. Choose replacement sooner when the housing is damaged, the wiring is brittle, or the same electrical fault keeps returning. Older systems may also justify an upgrade if parts are hard to find or the image quality no longer meets your needs.
Value comparison between repair parts, full replacement kits, and professional service
Small repairs like cleaning, reseating connectors, or replacing a fuse are the lowest-cost options, but they only help when the failure is minor. Full replacement kits can make sense when multiple parts are aging together or when the original system is no longer dependable. Professional service is often the best value when the fault is hidden in the vehicle wiring, trim, or infotainment integration.
Transparent verdict: when troubleshooting is enough and when a new system is the smarter long-term choice
If your backup camera quit working because of a simple setting, dirty lens, loose connector, or blown fuse, troubleshooting is usually enough. If the system has repeated failures, water damage, or compatibility problems, a new camera or upgraded kit is often the smarter long-term solution because it restores reliability instead of just delaying the next breakdown.
Frequently Asked Questions
Common causes include a blown fuse, loose connector, dirty lens, software glitch, or water intrusion. Start with the simplest checks before replacing the camera.
Yes, a blown fuse can shut down the camera system or the display path. Replace it only with the same type and rating specified by the manufacturer.
Wireless systems can lose signal because of interference, weak power, poor mounting, or transmitter and receiver problems. Check pairing, power, and placement first.
Yes, dirt, salt, ice, or road film can make the image look much worse than it is. Clean the lens gently with a soft cloth and check for fogging or cracks.
Replacement makes more sense when the housing is cracked, water has entered the unit, wiring is damaged, or the same fault keeps returning. If the issue is only a setting or fuse, troubleshooting is usually enough.
Check the vehicle make, model, year, connector type, mounting style, and any required adapter. Always confirm fitment with the official manual or compatibility list before buying.





One Comment