How to Capture Big Bucks on Trail Camera This Season
To capture big bucks on trail camera, focus on smart placement, low disturbance, and settings that match the terrain. A good camera helps, but the location and your checking habits usually matter more.
If you want big bucks on trail camera, the fastest path is usually not a pricier camera. Better placement, smarter timing, and consistent settings do more to reveal mature buck movement than chasing the highest megapixel count.
- Placement wins: Put cameras on natural funnels, trail crossings, scrapes, and food-to-bedding routes.
- Settings matter: Match resolution, sensitivity, burst, and delay to the habitat and battery plan.
- Cellular is convenience: It reduces visits, but signal and subscription terms can limit value.
- Low pressure helps: Fewer checks, better wind awareness, and cleaner access routes improve results.
How to Capture Big Bucks on Trail Camera This Season: What Actually Works

Answer first: the fastest path to better buck photos is smart placement, disciplined timing, and reliable camera settings—not just a more expensive camera.
Big bucks are most likely to show up on camera when you set the unit where deer already want to travel, keep human pressure low, and avoid settings that miss fast movement. A camera can only capture what passes in front of it, so the real advantage comes from combining deer behavior with reliable gear.
How Trail Cameras Work for Buck Scouting in 2026
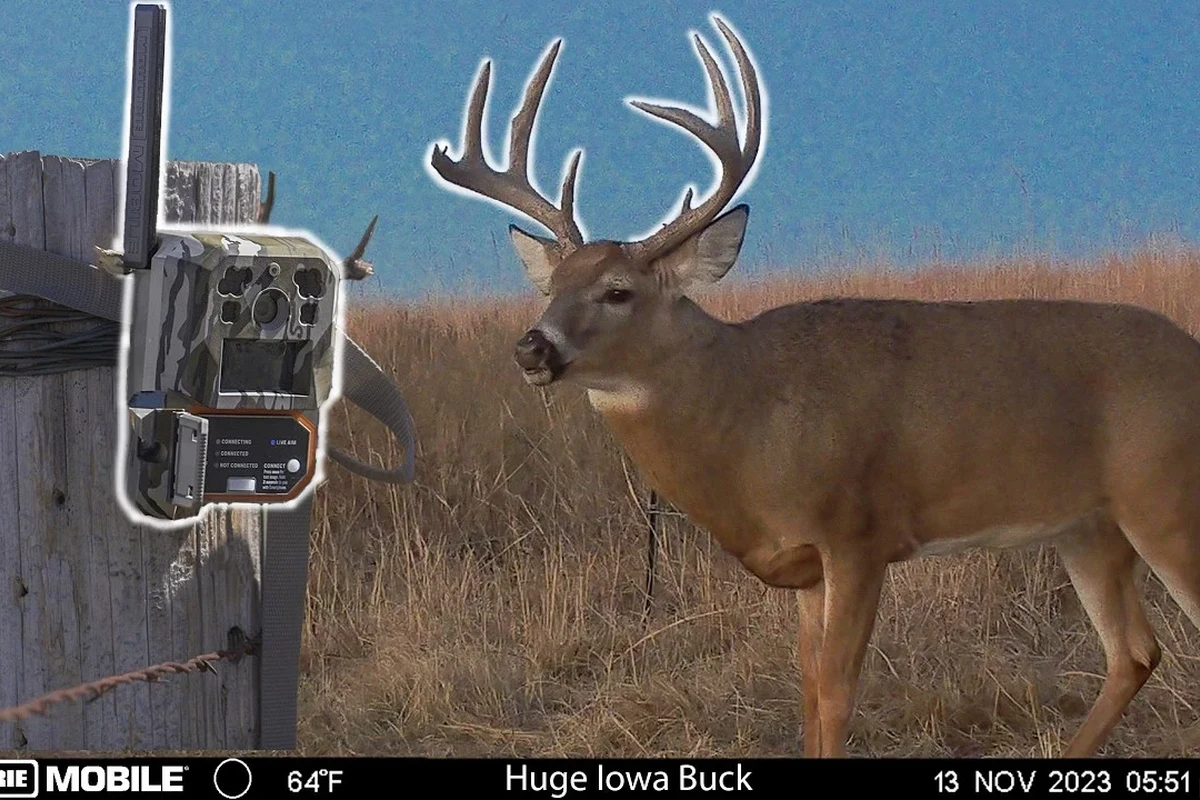
PIR motion detection, trigger speed, recovery time, flash type, and image resolution explained
Most trail cameras use a passive infrared, or PIR, sensor to detect heat and movement. When a deer crosses the detection zone, the camera triggers, snaps a photo or starts video, and then needs recovery time before it can capture the next event.
Trigger speed matters because a slow camera may catch only the rear end of a buck already leaving the frame. Recovery time matters for the same reason: if a deer or small group moves through quickly, a camera that resets slowly can miss the best shot or the next deer behind it.
Flash type also affects results. No-glow or low-glow infrared options are often preferred for stealth, while white flash can produce clearer color images at night but may be more noticeable to deer and people. Image resolution helps with detail, but it does not fix poor placement or slow performance.
Why deer behavior, wind direction, and camera angle matter as much as the device itself
Mature bucks often move with caution, especially in pressured areas. They use cover edges, travel with favorable wind, and may shift routes based on food, bedding, hunting pressure, and weather changes.
That means the same camera can produce great buck photos in one spot and almost nothing in another. Wind direction matters because deer often avoid locations that let them catch human scent too easily, and camera angle matters because a poor angle can cut off the head, antlers, or full body of the animal.
Many missed buck photos are not caused by bad cameras at all—they come from poor placement, especially when the camera is aimed straight at the trail instead of across it.
Best Trail Camera Features for Big Buck Success
Key specifications to compare: detection range, battery life, photo/video quality, night performance, and storage support
For buck scouting, detection range should match the terrain you are covering. A long range sounds impressive, but a camera that detects too far away in thick cover can produce more false triggers and less useful framing.
Battery life is another practical priority, especially if you cannot check the camera often. Photo and video quality matter for identifying antler shape, body mass, and direction of travel, while night performance determines whether you get usable images after dark.
Storage support is easy to overlook. Confirm the memory card type and capacity supported by the exact model, since limits vary by brand, firmware, and recording mode. If the manufacturer lists specific card requirements, follow those rather than assuming a larger card will work.
Cellular vs. non-cellular models: convenience, cost, signal dependence, and subscription trade-offs
Cellular trail cameras can reduce how often you need to enter a property, which is a real advantage for mature buck scouting. They can send images remotely, but only if the camera has usable signal and the service plan matches your needs.
Non-cellular cameras usually cost less up front and avoid monthly fees, but they require in-person card checks. That can be fine for low-pressure private land or seasonal scouting, though each visit adds scent and disturbance.
If you are deciding between the two, think about access, signal strength, and how often you can safely check the camera. For readers comparing broader device behavior and battery trade-offs, our guide on whether low power mode changes charging speed is a useful example of how settings can affect real-world performance without changing the hardware itself.
Weather resistance, mounting options, and theft deterrence for long-term field use
Trail cameras spend a lot of time in rain, heat, cold, and humidity, so weather resistance matters. Look for a housing designed for outdoor use, but still confirm the manufacturer’s guidance on temperature range, water exposure, and storage conditions.
Mounting options should be simple and secure. A good strap, bracket, or lock box can help keep the camera stable, while also making it harder for animals, wind, or people to move it.
Do not mount a camera in a way that damages trees, violates property rules, or creates a fall risk when you install or remove it. Follow the manufacturer’s mounting instructions and use permission-based placement only.
Where to Place Your Trail Camera for High-Value Buck Traffic
Food sources, pinch points, scrapes, bedding edges, trails, and water access
High-value buck traffic is most likely where deer already concentrate movement. Good options include food sources, field edges, pinch points, scrape lines, bedding edges, trails between cover and feeding areas, and water access points during dry periods.
The best location depends on the season and the property. A camera near a scrape can be useful in pre-rut, while a camera on a travel corridor between bedding and food may produce more consistent results in early season and late season.
- Place cameras where deer naturally funnel, not where you hope they will appear.
- Aim for crossing shots across a trail instead of directly down it.
- Use multiple cameras only if you can check them without creating extra pressure.
Height, angle, and direction: reducing false triggers and improving full-body captures
Camera height is often best when it keeps the lens above most ground clutter while still capturing the animal’s body. Too low and you may get vegetation, small animals, or a close-up of only the chest; too high and you may miss antler detail or body size clues.
A slight downward angle can help with coverage, but avoid pointing the camera at moving branches, tall grass, or direct sunrise and sunset glare. Direction matters too: if possible, orient the camera to reduce harsh light and avoid obvious scent trails from your access route.
Seasonal placement strategy for early season, pre-rut, rut, and late season
Early season often rewards cameras on food and predictable evening routes. Pre-rut is a strong time to watch scrapes, travel corridors, and staging areas near bedding cover. During the rut, bucks may break from routine and show up in more places, so cameras on funnels and transition cover can be valuable.
Late season usually pushes deer back toward reliable food and low-stress cover. In that period, a camera set where deer can feed safely without much disturbance is often more productive than a flashy location that requires frequent human visits.
Setup Guide: Camera Settings That Improve Buck Photos
Photo vs. video mode, burst count, delay settings, and time-lapse use cases
Photo mode is usually the simplest choice if you want quick identification and longer battery life. Video mode can show travel direction and body language better, but it may use more power and storage, especially if the camera records long clips.
Burst mode can be helpful when a buck moves quickly or when multiple deer cross the frame. Delay settings should balance repeat captures with battery life; too short can fill the card with similar images, while too long can miss a second deer following the first.
Time-lapse is useful for scouting large openings, food plots, or field edges where you want a broader movement picture. It is less useful in tight cover unless the camera is positioned carefully and the battery plan can support it.
Recommended resolution, sensitivity, and night mode settings for different habitats
Higher resolution can help with cropping and antler detail, but it may also create larger files and faster card use. In many scouting situations, a balanced resolution is more practical than the maximum setting, especially if the camera supports reliable mid-range options.
Sensitivity should match the habitat. Dense cover, brush, and windy areas may need a more conservative setting to avoid excessive triggers, while open trails may benefit from a more responsive one. Night mode should be chosen based on the manufacturer’s options and your tolerance for visible flash versus image clarity.
Menu names, sensitivity levels, and night modes vary by model and firmware. Check the official manual for the exact camera before changing advanced settings.
Memory card format, battery choice, and check-in schedule for dependable operation
Use the memory card format recommended by the manufacturer, and format the card in the camera when the manual says to do so. That helps reduce file errors and keeps the card aligned with the camera’s file system.
Battery choice depends on the model and climate. Some cameras work best with standard alkaline batteries, while others perform better with lithium or rechargeable packs approved by the manufacturer. Cold weather can shorten runtime, so verify what the camera supports before relying on it deep into the season.
Check-in schedule matters because every visit can affect deer behavior. If the camera is on private land and easy to reach, you may check it more often, but in pressured areas a longer interval usually protects the value of the data.
- Confirm the exact model’s card format, battery type, and mounting method.
- Check app requirements, firmware update support, and warranty terms if you choose a cellular unit.
- Verify weather rating, operating temperature guidance, and any signal or subscription limits.
Who This Approach Fits and When It Falls Short
Best for whitetail hunters, property managers, and scouting-focused landowners
This approach fits whitetail hunters who want better pattern data, property managers who need to monitor deer movement, and landowners who use cameras to understand seasonal use of their ground. It is especially useful when the goal is to identify mature buck travel routes without adding too much pressure.
It also works well for people who enjoy scouting as part of a broader land-management plan. A trail camera can help show how deer respond to food plots, habitat changes, and access points over time.
Limitations in heavily pressured areas, dense cover, poor cell service, and high-traffic public land
Trail cameras are less reliable where deer are heavily pressured, because mature bucks may avoid obvious setups. Dense cover can also reduce image quality and make trigger zones harder to manage.
Cellular models lose much of their advantage in poor signal areas, and public land brings extra concerns about theft, disturbance, and legal restrictions. In those situations, a simpler camera or a more hidden placement strategy may be the better choice.
For readers who manage multiple devices and want to avoid unnecessary service issues, our article on wireless charger compatibility is a good reminder that convenience still depends on the device and environment, not just the feature list.
Common mistakes: overchecking cameras, bad scent control, placing units too low, and ignoring wind
One of the biggest mistakes is checking cameras too often. Each visit can leave scent, disturb bedding areas, and change how bucks use the property.
Another common problem is placing the camera too low or too close to the trail, which can create blurry close-ups and missed antler detail. Ignoring wind is equally costly, because even a great location can go quiet if deer consistently catch human odor there.
Safety, Care, and Long-Term Maintenance for Trail Cameras
Weatherproofing, strap inspection, lens cleaning, battery replacement, and SD card care
Trail cameras need regular care to stay dependable. Inspect straps, brackets, and lock boxes for wear, and clean the lens gently with a soft, dry microfiber cloth before assuming a poor image is caused by settings.
Replace batteries before they fail completely if the camera is in a remote spot. Handle SD cards carefully, and avoid removing or inserting them with wet hands or in dirty conditions when possible.
Stop using damaged electronics, swollen batteries, frayed cables, overheating chargers, or unstable appliances and follow the manufacturer’s guidance.
Safe use in the field: secure mounting, property permissions, and minimizing human scent contamination
Secure mounting is not just about theft prevention; it also keeps the camera from shifting in wind or falling from a tree. Always use property permission and follow local rules before placing a camera on private or shared land.
To reduce human scent contamination, keep visits short, avoid unnecessary handling, and plan your route so you do not walk through the same area deer use heavily. That matters even more when you are trying to document mature bucks that already avoid pressure.
Storage guidance for off-season: removing batteries, protecting contacts, and checking for corrosion
When the season ends, remove batteries before storing the camera. That helps reduce the risk of corrosion, contact damage, or battery leakage during months of inactivity.
Store the camera in a dry place, keep the lens covered if the manufacturer provides a cap or case, and inspect the battery compartment before the next season. If you see corrosion or residue, follow the manufacturer’s cleaning guidance rather than forcing parts apart.
Value, Alternatives, and Final Recommendation for 2026
When a budget camera is enough and when premium or cellular models are worth the money
A budget camera is often enough if you scout private land, check cards in person, and mainly need basic buck movement data. A premium or cellular model becomes more attractive when you want faster alerts, less in-person disturbance, stronger night performance, or better reliability in harsh conditions.
Value should be judged by fit, not by feature count alone. A simple camera with dependable detection and good placement can outperform a more expensive unit that is hard to power, hard to mount, or too visible for the property.
Evidence limits: what trail camera data can show, and what it cannot prove about mature buck movement
Trail cameras can show where a buck passed, when it passed, and sometimes how often it used a route. They can also help you identify travel windows, preferred edges, and seasonal shifts.
What they cannot prove is the full story of deer behavior. A camera only records a small slice of time and space, so it may miss a buck that uses a nearby route at a different hour, on a different wind, or after a pressure change.
Transparent verdict: the best strategy is combining the right camera with disciplined scouting habits
The best approach for capturing big bucks on trail camera is to choose a model that fits your property, then use disciplined placement and low-impact checking habits. If you combine the right settings with the right location, you will usually get better results than by upgrading hardware alone.
For most readers, the smartest move is to start with one dependable camera, place it where deer naturally funnel, and adjust only after you have enough data to see a pattern. That keeps the system practical, affordable, and more likely to reveal the mature deer you are trying to track.
If your goal is better photos of mature deer, focus first on placement, wind, and camera settings, then choose the camera type that matches your access and checking style. Premium and cellular models can help, but they are most valuable when they support a low-pressure scouting plan rather than replace it.
Frequently Asked Questions
Place it where deer naturally funnel, such as pinch points, trail crossings, bedding edges, scrapes, or food-source routes. The best spot depends on the season and how much pressure the area gets.
Photo mode is usually easier on battery life and storage, while video can show direction and behavior better. Choose the mode that matches how often you can check the camera and how much detail you need.
A moderate height that avoids ground clutter and still captures the deer’s body is usually best. Exact placement varies by terrain, camera angle, and the trail you are watching.
They can be better if you want fewer site visits and remote image access, but only when signal and subscription terms work for your area. Non-cellular cameras still make sense for low-cost, low-pressure scouting.
Use the manufacturer’s recommended card format, choose a sensible resolution, and match sensitivity to the habitat. Burst and delay settings should be adjusted to avoid missed frames and unnecessary battery drain.
Check it as infrequently as your scouting plan allows, especially in pressured areas. Fewer visits usually mean less scent, less disturbance, and better chances of keeping mature bucks on a natural pattern.