USB-C Hub Getting Hot? 7 Checks Before You Replace It
If your USB-C hub is getting hot, first check whether it is simply warm during normal use or showing a fault such as a burning smell, visible damage, or repeated shutdowns. For those warning signs, stop using the hub and contact its manufacturer. If the hub is working normally and has no warning signs, compare its placement, attached devices, and charging setup one change at a time before buying a replacement.
A compact hub can handle a monitor, storage, network traffic, and laptop charging on the same desk. Touching its enclosure tells you that heat is reaching the outside, but gives you limited information about what is happening inside. The useful question is whether the exact model is behaving as documented under your particular workload.
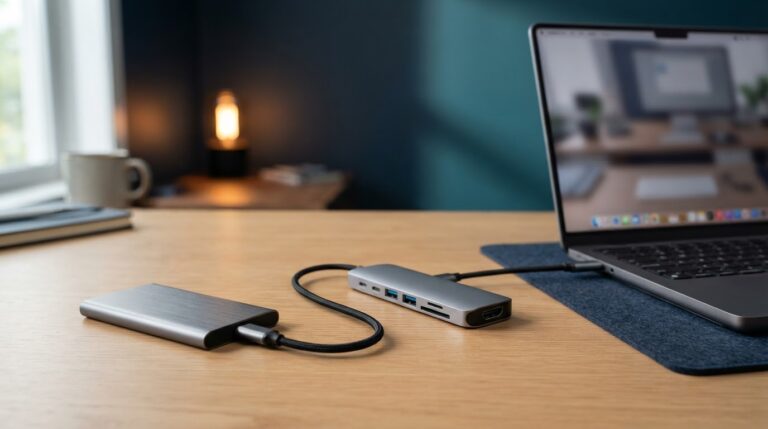
This guide is a research-based troubleshooting workflow. The images illustrate desk setups and are reused from our USB-C accessory guides. We have not measured the operating temperature of your hub or carried out laboratory thermal testing for this article.
Start with the symptoms. Check warning signs, then compare placement and the charging setup before choosing another hub.
| What you notice | Next step |
|---|---|
| Warm housing with normal operation | Check the model documentation and desk placement. |
| Burning smell, visible damage, or repeated shutdowns | Stop using the hub and contact its manufacturer. |
| The hub feels warmer with charging connected | Compare direct laptop charging if the setup supports it. |
| An SSD disconnects during transfers | Compare the SSD directly and record the shared hub workload. |
| A monitor fails in one display mode | Check the exact supported resolution and refresh combination. |
Why a USB-C hub can feel warm
Plugable explains that its hubs can become warm as they handle power and data, and that an aluminum housing can carry heat to the outside. Its guidance calls out passthrough charging and connected peripherals as factors. That explanation applies to the products described in its hub temperature support article.
Read the manual for your own model before interpreting a number from another product. A housing temperature, room temperature, and internal component limit describe different measurements. An internal chip rating cannot establish whether a surface is appropriate to touch. A figure quoted for one tested hub also cannot become a pass-or-fail limit for every hub.
Keep the problem specific. If a connector has become unusually hot, tell support exactly which connector. If the whole hub is warm while the display and accessories remain stable, record that separately. If the hub repeatedly resets after warming up, record the delay and which functions disappear together. These observations help support choose a relevant test.
1. Check warning signs before running a comparison
Plugable advises disconnecting a hub and contacting support for a burning smell, visible damage, or repeated shutdowns. If you see these signs, end the troubleshooting session. A second workload test is unnecessary. Let the manufacturer advise you about replacement or warranty service. Avoid reconnecting visibly damaged equipment just to collect a temperature reading.
Before changing a working storage connection, finish transfers and safely eject attached drives using the operating system. If the setup has already failed or shows an urgent warning sign, prioritize stopping use. Keep a note of any unfinished transfer so you can check the files later. Save the hub model and a photograph of its label for the support request.
If there is no warning sign, write a short description of what prompted your concern. “The housing is warm after a video call” is different from “the monitor and SSD disappear after ten minutes.” Use that description as the baseline for the following checks. You need a repeatable observation to decide whether any change helped.
2. Move the hub onto an open desk
For a normal-working hub, start with a simple placement comparison. Set it on a clear, firm surface in the orientation the manufacturer allows. Keep it out of a carrying pouch and leave space around it. Move it away from the laptop’s exhaust and direct sunlight. Follow any clearance or mounting instructions in the hub manual.
Keep the connected devices and workload the same for this first comparison. If you move the hub and simultaneously remove the monitor and charger, you will not know which change mattered. Note the room conditions and how long the setup has been running. Compare behavior after a similar period rather than judging a cold startup against an hour of activity.
Avoid fastening a hub underneath a laptop or stacking other warm electronics on it while investigating the issue. If an under-desk installation is necessary, check that the mounting arrangement complies with the vendor’s instructions. Record whether the same hardware behaves differently in the open. That is more informative than adding several cooling accessories immediately.

3. Separate passthrough charging from the data connection
If your laptop supports a separate charging connection, compare the hub with the laptop powered by its normal adapter directly. Remove the charging input from the hub and keep a single light peripheral attached for the first run. Use the hub manufacturer’s instructions for any required external supply. Some docks need their supply for normal operation.
This comparison changes where laptop charging travels. Write down whether the hub still feels similarly warm and whether any reset remains reproducible. The result can help you describe the trigger, although a cooler enclosure alone does not prove that the previous setup was defective. Keep the laptop battery state and running applications reasonably similar across comparisons.
Check the hub’s advertised host charging output as well as its input rating. If your laptop charges slowly, use our USB-C hub charging guide to review that separate symptom. Avoid assuming that a larger wall charger will resolve a hub temperature concern. Its output must also be suitable for the intended charging configuration.
4. Add peripherals back one at a time
Start with the smallest setup your hub manual supports. Add the keyboard, monitor, Ethernet connection, and storage individually, keeping a note of the first addition that changes the behavior. Then distinguish a peripheral sitting idle from that same peripheral doing work. An SSD connected to a port and an SSD running a long transfer are different test conditions.
If an issue appears during file transfers, stop the transfer safely and compare the SSD on a direct computer port where possible. Use a copy of nonessential files for a repeat test. Check that the destination has enough free space, and record whether the operating system reports a disconnect. Our external SSD disconnect guide covers that path in more detail.
If every accessory vanishes at once, record the shared failure and the host cable involved. If only the webcam freezes, check whether it remains listed in the system and compare a direct connection using our webcam hub troubleshooting guide. Assigning every nearby symptom to heat can hide a separate cable, application, or power problem.
5. Compare the exact display mode and host cable
Write down the monitor resolution, refresh rate, and number of displays. If a display problem appears only with a particular mode, check the dock’s supported display combinations and the computer’s own limits. Repeat with one screen using a mode the manual explicitly supports. Keep the same cable for that round so the comparison remains interpretable.
A stable picture at a lower mode gives you a useful observation for support. It does not establish the temperature of an internal component. If the problem is a visible picture limited to 30 Hz, follow our 4K 30 Hz dock checklist. If the display cuts out, note whether USB devices disappear at the same moment.
For a detachable host cable, compare the supplied cable with a known-good replacement that meets the hub’s data and video requirements. A cable advertised for charging may not support the required data connection. Inspect the cable description and the dock manual together. With a fixed-cable hub, document the entire hub model because that cable cannot be swapped independently.
6. Record temperatures only with the measurement context
If you have a suitable thermometer and choose to record readings, include the room conditions, measurement location, instrument type, workload, and elapsed time. Follow the instrument instructions for that surface. A reading from one spot should not be presented as the temperature of every part of the hub. For most support requests, exact model numbers and a reproducible fault are the better starting point.
Be careful with units and wording. A temperature rise describes a difference from a baseline, while an absolute surface temperature describes the surface at that moment. Anker’s hub warmth troubleshooting guidance uses temperature rise and recommends comparison with other compatible equipment when investigating a problem. Preserve that distinction when reporting your own measurements.
Ask the vendor which operating conditions and limits apply to your model. Include the charger, laptop, connected devices, and any measurements you already have. Describe the symptom in ordinary language before adding numbers. “All USB devices reset during an SSD transfer” gives support a concrete behavior to investigate alongside the temperature concern.
7. Decide whether to keep, reconfigure, or replace the hub
If the hub functions reliably, has no warning signs, and behaves as its manufacturer describes, the most useful change may be desk placement or a simpler cable layout. Keep the configuration that works for your daily tasks. Recheck it during the workload you actually need, such as a long call or a normal editing session, before treating a short idle test as conclusive.
Contact the manufacturer if the same fault follows the hub across supported configurations, particularly with its supplied cable and power arrangement. Send the small comparison log rather than a list of unrelated settings you changed. Include the seller, purchase date, and warranty details if you have them. A supported replacement may make more sense than buying another accessory to mask the symptom.
For a replacement, write a short requirement list first. Include the host connection, supported monitor combinations, storage data speed, laptop charging output, necessary power adapter, and intended desk placement. A larger dock or a model with an external supply can suit a particular setup, but those features alone do not establish its thermal behavior. Compare the exact product documentation and return terms.
If your desk needs more than a compact travel hub can provide, our DisplayLink versus Thunderbolt dock comparison explains the host and display tradeoffs. Use the compatibility decision first, then compare available models. Keep a reliable direct connection for essential storage or a camera if that is the configuration your tests support.
What to send the manufacturer
Put the information in one short message: hub model, laptop model, operating system, charger and host cable, display settings, and attached peripherals. State how long the setup runs before the symptom appears. List the direct connection result and the simplest supported hub configuration you tried. Include warning signs clearly and stop using a unit that shows them.
For example, a useful test record says that the hub works with one display and a keyboard, but disconnects storage during a transfer with a particular charger attached. It also says whether the same transfer works on a direct port. This gives support a repeatable starting point without claiming that the hub has overheated based solely on touch.
Frequently asked questions
Is a warm aluminum USB-C hub always faulty?
Warmth by itself does not establish a defect. Read the manufacturer’s guidance for the exact model and check whether the hub remains stable under a supported workload. Stop use and contact support for a burning smell, visible damage, or repeated shutdowns.
Will charging the laptop directly make the hub cooler?
It changes the power path and can be a useful comparison when the laptop and hub support that arrangement. Keep the peripherals and workload similar and record the result. Follow the dock’s power supply requirements before trying it.
Should I buy a powered hub to solve the problem?
Choose one only after checking the fault and your peripheral requirements. An external supply can change how a setup is powered, but the product still needs to support your computer, display modes, and accessories. Compare the exact model’s documentation.
Can a warm hub explain an SSD disconnect?
It is one possible observation to report alongside the disconnect, but it does not identify the cause. Compare the drive directly, then test the hub with fewer peripherals and the documented cable and supply. Record which change affects the failure.
What is the first check before replacing a hot USB-C hub?
Check for a burning smell, damage, or shutdowns first. If those appear, stop using the unit and contact the manufacturer. For a normally working hub with no warning signs, begin with clear desk placement and a simple supported configuration.
Ready to compare replacements? Match the host connection, monitor modes, data ports, and charging requirements first. These retailer buttons open hub search results.
As an Amazon Associate, we earn from qualifying purchases. We may also earn a commission through other affiliate links at no extra cost to you.