

Webcam Keeps Disconnecting Through a USB Hub? 7 Fixes

If your webcam keeps disconnecting through a USB hub, plug it directly into your computer and run the same camera preview for at least as long as it usually takes the failure to occur. If the direct connection is stable, reconnect the hub with only the camera attached. If the camera disconnects in both setups, test another direct USB port and check whether the camera still appears in your operating system when the picture drops.
A frozen picture, an app that cannot access the camera, and a USB device that disappears can look identical to the person on the other end of a call. The checks below help you tell them apart. Use your normal camera settings at first and change one thing at a time so you can reproduce the result.
Test the webcam before replacing anything. Compare a direct USB connection with the same test through your hub.
| What you see | First test | What to check next |
|---|---|---|
| The webcam disappears from the system when connected through the hub | Connect it directly to the computer | Hub port, upstream cable, or hub power |
| Camera preview freezes but the system still lists the webcam | Try the local Camera app with meeting apps closed | App, video mode, or the camera stream |
| Webcam and other hub devices disappear together | Test with only the webcam on the hub | Shared hub connection, power supply, or upstream port |
| The webcam fails only when an SSD is busy | Repeat at the same camera setting with the SSD idle, then active | Shared connection or power under load |
| Only coworkers see frozen video, while the local preview stays smooth | Compare a local recording with a test call | Call application or network |
| It always fails after sleep but works after a fresh start | Repeat the same wake sequence with a direct connection | Resume behavior for the camera, hub, or host system |
1. Compare a direct USB connection with the hub
Close any meetings and plug the webcam into a built-in USB data port. Use the supplied webcam cable if it is detachable. If the computer and camera have different connectors, a known-good data adapter may be needed. Record that adapter in your notes because it becomes part of the test. Try to avoid stacking adapters, extension cables, or another hub.
Open a local camera preview. Pick the external camera by name, especially on laptops that also have a built-in camera. Keep the same mode you use for calls and run the preview past the usual time to failure. If the problem normally starts as soon as you return from sleep or turn on a light connected to the hub, reproduce that condition in a separate round.
Then connect the hub and plug only the webcam into it. Match the app, camera mode, laptop power state, and test duration. A direct connection that stays stable while the hub path repeatedly fails gives you a reason to investigate the hub setup first. If both fail, switch to a second built-in port and check the camera cable before shopping for a hub.
Logitech’s webcam detection guide recommends bypassing hubs and docks during troubleshooting. Microsoft’s Windows camera guide also recommends trying another USB port for an external camera.

2. Check whether the webcam disappears or the picture just freezes
On Windows, open Device Manager and look under Cameras or Imaging devices. Some models may appear under another device category. Note the external camera’s exact name while it is working. When the stream drops, check the list before unplugging anything. On a Mac, use System Information and inspect the USB device tree while comparing the same before-and-after condition. Refresh or reopen the view if needed.
A camera that disappears and returns after a reconnect points you toward the USB connection or device initialization. A camera that remains listed can still have a transport problem, but now you also have reason to test the application, the selected camera, and the streaming mode. Note whether the webcam LED changes and whether the webcam microphone drops at the same time. These details are useful clues alongside the system device list.
If another app can see the external camera immediately after the failure, reproduce the problem with the original app alone. If the camera is listed but every preview freezes, keep investigating the device and connection. Avoid rebooting as your first response during a controlled test because it clears the state you are trying to observe.
3. Try a different data port and remove extra connections
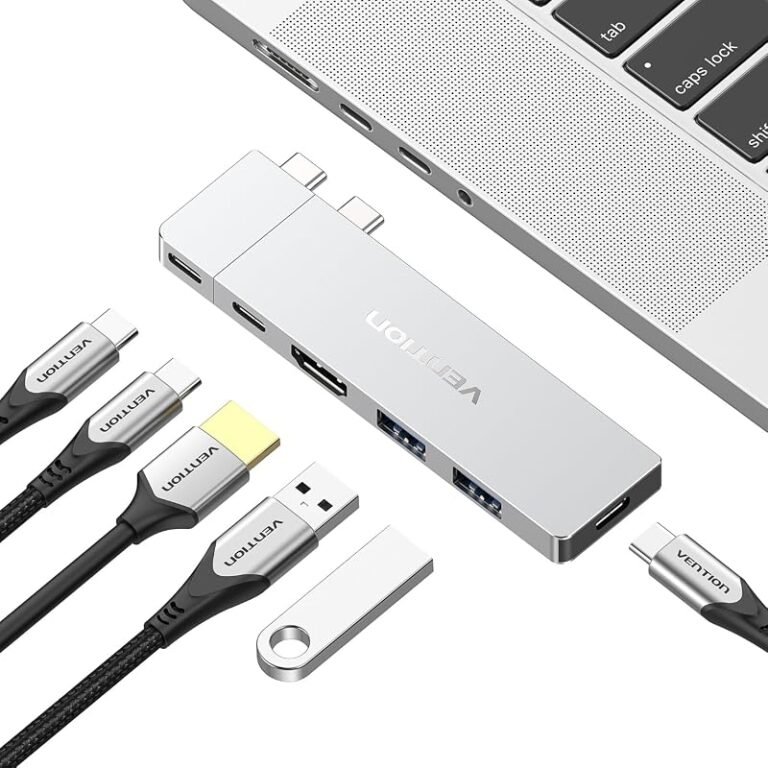
Read the markings and manual for the exact hub model. A USB-C port marked PD input may be intended for a charger. Another port may carry data at a speed that differs from its neighbor. Connector shape alone cannot tell you what a port supports, and port colors are not a reliable substitute for the manual.
Move the webcam to another documented USB data port on the same hub and repeat the preview. If just one port fails, take a close look at the connector and try a second known-good accessory there. If all hub ports show the same failure, focus on the link from hub to computer. Reconnect the hub snugly and test a second compatible built-in port, keeping the webcam on the same hub socket.
Remove unnecessary adapters and extensions from both paths. If either the webcam or hub has a detachable cable, try its supplied cable or a known-good replacement that meets the manufacturer’s data requirements. A replacement USB-C cable that charges a phone can still be unsuitable for the data mode you are testing. With a fixed-cable hub, compare the whole hub on another compatible computer if one is available.
4. Test the hub’s power and what else is attached
Start with the webcam as the only peripheral. If the hub ships with an external power supply, use that supply as documented. A hub’s laptop-charging rating describes a different capability from the power available to USB accessories. Read the manufacturer’s description of peripheral power and any limits across ports before assuming a higher-wattage laptop charger changes the result.
If the webcam is stable by itself, reconnect your keyboard, audio interface, SSD, or other devices one at a time. Test the camera after each addition. Then compare an idle device with the same device in use. An external SSD might sit connected without issue until you start a transfer. If the camera drops at that point, move the SSD to a separate built-in port and repeat the same workload.
Save your work and safely eject storage before disconnecting the hub. If storage, the webcam, and another device disappear at once, document the simultaneous dropout. The upstream cable, power source, or hub itself is a more useful place to investigate than a setting in the meeting app. If only the webcam vanishes, repeat with a different hub port and known-good webcam cable to narrow things further.
If the entire hub disconnects, see our USB-C hub disconnect troubleshooting guide. If the camera stays connected and only the wireless mouse lags, try these wireless mouse lag checks.

5. Compare camera modes with the same workload
Where your software exposes the controls, start at 1080p at 30 frames per second or a lower supported mode. Compare it with your usual higher-resolution or higher-frame-rate setting. Use the same preview or recording app for both measurements. Some meeting apps adjust their own video quality, so a camera utility or local recording app that reports the actual selected mode can make the comparison clearer.
If the lower mode is consistently stable through the hub and the higher mode repeatedly fails, run the higher mode directly from the computer next. A failure limited to the hub path makes its data link and remaining peripherals worth checking. A failure in both paths gives you a reason to review the camera’s cable, supported modes, software, and manufacturer documentation.
A lower stable setting can get you through today’s meeting. To decide whether it is a lasting fix, repeat the mode you actually need for streaming, teaching, or recording. A five-minute preview at 720p gives little information about a webcam that fails after 25 minutes at your regular recording setting.
6. Separate Windows camera access and app problems from USB problems
Close the meeting application completely, then open the Windows Camera app and select the external camera. If Camera works, close it and reopen the meeting app. Check its selected input and test the preview before joining a call. For a browser-based meeting, check the site’s camera permission and the browser’s chosen camera. If permissions are managed by your organization, ask the administrator to verify the relevant settings.
On Windows 11, camera access settings are under Settings → Privacy & security → Camera. Microsoft describes separate controls for camera access, app access, and desktop app access. Review the Windows camera permissions guide if one app cannot start an otherwise visible camera. If the issue began after an update, check the camera or computer manufacturer’s advice for your exact model and operating system.
For calls where other people see a frozen image while your local preview stays smooth, record a short local clip and compare it with a private test call. A stable local clip gives you evidence to investigate the meeting client or connection before swapping hardware. If the camera also vanishes from your operating system, return to the direct-USB comparison and record the trigger.
7. Reproduce the failure before replacing anything
For problems after sleep, save your work, close the meeting client, and repeat a short sleep-and-wake cycle with the webcam through the hub. Note whether the system detects the camera during wake and whether opening the local preview brings it back. Then repeat the same cycle with the direct connection. Keep the laptop lid position and power source consistent across both tests.
Keep four details for each run: how the camera was connected, what else was attached, what mode the app used, and when the failure occurred. Add the exact device and cable models if you plan to contact support. Repeat any result that will influence a purchase. A single successful reconnect establishes that the camera can recover, while a repeatable comparison helps establish which connection is reliable.
Replace the cable first if the failure consistently follows that detachable cable. Consider a different hub if a known-good camera works directly, but multiple documented data ports on the hub fail under the same conditions with the supplied power and upstream connection. For a permanent desk setup, leaving the webcam on a direct port may be the simplest solution. If you need a replacement hub, check the peripheral data speeds, required power adapter, computer compatibility, and return window against your exact setup.
Frequently asked questions
Why does my webcam work directly but keep dropping through the hub?
The hub path adds a connection between the hub and computer and may share data and power with other peripherals. Start with only the webcam on a documented data port. Compare the same camera settings with and without the hub, and bring devices back one at a time.
Can a powered hub fix webcam disconnects?
It can help when the failure is related to available peripheral power. Use the supply specified for your hub. If the camera disconnects with the correct supply and the camera as the only accessory, try a different data port or upstream cable and compare the direct result.
Why does my webcam freeze when an external drive is busy?
Reproduce that pattern with a local preview and the drive idle, then during a transfer. If the freeze follows drive activity, move the drive to a separate built-in port. This tests whether sharing the hub is part of the problem. There can also be a camera or app issue, so check whether the webcam disappears from the system.
Do I need a USB 3 hub for a webcam?
Check the webcam manufacturer’s requirements for your specific resolution and frame rate. Some cameras support lower modes over slower ports, while higher modes may need a faster USB data connection. The port, cable, hub and computer must all support the required mode.
Can a different app select the wrong camera after a disconnect?
An app may return to a built-in camera or require you to select the external model again. Verify the input by name after each change. If the external webcam stays missing from the system device list, troubleshoot detection first.
Next step — Run one direct preview and one hub-only preview with identical settings. Write down which setup fails and whether the webcam disappears from the operating system.



One Comment