Best Camera Lift Guide for Smooth Aerial Shots
A camera lift is worth it when you want hidden hardware, repeatable framing, and a cleaner room layout. It is less appealing if you need the simplest setup or do not have the ceiling support and clearance to install one safely.
A camera lift is a motorized mounting system that raises and lowers a camera from a ceiling, cabinet, or hidden enclosure for cleaner framing and a less cluttered room. For smart home owners, creators, and conference room planners, it can be a smart way to keep gear out of sight while still getting flexible overhead or elevated shots.
- Best fit: Home studios, conference rooms, and multi-use spaces that need hidden camera placement.
- Most important specs: Load capacity, travel range, noise, and control method.
- Installation risk: Ceiling structure, cable routing, and access for maintenance matter more than marketing claims.
- Smart-home use: Verify exact app and platform support by model number before planning automations.
- Best alternative: Tripods and wall mounts are easier if concealment is not essential.
Best Camera Lift Guide for Smooth Aerial Shots: What It Is and Whether You Need One
A camera lift is most useful when you want the camera to disappear when not in use, then move into position at the touch of a button or through a control system. It is not the cheapest or simplest mounting option, but it can solve a real problem in multi-use spaces where a tripod, wall arm, or permanent ceiling mount would be in the way.
Quick answer: who should buy a camera lift in 2026 and who should skip it
Buy one if you need a hidden, repeatable camera position for a home studio, livestream setup, meeting room, classroom, or polished smart home media space. Skip it if you only need occasional camera movement, have limited ceiling structure, or want a low-cost solution that does not require planning for power, clearance, and installation.
How a camera lift works in a smart home or creator setup
Most camera lifts use a motor, rails, cable system, or telescoping mechanism to move a camera platform up and down. In a smart home or creator workflow, that movement may be controlled by a wall switch, remote, app, or automation platform, depending on the model.
The key benefit is predictable positioning. Instead of re-aiming a tripod every time, the camera can return to the same height and angle, which helps with consistent framing for overhead cooking videos, product demos, conference calls, or room-overview shots.
Many hidden lift systems are chosen as much for room design as for camera movement, because they help keep cables, mounts, and hardware out of sight.
Camera Lift Types Compared: Ceiling-Mounted, TV-Lift Style, and Motorized Hidden Mounts
Not every camera lift is built the same. The right style depends on how much space you have above the ceiling, how visible the hardware can be, and whether the camera needs a short drop, a long travel range, or a fully concealed resting position.
Which lift style fits small rooms, studios, and multi-purpose living spaces
Ceiling-mounted lifts work well when the camera needs to descend from above and stay close to the center of the room. TV-lift style systems are often better when the camera is stored in cabinetry, soffits, or furniture and rises into view only when needed.
Motorized hidden mounts are a good fit for multi-purpose living spaces because they can keep the room looking normal between uses. In a small room, the best choice is usually the one with the least visible footprint and the shortest required travel distance.
| Option | Best For | Key Consideration |
|---|---|---|
| Ceiling-mounted lift | Studios, meeting rooms, overhead shots | Needs solid ceiling support and enough depth |
| TV-lift style | Cabinets, furniture, concealed installs | Check enclosure size and heat clearance |
| Hidden motorized mount | Living rooms, hybrid work spaces | Balance concealment with access for service |
Practical trade-offs: visibility, travel range, load limits, and installation complexity
The more hidden the lift, the more planning it usually requires. A fully concealed system may need extra ceiling depth, stronger mounting points, more careful cable routing, and easier service access than a simple exposed arm or bracket.
Travel range matters because the camera has to move far enough to clear furniture, lights, fans, or people in the room. Load limits matter because the lift must support the camera plus any lens, cage, microphone, or accessory weight the manufacturer allows.
- Clean, hidden look when not in use
- Repeatable camera height and framing
- Useful for rooms that serve multiple purposes
- More installation planning than a tripod or wall mount
- Requires careful attention to weight and clearance
- Repairs and maintenance can be harder to access
Key Buying Criteria: Size, Weight Capacity, Noise, Connectivity, and Control Options
For a camera lift, the best specs are the ones that match your room and your workflow. A lift that looks impressive on paper can still be a poor fit if it is too loud for video, too deep for the ceiling, or incompatible with the way you want to control it.
Dimensions and clearance: measuring ceiling depth, camera size, and drop distance
Start with the ceiling cavity or cabinet space. You need enough depth for the lift body, the camera, the mount, and any cable bend radius the manufacturer requires, plus enough drop distance for the camera to clear nearby objects.
Measure the camera with its heaviest normal setup, not just the bare body. That includes a lens, cage, microphone, adapter plate, or any accessory that remains attached during use. If the lift has a travel limit, make sure it can reach the exact shooting height you need without bottoming out or stopping short.
- Check the exact lift dimensions, camera clearance, and travel range
- Confirm the camera plus accessories stay within the rated load limit
- Verify ceiling structure, power access, and service access before installation
Power and wiring requirements: rated wattage, cable quality, and safe installation limits
Camera lifts may need low-voltage control wiring, standard AC power, or a mix of both, depending on the design. Do not assume a nearby outlet is enough; the official manual should explain the correct power requirements, cable type, and any limits on extension or routing.
Use only cables and adapters that match the manufacturer’s guidance. If the lift includes an external power supply, keep it in a ventilated location and avoid pinching or sharply bending cables in moving parts.
Do not modify structural mounting points, overload the lift, or run cables through moving parts unless the manual explicitly allows it. Stop using any system that shows frayed wiring, unusual heat, grinding sounds, or unstable movement.
Smart home compatibility: app support, voice control, Wi‑Fi, Zigbee, or hardwired control
Control options vary widely by model. Some lifts use a simple remote or wall switch, while others may support app control, dry-contact integration, or home automation platforms through a hub or controller.
If smart-home integration matters, confirm the exact supported ecosystem before buying. App availability, voice assistant support, firmware features, and local control behavior can change by region, app version, or model revision, so the official compatibility list is the safest reference.
Smart-home compatibility often depends on the control module, not just the lift motor. Always verify the exact model number, app listing, and supported platform before planning automations.
Noise, speed, and motion smoothness for video-friendly operation
For recording, the lift should move smoothly and predictably rather than quickly and abruptly. Noise matters because a loud motor can distract during livestreams, conference calls, or quiet studio recordings.
Look for specifications or product details that describe soft-start motion, quiet operation, or adjustable speed, but treat marketing language carefully. If the manufacturer does not provide a clear noise rating, assume real-world sound will depend on room acoustics, mounting quality, and load.
Best Use Cases and Real-World Benefits for Home Studios, Content Creators, and Conference Rooms
The biggest advantage of a camera lift is not just movement. It is the ability to keep a room looking clean while still having a camera ready at a repeatable position whenever you need it.
Why a camera lift helps with clean framing, hidden hardware, and flexible angles
A lift helps preserve a tidy visual environment because the camera can stay hidden when the room is being used for something else. That matters in living rooms, home offices, classrooms, and conference rooms where permanent gear can feel intrusive.
It also helps with repeatable framing. If you regularly film overhead shots, desk setups, or talking-head content from a fixed height, a lift can make it easier to return to that position without rebuilding the setup each time.
Where it adds the most value versus a tripod, wall mount, or gimbal
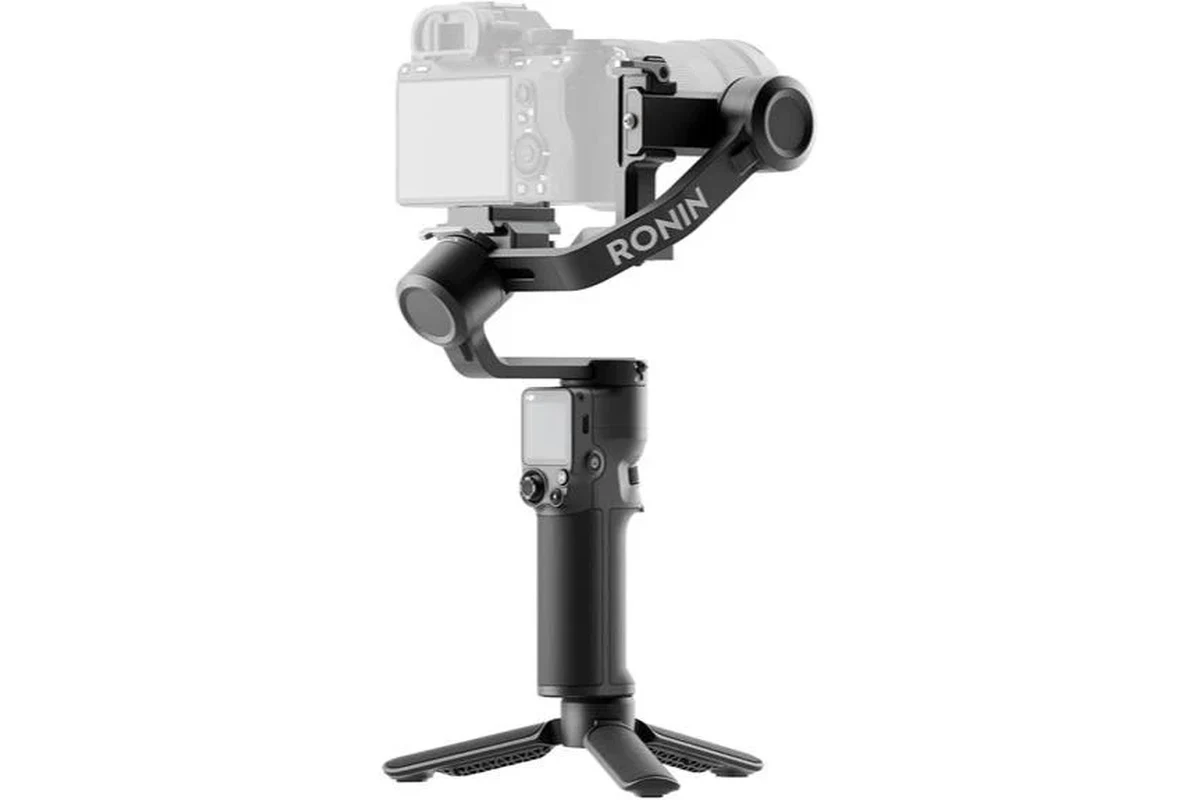
A tripod is still the simplest option if portability and low cost are most important. A wall mount is better when the camera can stay in one fixed spot, and a gimbal is more appropriate when the camera needs to move dynamically during filming.
A camera lift adds the most value when you want hidden hardware, a polished room, and a consistent starting position. That makes it especially appealing for hybrid workspaces, multi-use media rooms, and creator setups that need to disappear between sessions.
Limitations to keep in mind: ceiling structure, budget, and maintenance access
Not every ceiling is suitable for a lift. You need enough structural support, enough space for the mechanism, and enough access to inspect or service the system later.
Budget is another practical limit. Even if the lift itself is the right idea, installation, electrical work, and any custom enclosure can add complexity. Before buying, check the return policy, warranty terms, and whether replacement parts or service are easy to obtain from the manufacturer.
Setup Guide: Installation Planning, App Setup, and Safe Operation
Installation is where many camera lift problems start, so planning matters more than speed. The safest approach is to confirm structure, power, and control requirements before anything is mounted.
Pre-install checklist: joists, mounting surface, power access, and camera compatibility
Make sure the mounting surface can support the full system, not just the camera. That usually means checking joists, framing, cabinet structure, or the approved mounting method described in the manual.
Also confirm that the camera body, lens, and accessories fit within the lift’s platform or mount. If the lift is meant for a specific enclosure or bracket, use the correct hardware rather than improvising with generic parts.
- Keep the camera configuration consistent so weight and balance do not change unexpectedly
- Leave room for cable movement at full extension and full retraction
- Document the model number and firmware version for future support requests
Setup steps to verify before use: calibration, travel limits, and control pairing
After installation, verify the travel path before regular use. The lift should stop cleanly at its upper and lower limits without striking the ceiling, cabinet, or camera accessories.
If the unit uses an app or remote, pair it according to the official instructions and confirm that every control method behaves the same way. For smart-home use, test automations one at a time so you can identify whether a problem comes from the lift, the app, or the platform integration.
Install only on the approved structure and tighten all fasteners to the manufacturer’s guidance.
Confirm the lift stops before any part of the camera or mount can collide with the room.
Check remote, app, or wall control operation several times with the room clear.
Safety guide: load ratings, pinch points, emergency stop behavior, and inspection routine
Never exceed the rated load limit, even if the motor seems to move the camera without strain. Extra weight can shorten motor life, increase noise, and create a safety risk over time.
Keep hands, cables, and loose items away from moving parts. If the lift has an emergency stop feature, learn how it works before normal use, and inspect the system regularly for loose fasteners, cable wear, and unusual movement.
Stop using damaged electronics, frayed cables, loose mounts, overheating motors, or unstable hardware and follow the manufacturer’s instructions for service or replacement.
Maintenance, Storage, and Long-Term Care for Reliable Performance
A camera lift can last longer and stay quieter if you treat it like a moving mechanical system, not just a bracket. Routine care is especially important in dusty rooms, ceiling cavities, and spaces where the lift is used often.
Cleaning moving parts, checking fasteners, and keeping rails or motors dust-free
Use the cleaning method recommended by the manufacturer, and avoid spraying liquids into the motor or rails. Dust buildup can affect motion over time, especially in enclosed spaces or rooms with heavy HVAC airflow.
Check fasteners periodically, especially after the first few weeks of use and after any move or reconfiguration. If the lift begins to sound different, move unevenly, or drift out of alignment, inspect it before continuing regular use.
Heat management, cable wear, replacement guidance, and warranty details to verify
Motors and power supplies can generate heat, so keep vents unobstructed and avoid enclosing components more tightly than the manual allows. Cable wear is another common issue, especially where a cable flexes during every cycle.
Before buying, confirm how the warranty handles motors, controllers, remotes, and wear items. Also check whether replacement parts are sold separately and whether the manufacturer provides service documentation or authorized repair options.
When to service, replace, or retire a lift system
Service the system if movement becomes noisy, jerky, or inconsistent, or if the control system starts failing intermittently. Replace it if the motor, structure, or control electronics are no longer reliable and parts are unavailable.
Retire the lift if the frame is damaged, the load requirements have changed beyond the rating, or the manufacturer no longer supports safe operation. With ceiling-mounted gear, safety should outweigh convenience.
Common Mistakes, Troubleshooting, and How to Avoid Costly Damage
Most camera lift problems come from setup mistakes, not from the idea itself. The good news is that many issues can be prevented by checking structure, alignment, and compatibility before the first cycle.
Frequent setup errors: overloading, poor alignment, weak anchors, and bad cable routing
Overloading is the most obvious mistake, but poor alignment is just as common. If the lift is not square to the mounting surface, it may bind, wobble, or wear unevenly over time.
Weak anchors and sloppy cable routing can create both performance and safety issues. Use only approved mounting points and make sure cables do not snag, pinch, or rub against moving components.
Fixing jitter, slow movement, stalled motors, and connectivity problems
If the lift jitters or moves slowly, first check for overloading, misalignment, or obstruction. If the motor stalls, stop using the system until the cause is clear, because forcing it can damage the mechanism.
For connectivity problems, confirm power, pairing, app permissions, and firmware status according to the manufacturer’s support guide. If the lift uses a smart-home platform, test the physical remote or wall control separately so you can isolate whether the issue is mechanical or software-related.
Evidence limits and what specs to confirm before trusting marketing claims
Marketing language often emphasizes “silent,” “heavy-duty,” or “smart” without explaining the conditions behind those claims. Before trusting a product page, verify the actual load limit, travel range, supported control method, and installation requirements in the manual or spec sheet.
If a feature is important to you, confirm it in the official documentation, app listing, or compatibility chart. That is especially true for voice control, automation support, and any claims about quiet operation or premium materials.
Final Verdict: Best Camera Lift Value in 2026 and the Right Buyer Profile
The best camera lift is the one that matches your room structure, camera weight, and control needs without making installation or maintenance impractical. For most buyers, the strongest value comes from a model that is quiet enough for recording, easy to control, and sized correctly for the camera setup you plan to keep on it.
Best overall recommendation by room type, workflow, and budget
For a home studio or conference room, a ceiling-mounted or hidden motorized lift is usually the best fit if you need clean visuals and repeatable framing. For smaller or more flexible rooms, a simpler concealed lift style may be the better value if it meets the load and travel requirements without overcomplicating installation.
Alternatives if a camera lift is too expensive or too complex
If the project feels too involved, a sturdy tripod, wall mount, or articulating arm can solve many of the same framing problems at much lower cost and with less maintenance. For creators who need movement during filming, a gimbal or adjustable stand may be more practical than a motorized ceiling system.
Transparent conclusion on value, convenience, and long-term fit
A camera lift is worth considering when you care about a clean room, hidden hardware, and repeatable camera placement more than simplicity. If you verify the structure, clearance, power, and compatibility details up front, it can be a very polished long-term solution; if not, a simpler mount will usually be the safer and easier choice.
Choose a camera lift if you need concealed mounting and consistent overhead positioning in a room that serves more than one purpose. Skip it if your ceiling structure is uncertain, your budget is tight, or you want the easiest possible setup and maintenance path.
Frequently Asked Questions
A camera lift is best for home studios, conference rooms, and creator spaces that need hidden hardware and repeatable camera placement. Skip it if you want the simplest, lowest-cost setup or if your ceiling structure and clearance are uncertain.
Measure ceiling depth, drop distance, and the space needed for the camera plus accessories. Confirm the lift’s travel range and mounting requirements in the official manual before buying.
Load capacity, travel distance, noise, control method, and installation requirements are the most important specs. Smart-home compatibility should be verified by exact model number and app listing.
A camera lift is better when you want a hidden, polished look and a fixed repeatable position. A tripod or wall mount is usually easier, cheaper, and better for users who do not need concealment.
Keep rails, motors, and moving parts free of dust, check fasteners regularly, and inspect cables for wear. Follow the manufacturer’s cleaning and service guidance, especially if the lift is used often.
Confirm the load limit, travel range, control options, warranty terms, and installation requirements in the official documentation. If a feature is not clearly listed, treat it as unverified until the manufacturer confirms it.