Can You Replace a Knock Sensor Yourself
Yes, you can replace a knock sensor yourself if the part is easy to reach and you confirm the exact fit first. If the sensor is buried or the diagnosis is unclear, a professional repair is usually the safer choice.
Yes, many drivers can replace a knock sensor themselves, but only if the sensor is reasonably accessible, the correct part is confirmed, and you are comfortable working carefully around engine components. The job can be straightforward on some vehicles and frustrating on others, so the real question is less “can you?” and more “does your specific engine make this a smart DIY repair?”
- DIY is possible: Many knock sensor replacements are manageable with basic tools and patience.
- Fit matters: Confirm engine code, connector type, bank location, and part number before buying.
- Diagnosis matters: A knock code can also point to wiring, corrosion, or engine issues.
- Access changes everything: Some sensors are simple to reach, while others require major disassembly.
- Use the manual: Torque specs and reassembly steps are critical for a lasting repair.
Can You Replace a Knock Sensor Yourself? Quick Answer and What It Really Takes
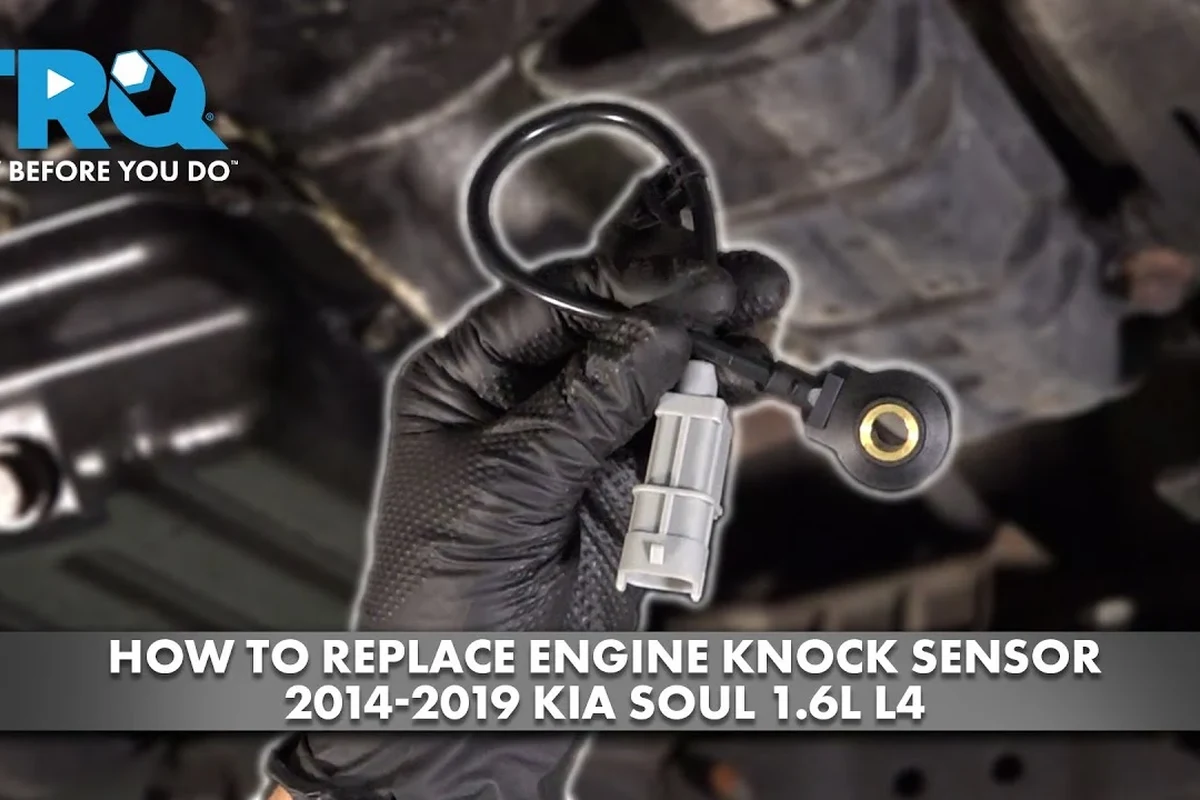
A knock sensor replacement is often a doable home repair for someone with basic mechanical skills, hand tools, and patience. The difficulty depends heavily on engine layout, sensor location, and whether the intake manifold, valve cover, or other parts must come off to reach it.
If you already know how to disconnect a battery, remove trim or intake pieces, label connectors, and follow torque specs, DIY may make sense. If the code diagnosis is uncertain or access is tight, a professional diagnosis can save time and prevent a wrong-part or wrong-repair situation.
How a Knock Sensor Works and Why It Matters to Engine Safety
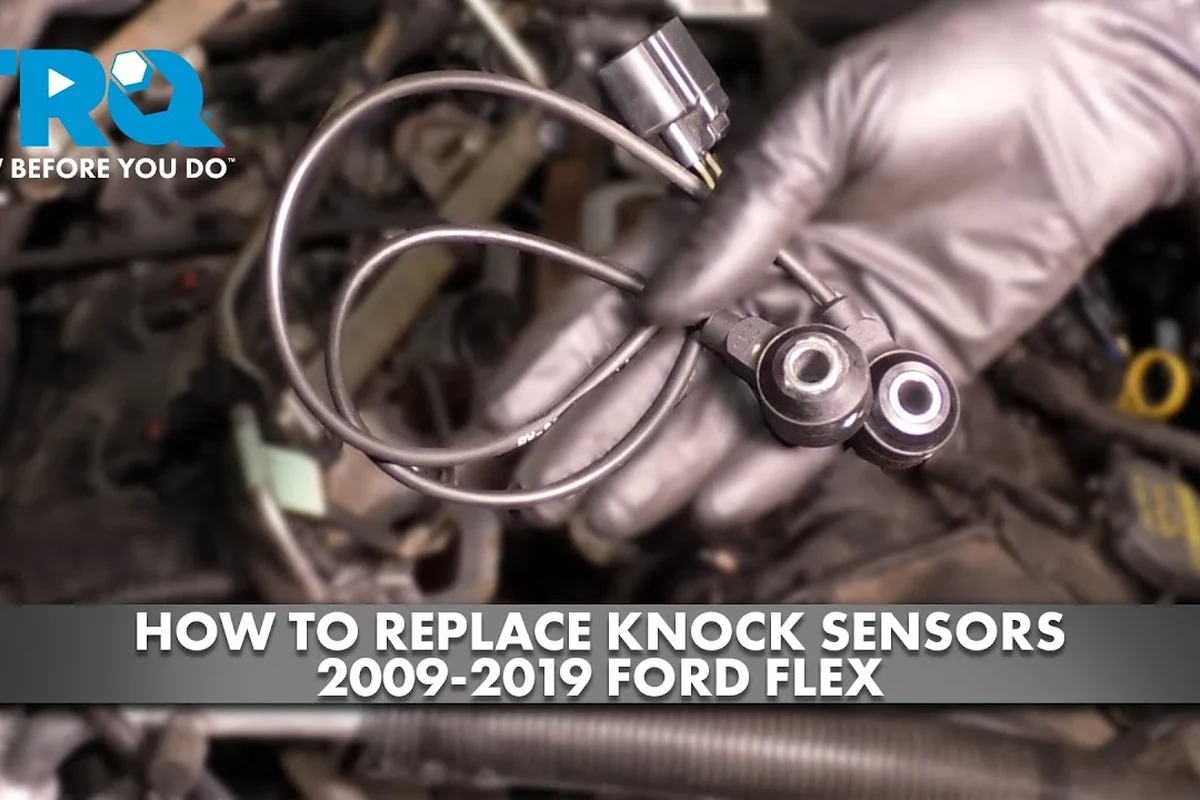
A knock sensor listens for abnormal engine vibration that can signal detonation, also called engine knock or pinging. The engine control unit, or ECU, uses that signal to adjust ignition timing and protect the engine from damage.
What the sensor detects and how the ECU responds
The sensor is usually mounted on the engine block or near a cylinder bank where it can detect vibration patterns. When the ECU sees a signal that looks like knock, it can reduce timing advance and change how the engine runs to lower stress on the cylinders, pistons, and valves.
Many modern engines will protect themselves by reducing performance when the knock sensor circuit fails or reports implausible data.
Common symptoms of a failing knock sensor
A bad knock sensor can trigger a check engine light, reduced power, poor acceleration, or rougher engine behavior under load. Some vehicles may also show a knock sensor circuit code, while others simply run conservatively and feel sluggish.
It is important not to assume every knock-related code means the sensor itself is bad. Wiring damage, connector corrosion, engine noise, low-quality fuel, or other mechanical problems can cause similar symptoms, so diagnosis matters before replacement.
Who Can Realistically Replace a Knock Sensor at Home
DIY replacement is realistic for owners who can work methodically and verify the exact part before buying. It is less realistic if the engine bay is tightly packed, the sensor is under the intake manifold, or you do not have the tools to remove and reinstall surrounding components safely.
Skill level, tools, and workspace needed
At minimum, you usually need a safe workspace, a socket set, extensions, possibly a torque wrench, and the ability to read a service manual or repair guide. A scan tool can also help confirm codes before and after the repair, though the exact tool requirements vary by vehicle.
- Look up the sensor location before buying parts so you understand how much disassembly is involved.
- Use the factory torque specification if available, especially for the sensor and any intake parts you remove.
- Label connectors and bolts as you remove them to avoid reassembly mistakes.
When DIY makes sense versus when a shop is the safer choice
DIY makes sense when the sensor is accessible, the diagnosis is clear, and you are already comfortable with basic engine work. A shop is the safer choice if the repair requires major teardown, if a previous repair attempt failed, or if you suspect the issue may be wiring, fuel quality, or internal engine noise rather than the sensor itself.
Do not keep driving with severe knock, flashing warning lights, overheating, or obvious engine noise. Those symptoms can point to a problem that needs immediate professional attention.
Key Specifications and Fit Checks Before You Buy a Replacement
Knock sensors are not a universal part. Fit depends on engine family, connector style, mounting style, calibration expectations, and sometimes even the bank or cylinder location.
OEM vs aftermarket knock sensors
OEM parts are usually the safest choice when you want the closest match to the original sensor design and calibration. Aftermarket sensors can be a good value, but quality and compatibility vary, so it is important to verify the exact application rather than assuming a listing will work for every version of the vehicle.
Some vehicles are sensitive to sensor design differences. A part that physically fits may still cause repeat codes or poor drivability if it does not match the engine’s expected signal range.
Vehicle compatibility, connector type, torque specs, and location
Before you buy, verify the year, make, model, engine code, bank location, connector shape, and mounting style. Also check whether the sensor is installed directly on the block, under the intake, or near another component that must be removed first.
What to verify in 2026: part number, engine code, warranty, and return policy
In 2026, the safest buying approach is still to confirm the OEM part number, engine code, and seller return policy before ordering. Warranty terms and compatibility notes can vary by retailer and region, so check the listing details and the manufacturer’s current catalog or fitment tool if available.
- Check compatibility, model number, connector type, and intended engine bank
- Confirm torque specs, return policy, warranty terms, and any fitment notes
- Verify whether other parts must come off to reach the sensor
Step-by-Step Overview of the Replacement Process
The exact repair sequence varies by vehicle, but the general process is similar: make the engine safe to work on, access the sensor, replace it carefully, and confirm the code does not return. A factory service manual or trusted model-specific repair guide is the best reference for the exact steps.
Safety prep, battery disconnect, and cooling-down time
Let the engine cool fully before starting, especially if the sensor sits near hot exhaust or intake components. Disconnect the battery if the repair procedure calls for it, and keep track of any learned settings or radio/security codes that your vehicle may need afterward.
Park on a flat surface, let the engine cool, and gather the correct tools, replacement sensor, and any needed gaskets or seals.
Remove the parts needed to reach the sensor, keeping bolts and connectors organized for reassembly.
Remove the old sensor, inspect the connector and wiring, install the new unit, and tighten it to the specified torque.
Reinstall removed parts, reconnect the battery if needed, clear codes, and confirm the repair with a scan tool or a road test.
Accessing the sensor, removing the old unit, and installing the new one
Once you can reach the sensor, unplug the connector gently and inspect it for corrosion, broken clips, or damaged insulation. Remove the old sensor without forcing it, then install the replacement using the proper torque so the sensor can read vibration correctly without being overcompressed.
If the sensor is under an intake manifold or other major component, replace any gaskets or seals that the service manual recommends. Reusing worn sealing parts can create vacuum leaks or drivability problems that look like a bad sensor.
Clearing codes and confirming the repair
After installation, clear the fault code with a scan tool if your vehicle requires it. Then confirm that the warning light stays off and that the engine runs normally under the driving conditions that previously triggered the issue.
If the code returns quickly, do not keep swapping parts blindly. Recheck the connector, wiring, mounting torque, and any related engine issues before assuming the new sensor is defective.
Real-World Benefits, Limitations, and Cost Value of DIY Replacement
The main appeal of DIY is avoiding labor charges and getting the vehicle back on your schedule. But the savings only matter if the diagnosis is correct and the repair does not turn into a larger disassembly project.
Potential savings compared with professional labor
Replacing the sensor yourself can reduce the total cost substantially when the part is inexpensive and access is simple. The value drops when the job requires special tools, several hours of teardown, or replacement gaskets and seals that add both cost and complexity.
Trade-offs: hard-to-reach sensors, seized bolts, and diagnostic uncertainty
Some knock sensors are tucked under intake components or mounted in locations that make bolt access awkward. Rusted fasteners, brittle connectors, and unclear fault codes can turn a simple repair into a time-consuming diagnostic job, which is why some owners choose a shop even if they are comfortable with basic maintenance.
DIY replacement is best for owners with basic mechanical skills, a clearly identified part number, and easy sensor access. If the sensor is buried or the code may be caused by wiring or engine noise, professional diagnosis is often the better value.
Common Mistakes, Safety Risks, and How to Avoid Them
Most DIY mistakes come from rushing the diagnosis, using the wrong part, or reassembling the area without checking connectors and torque specs. A careful, model-specific approach prevents most of the problems that lead to repeat codes.
Overtightening, wrong parts, damaged wiring, and skipped diagnostics
Overtightening can affect sensor performance or damage the mounting point, while under-tightening can cause poor signal transfer. Using the wrong sensor, especially one that looks similar but is not calibrated for your engine, is another common reason the repair fails.
Damaged wiring and skipped diagnostics are just as risky. If the harness is cracked, oil-soaked, or loose, replacing the sensor alone may not solve the problem.
Working safely around hot engines, electrical systems, and fragile connectors
Always work on a cool engine whenever possible, and handle electrical connectors by the housing rather than pulling on the wires. Use care around brittle plastic clips, and stop if you find fuel leaks, coolant leaks, or signs of deeper mechanical damage.
Never force connectors, pry aggressively on plastic parts, or work near a hot exhaust system without proper cooling time. Broken clips and burned hands are common avoidable DIY mistakes.
Maintenance Tips, Final Recommendation, and When to Seek Professional Help
After replacement, keep an eye on the engine light, listen for abnormal knock under load, and inspect nearby hoses, wiring, and gaskets for anything that could have contributed to the original fault. If the vehicle still runs poorly, the sensor may have been only part of the problem.
How to protect the new sensor and inspect related engine issues
Make sure the connector is fully seated and routed away from heat and moving parts. If the old sensor failed because of oil leaks, coolant leaks, or wiring damage, fix those issues too so the new part is not exposed to the same conditions.
- Keep the service manual or model-specific torque chart nearby during reassembly.
- Inspect vacuum hoses, wiring looms, and nearby gaskets while the area is open.
- Use the correct fuel grade recommended by the manufacturer if knock complaints were part of the original symptom set.
Bottom-line verdict for DIYers in 2026
So, can you replace a knock sensor yourself? Yes, if the sensor is accessible, the part is verified, and you are comfortable doing careful engine-bay work. If access is difficult or diagnosis is uncertain, paying for professional help is often the safer and more economical choice in the long run.
DIY knock sensor replacement is a practical home repair for many vehicles, but it is not automatically a simple one. Confirm the exact fit, follow the service manual, and choose a shop if the sensor location, wiring, or diagnosis makes the job uncertain.
Frequently Asked Questions
Often yes, but it depends on access, tools, and your comfort with engine work. Some vehicles make the job simple, while others require removing major components to reach the sensor.
Most jobs need basic hand tools, extensions, and sometimes a torque wrench. A scan tool can also help confirm the code before and after the repair.
A check engine light and knock-related code are common signs, but they do not prove the sensor is the only problem. Wiring damage, connector corrosion, fuel quality, or engine noise can cause similar symptoms.
OEM parts are usually the safest fit when you want the closest match to the original sensor. Aftermarket parts can work, but compatibility and quality vary, so verify the exact part number and engine application.
Verify the year, make, model, engine code, connector type, mounting style, and torque specification. Also confirm the seller’s return policy and warranty terms in case the part does not fit or solve the issue.
Choose a shop if the sensor is buried, bolts are seized, the wiring looks damaged, or the diagnosis is unclear. Professional help is also safer if the engine has severe knock, overheating, or other serious symptoms.