How to Organize Camera on Invid Elevate App Easily
Rename each camera clearly, group them by location, and move the most important views to the top. If settings do not save, check permissions, connectivity, and app version first.
If you want to organize cameras in the Invid Elevate app, the fastest approach is usually to rename each camera clearly, place them into logical groups or rooms, and then reorder the dashboard so the most important views appear first. The exact menu labels can vary by app version and camera model, so it helps to confirm the current steps in the official manual if your screen looks different.
- Start with names: Use clear location-based labels like Front Door or Upstairs Hallway.
- Group logically: Match rooms, zones, or floors to the real layout of your home or office.
- Prioritize alerts: Give high-traffic or critical cameras different notification settings.
- Keep the dashboard clean: Limit the number of priority cameras so the main screen stays useful.
How the Invid Elevate Camera Organization Works in 2026
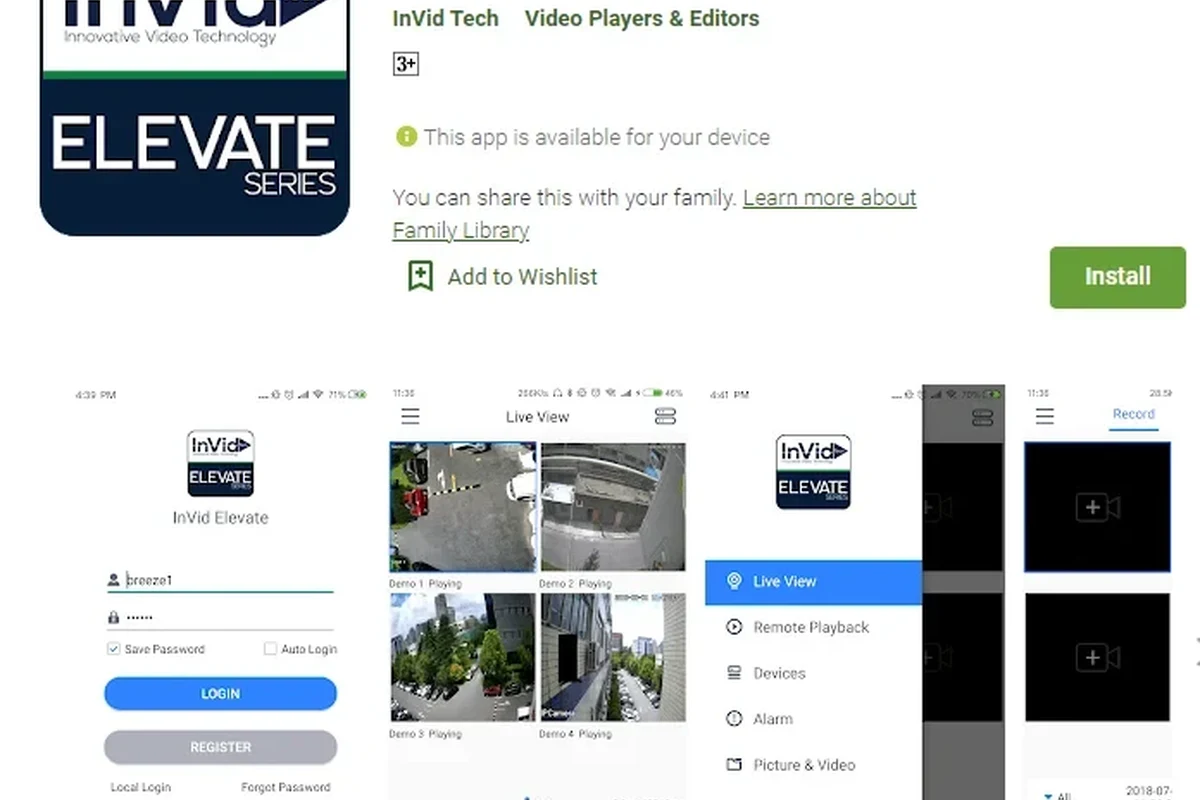
Invid Elevate is designed to help you manage multiple cameras from one app dashboard, but the organization tools you see may depend on firmware, account permissions, and the specific camera lineup attached to your system. In practice, most users get the best results by thinking in three layers: what each camera is called, where it belongs, and how urgently it should notify you.
That matters because a security app is not just a live-view grid. It is also a control center for alerts, playback, and quick access to the cameras you check most often. If your system includes indoor, outdoor, driveway, entryway, or business-area cameras, a little structure can save time every day.
Camera groups, naming, and dashboard layout
Most camera organization starts with names that make sense at a glance. A label like “Front Door,” “Back Patio,” or “Office Hallway” is far easier to scan than a default device name or a generic camera number.
Groups or rooms, when supported, help you cluster related cameras together. For example, a homeowner may want all first-floor cameras in one group and upstairs cameras in another, while a small office may prefer reception, stockroom, and parking-lot categories. If the app supports tiles, folders, or room-based views, use the feature that best matches your property layout.
How organization affects live view, alerts, and playback
Organization is not only about appearance. It can affect how quickly you find a live feed, how easily you review recorded clips, and how you respond to motion alerts. When the app is arranged logically, you spend less time scrolling and more time checking the right camera.
Alert settings are especially important. A camera at the front door may deserve more immediate notifications than a camera in a low-traffic storage area. If the app lets you set different alert preferences by camera, use that to reduce noise without missing meaningful events.
Setup Checklist Before You Rearrange Cameras
Before changing names or moving devices around, make sure the app and account are ready. That prevents confusion later if settings do not save, cameras disappear temporarily, or changes do not sync across devices.
- Check compatibility, model number, app requirements, dimensions, ports, wattage, and intended use
- Confirm safety guidance, warranty, return policy, privacy settings, and update support
App version, account access, and device permissions
Start by confirming that you are signed into the correct Invid Elevate account and that you have admin-level access if the system is shared. Some organization tools are limited for secondary users, especially in multi-user homes or offices.
Also check that the app is updated and that your phone has the necessary permissions enabled, such as notifications and local network access if the app requires it. If you manage cameras from more than one device, make sure the changes you make on one device are syncing properly to the others.
Connectivity, camera online status, and network stability
Rearranging cameras is much easier when all devices are online. If a camera is offline, it may not appear where you expect or may fail to save its new name or group assignment.
Stable Wi-Fi or wired connectivity also matters. If your network is weak, laggy, or frequently dropping, the app may look disorganized when the real issue is a connection problem. For broader home network setup issues, our guide on connecting a device to Wi‑Fi can help you think through the same basic troubleshooting steps.
Smart home details to verify: compatibility, storage, and warranty support
Before you make major changes, confirm that your cameras and cloud or local storage plan still match your needs. Some systems limit how many devices can be grouped, how long video is stored, or which features are available on a given plan.
It is also worth checking warranty terms and support coverage in case a camera stops syncing after a reset or firmware update. If you are unsure whether a feature is model-specific, the official product page and user manual are the safest references.
Step-by-Step Guide to Organize Cameras in the Invid Elevate App
The exact buttons may vary, but the workflow is usually straightforward: identify each camera, rename it, group it, prioritize the most important feeds, and fine-tune alerts. Take it one step at a time so you do not lose track of which camera is which.
Go to the section where all connected cameras appear, then select the camera you want to organize first. If the app has a settings gear, device menu, or edit option, that is usually where naming and grouping tools live.
Use a location-based name that tells you exactly what the camera covers. Keep names short, consistent, and easy to scan in a hurry.
Assign the camera to a logical category such as upstairs, front exterior, or office entry. This makes the dashboard easier to browse and helps shared users understand the layout.
Move the most important views to the top or front of the dashboard if the app allows it. Put the cameras you check most often where they are visible without extra scrolling.
Set stronger notifications for high-priority areas and lighter alerts for low-traffic zones. Then verify that playback and event history still make sense after the new organization is saved.
Renaming cameras for faster identification
Renaming is the simplest and most useful change you can make. A well-chosen name should answer one question immediately: “What camera is this?”
Good examples include “Garage West,” “Nursery Door,” or “Reception Desk.” Avoid vague labels like “Camera 1” or “Back.” If you manage several properties or floors, consider adding a prefix such as “1F,” “2F,” or “Apt B” to keep names unique.
Use the same naming pattern for every camera, such as location first and purpose second. Consistency matters more than creativity when you are checking alerts quickly.
Creating rooms, zones, or location-based groups
If Invid Elevate offers grouping, use it to reduce clutter. Rooms work well for indoor spaces, while zones are often better for properties that have separate outdoor areas or business sections.
For a home, you might create groups like Entry, Living Areas, Upstairs, and Exterior. For a small office, you might use Lobby, Hallway, Storage, and Parking. The goal is to make the app reflect the real space, not just the order in which cameras were installed.
Reordering camera tiles and prioritizing key views
When the app supports tile reordering, place the most important cameras first. That usually means the front door, main entry, nursery, cash area, or any location with higher security value.
Try not to overload the top row with too many devices. If everything is marked important, nothing stands out. A smaller number of priority cameras is easier to manage and more useful during a real alert.
Assigning alert preferences by camera
Different cameras deserve different notification levels. A motion-heavy driveway camera may need motion zones or reduced sensitivity, while a front door camera may need more immediate alerts.
If the app lets you customize alerts by camera, review each device one by one. This is a good time to check whether notifications are too frequent, too quiet, or triggered by routine movement like passing cars, trees, or pets.
Best Practices for a Cleaner, Easier Camera Layout
A camera dashboard should feel simple, not crowded. The best setups usually rely on a few clear rules that make the system easy to understand for everyone who uses it.
How to group cameras by floor, purpose, or risk level
Grouping by floor is useful in homes with multiple levels because it matches how people think about the building. Grouping by purpose works well when cameras serve different jobs, such as entry monitoring, package watching, or indoor child care.
For businesses, risk level can be a practical approach. High-priority areas like entrances or point-of-sale spaces may deserve the most visible placement, while storage or back-room cameras can stay in secondary groups.
Using consistent naming conventions for homes and small businesses
Consistency prevents mistakes, especially when several people share the app. Pick one format and stick with it across all cameras, such as “Location – View” or “Floor – Area.”
This also helps when you add new cameras later. If your system grows over time, a structured naming convention keeps the app from turning into a random list of device names.
Many smart-home apps become harder to use not because they lack features, but because the user never creates a naming system before adding several devices.
Reducing clutter on the main screen without losing access
If the dashboard feels crowded, hide or deprioritize cameras you rarely check, while still keeping them accessible in the full device list. The goal is to keep the main screen focused on the feeds that matter most day to day.
For shared homes, this also reduces confusion. A cleaner layout makes it easier for family members, roommates, or staff to find the right camera without guessing.
Common Mistakes When Organizing Cameras and How to Avoid Them
Most organization problems come from rushing the setup or using labels that make sense only in the moment. A little extra planning now usually prevents a lot of frustration later.
Duplicate names, poor grouping, and forgotten permissions
Duplicate names are one of the most common mistakes because they make alerts and playback harder to interpret. If two cameras are both called “Front,” you will eventually have to stop and guess which one is which.
Poor grouping causes a similar problem. If rooms do not match the actual layout, the app can feel more confusing than helpful. Also remember to confirm that every user who needs access has the right permissions to see the cameras and settings they are supposed to manage.
Overloading the app with too many priority cameras
It is tempting to mark too many cameras as important, but that usually defeats the point. If every camera is treated as urgent, your dashboard and notifications can become noisy and less useful.
Instead, choose a small set of truly critical views. You can always check the rest through the full list or playback history when needed.
Sync issues after app updates or device resets
Sometimes camera order or group settings seem to change after an update, sign-in refresh, or device reset. This does not always mean the camera was removed; it may simply need a sync refresh or re-save.
If that happens, check whether the app is up to date, whether the camera is online, and whether the settings were saved under the correct account. For broader reset-related troubleshooting, our article on resetting a smart device without the app shows why official reset steps matter so much for connected products.
Troubleshooting and Maintenance for a Stable Camera Setup
Once your cameras are organized, a little maintenance keeps the layout useful. Smart-home systems work best when they are updated, checked occasionally, and kept free of avoidable account or storage problems.
What to check when cameras do not appear in the right order
If the order looks wrong, first confirm whether the app sorts by name, last activity, or a custom drag-and-drop order. Different apps handle the same screen in different ways.
Then check whether the camera is offline, whether the app needs a refresh, or whether the account is signed in on multiple devices with conflicting settings. If the issue only appears on one phone or tablet, the problem may be local to that device rather than the camera itself.
Stop using damaged electronics, swollen batteries, frayed cables, overheating chargers, or unstable appliances and follow the manufacturer’s guidance.
App refresh, cache clearing, and reconnect steps
A simple refresh is often the first safe troubleshooting step. Close and reopen the app, sign out and back in if needed, and check whether the camera list updates.
If the app still behaves strangely, clearing cache or reinstalling the app may help, depending on your device and operating system. Only use official app-store versions and follow the manufacturer’s reconnect instructions rather than trying unofficial workarounds.
Ongoing maintenance: updates, storage review, and account security
Keep firmware and app updates current when possible, since updates can improve stability, fix bugs, or change organization features. Review storage settings occasionally so old clips are being saved the way you expect.
Account security also matters in a shared smart-home setup. Use a strong password, enable two-factor authentication if available, and remove old users who no longer need access. For privacy-sensitive areas, review permissions regularly instead of assuming the defaults are still right.
Who the Invid Elevate App Organization Method Fits Best
This organization approach is useful for anyone managing more than one camera, but it becomes especially valuable as the number of devices grows. The more cameras you have, the more important naming, grouping, and alert control become.
Ideal users: homeowners, renters, small offices, and multi-camera setups
Homeowners often benefit from room-based grouping and location-based names. Renters may prefer a simpler setup that highlights entry points and a few key interior spaces without overcomplicating the dashboard.
Small offices, studios, and shops can use the same ideas to separate public, staff-only, and storage areas. If you have a multi-camera setup, a well-organized app can make everyday monitoring much faster and less stressful.
Key limitations, practical trade-offs, and value considerations
The main limitation is that not every app offers the same level of customization. Some systems allow deep grouping and alert control, while others keep organization fairly basic.
That is why it is worth checking the current app features before you rely on a specific workflow. If the app supports the tools you need, the value is strong because better organization improves usability without requiring extra hardware.
Final Recommendation: Is Organizing Cameras in Invid Elevate Worth It?
Yes, organizing cameras in the Invid Elevate app is worth doing if you want quicker access, cleaner alerts, and less confusion when managing multiple feeds. The best results usually come from clear names, logical groups, and a dashboard that puts your most important cameras first.
If your app version supports only limited organization, focus on the basics: rename every camera, sort them by location, and review alert settings. That simple setup is often enough to make a smart-home camera system feel much easier to live with.
- Rename each camera by location so it is easy to identify at a glance.
- Use rooms, zones, or groups to match your real home or business layout.
- Prioritize only the most important cameras on the main dashboard.
- Check app version, permissions, and connectivity if settings do not save correctly.
Frequently Asked Questions
Open the camera’s settings or edit menu, then look for the name field. Use a clear location-based label so you can identify it quickly later.
If your app version supports grouping, you can usually place cameras into rooms, zones, or location-based categories. Choose the structure that matches your home or business layout.
The app may sort by name, last activity, or a custom order depending on the version. Check whether the camera is online and refresh the app if the layout looks wrong.
Yes, different cameras often need different alert levels. High-traffic areas may need fewer notifications, while important entry points may need stronger alerts.
Confirm the correct account, app version, permissions, and camera online status first. Stable connectivity helps prevent sync problems during setup.
Focus on the basics: rename each camera clearly, keep a consistent naming pattern, and prioritize the most important feeds. That alone can make the system much easier to use.