Can I Clean Camera Sensor with Q Tip
No, a Q tip is usually not a safe choice for cleaning a camera sensor. Use a blower first, then a proper sensor swab if needed, and stop for professional service if the spot will not come off.
If you’re asking, “can I clean camera sensor with q tip,” the safest short answer is no for most people. A cotton Q tip can leave fibers, push dust around, or apply too much pressure, so purpose-made sensor tools are the better choice for routine cleaning.
- Q tip risk: Cotton fibers and uneven pressure can make sensor contamination worse.
- Best first step: Use a hand blower to remove loose dust before touching the sensor.
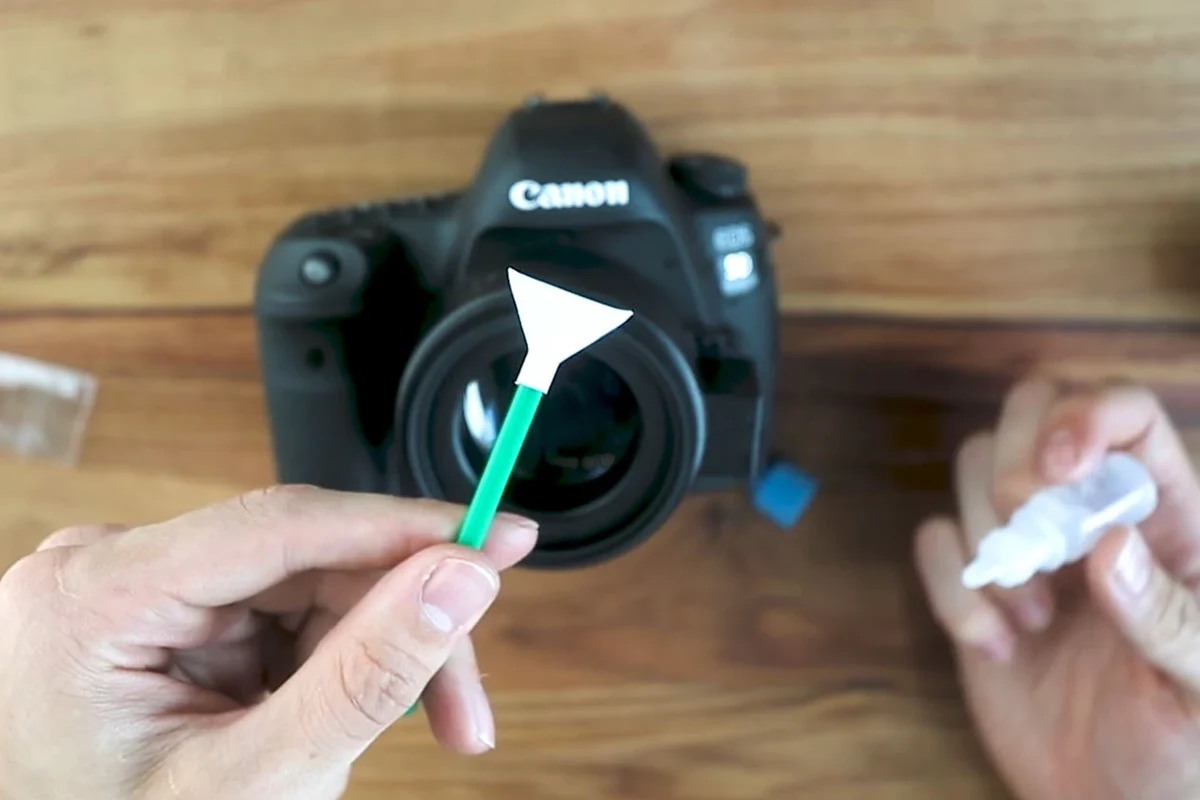
- Better tool: Sensor-sized swabs are made to reduce lint and match the sensor width.
- Know when to stop: If residue is stubborn or the sensor looks damaged, use professional cleaning.
Can I Clean Camera Sensor with Q Tip? Short Answer and What You Need to Know
A Q tip is not a good first-choice tool for cleaning a camera sensor. The sensor sits behind delicate glass or a filter stack, and even a small amount of lint, uneven pressure, or liquid can turn a simple dust issue into a more stubborn cleaning problem.
That does not mean every sensor cleaning situation is complicated. It means the safest approach is to start with the least invasive method, inspect carefully, and only move to approved sensor cleaning tools when needed.
How a Camera Sensor Gets Dirty and Why a Q Tip Is Risky
Camera sensors collect dirt in a few predictable ways, and understanding the source helps you choose the right fix. A visible spot in your photos may be dust, but it can also be oil, residue, or debris from the camera body itself.
Common causes of dust, oil, and sticky residue on the sensor
Dust often enters when you change lenses, especially in windy, sandy, or crowded environments. Mirrorless cameras can be more exposed during lens swaps because the sensor is closer to the opening, though any interchangeable-lens camera can pick up contamination.
Oil or residue is different from dry dust. It may come from shutter mechanisms, degraded foam, environmental pollution, or accidental contact with a cleaning tool that left behind material on the sensor cover glass.
Why cotton fibers and pressure can create new problems
Cotton swabs are made for general cleaning, not precision optical surfaces. Even a fresh Q tip can shed fibers, and those fibers may be harder to remove than the original dust spot.
Pressure is the other concern. A sensor assembly is delicate, and rubbing too hard can smear residue, drag grit across the surface, or create streaks that show up more clearly than the original issue.
Never use excessive force on a sensor or try to scrape off a stubborn spot with a hard object. If contamination will not lift easily, stop and switch to a proper sensor swab or professional service.
When a Q Tip Might Be Used and When It Should Be Avoided
There are a few narrow situations where a dry, clean swab seems tempting, but “tempting” is not the same as “recommended.” In most cases, a Q tip should be treated as a last resort rather than a routine cleaning tool.
Situations where a dry, clean swab may seem tempting
Some people consider a Q tip for a tiny speck that appears near the edge of the sensor or for cleaning inside the camera body near, but not on, the sensor. Others may reach for one when they do not have the correct cleaning kit nearby.
Even then, it is easy to accidentally touch the actual sensor surface or leave lint behind. If you are tempted to improvise, it is usually a sign that it is better to pause and get the right supplies.
Sensor types, camera systems, and sensitivity considerations
Different camera systems vary in how exposed the sensor is and how easy it is to access. Interchangeable-lens cameras, especially mirrorless models, generally require more careful cleaning than compact cameras because the sensor is directly behind the lens mount.
Some cameras also have dust-reduction features or sensor-shake systems that may help with loose particles, but those features do not replace cleaning. Always check the official manual for your exact model before opening the shutter or using any cleaning function.
Safer Sensor Cleaning Methods Compared
For most readers, the question is not just whether a Q tip can be used, but what works better with less risk. The answer is usually a sequence of purpose-built tools, starting with the gentlest option.
Air blower, sensor brush, and wet sensor swabs
An air blower is often the first step for loose dust. It can remove particles without touching the sensor, which makes it the least invasive option when the debris is dry and light.
A sensor brush can help in some cases, but it must be clean and used correctly. Wet sensor swabs are typically the next step for oil or stuck-on residue because they are sized for the sensor and designed to spread cleaning fluid evenly across the surface.
Why purpose-made sensor cleaning tools usually outperform household cotton swabs
Sensor swabs are made to match sensor widths and minimize lint. Their shape helps distribute pressure more evenly than a cotton tip, which is important when you are cleaning a precision optical surface.
They also work with sensor cleaning fluid that evaporates cleanly when used as directed. A household Q tip may absorb too much liquid, leave streaks, or break down during use, which increases the chance of repeat cleaning.
- Start with a blower before touching the sensor surface.
- Use fresh, single-use sensor swabs rather than reusing any cleaning tip.
- Check your camera manual for the recommended cleaning mode and sensor access steps.
Step-by-Step Safe Cleaning Guide for Beginners
If you are new to sensor cleaning, focus on control, cleanliness, and patience. The goal is to remove contamination without introducing new debris or damaging the sensor cover glass.
Preparation: battery level, workspace, and camera settings
Begin with a fully charged battery or at least enough power to keep the shutter open during the cleaning process, if your camera requires it. Work in a clean, low-dust room with a stable table, good lighting, and minimal airflow from fans or open windows.
Use the camera’s sensor cleaning or manual cleaning mode if the manufacturer provides one. Remove the lens only when you are ready to clean, and keep the camera body facing downward when possible so dust is less likely to settle inside.
Stop if you see scratches, unusual coating damage, liquid intrusion, or debris that appears stuck under the sensor cover glass. Those issues need manufacturer guidance or professional service, not more swabbing.
Cleaning sequence: blow first, inspect, then use approved tools
Start with a hand blower to remove loose dust. Then inspect the sensor using a test photo of a plain bright surface or a magnified inspection method recommended by your camera maker.
If dust remains and the camera manual allows it, use a proper sensor swab with the correct cleaning fluid for your sensor size and cleaning method. Follow the swab instructions carefully and use a light, single-pass motion rather than repeated rubbing.
Charge the battery, clean the workspace, and enable the camera’s sensor cleaning mode if available.
Use a blower first so you do not drag particles across the sensor surface.
Check whether the spot is gone or whether it looks oily, sticky, or unchanged.
If needed, use a sensor-sized swab and approved fluid, then recheck the result.
What to do if spots remain after a basic cleaning pass
If the spot remains after blower cleaning, it may be a sticky deposit rather than loose dust. In that case, a proper wet sensor swab is usually more effective than trying to rub the area with a cotton Q tip.
If multiple cleaning passes do not solve the problem, stop and reassess. The issue may be on the lens, inside the viewfinder path, or deeper in the camera body rather than on the sensor itself.
Common Mistakes That Can Damage the Sensor
Most sensor damage comes from overconfidence, not from the cleaning fluid alone. The safest process is slow, controlled, and limited to tools designed for the job.
Using too much pressure, reusing swabs, or touching the sensor directly
Pressing hard can smear residue and increase the chance of scratching the sensor cover glass. Reusing a swab can redeposit debris, while touching the surface directly with a finger or random tool can leave oils that are harder to remove than dust.
Each cleaning pass should be deliberate. If the first pass does not work, do not assume more force will help.
Cleaning in a dusty room or with the wrong liquid
A dusty room, a running fan, or a cluttered workspace can undo your efforts quickly. Even if the sensor is cleaned well, airborne particles can settle again before you reinstall the lens.
Using the wrong liquid is another common mistake. Household cleaners, alcohol not intended for optics, or excessive fluid can leave residue or create streaking, so stick to products made for sensor cleaning and follow the manufacturer instructions.
How to Choose the Right Sensor Cleaning Kit in 2026
Choosing a cleaning kit is mostly about fit and reliability. The best kit for you depends on sensor size, how often you change lenses, and whether you mainly deal with dust or oily spots.
Key decision criteria: sensor size, swab width, fluid compatibility, and packaging
Match the swab width to your sensor format, such as full-frame, APS-C, or another size supported by the kit. A mismatch can make cleaning awkward or leave edges untreated.
Also check whether the cleaning fluid is intended for sensor use and whether the packaging keeps swabs sealed and clean. If the kit includes a blower or brush, verify that those tools are suitable for optical cleaning rather than generic household use.
Value, storage, shelf life, and replacement guidance
Value is not just the number of swabs in the box. It also includes how long the kit stays clean in storage, whether the fluid container seals well, and whether replacement parts are easy to buy when you run out.
For occasional photographers, a small kit may be enough. Frequent lens changers, travelers, and creators who shoot outdoors may prefer a more complete kit with a blower, sensor swabs, and fluid, as long as each part is compatible with the camera model and sensor size.
- Check sensor size, swab width, and whether the kit matches your camera format
- Confirm the fluid is intended for sensor cleaning and that the packaging stays sealed
- Review the camera manual, warranty guidance, and cleaning instructions before using any tool
Final Recommendation: Is a Q Tip Ever Worth It?
For most photographers, a Q tip is not worth the risk on a camera sensor. The better approach is a blower first, then a sensor-sized swab or professional cleaning if the contamination is stubborn.
Best-practice verdict for most photographers
If you want the safest and most predictable result, choose tools made for sensor cleaning. They are designed to reduce lint, control pressure, and work with the sensor’s actual dimensions, which is why they usually outperform a household cotton swab.
Most users who need routine sensor care should use a blower plus a purpose-made sensor swab. A Q tip is only a poor fallback in an emergency, and even then it is not the preferred option.
When to stop and use a professional cleaning service instead
If the spot will not move, if you suspect internal damage, or if you are uncomfortable opening the camera body, it is smart to stop. A professional service is often the better choice for expensive bodies, heavily used cameras, or sensors that have already been scratched by a previous cleaning attempt.
Do not rely on a Q tip for routine sensor cleaning. Use a blower and proper sensor cleaning tools instead, and hand the job to a professional when the contamination is stubborn or the sensor may be damaged.
Frequently Asked Questions
It is not recommended for most users because cotton swabs can leave fibers and apply uneven pressure. A purpose-made sensor swab is safer and more reliable.
Start with a hand blower to remove loose dust. If that does not work, use a sensor cleaning tool designed for your sensor size.
Take a test photo of a plain bright surface and move the lens slightly if needed to compare results. If the spot stays in the same place across images, it is more likely on the sensor.
Yes, for most sensor cleaning jobs they are better because they are sized for the sensor and made to reduce lint. They also work more predictably with sensor cleaning fluid.
Stop if the spot will not move, if you see scratches or liquid damage, or if you feel unsure about opening the camera body. A professional cleaning service is safer in those cases.
Check sensor size, swab width, fluid compatibility, packaging, and the camera maker’s cleaning guidance. It is also wise to review the manual and warranty terms first.